Page speed is a crucial element in determining the search engine rankings of your website. Not to mention, slow websites lead to poor user experience. Our users often ask us how WPBeginner loads so fast. The answer is simple, we use W3 Total Cache and MaxCDN. However, some of our users told us that they cannot afford MaxCDN. In this article, we will show you how to set up CloudFlare's FREE CDN on WordPress.
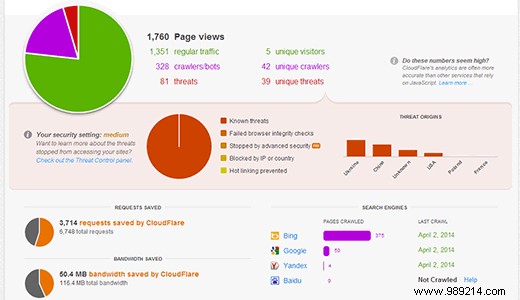
CloudFlare is basically a Web Application Firewall, Distributed Proxy Server, and Content Delivery Network (CDN). It optimizes your website by acting as a proxy between visitors and your server, helping to protect your website from DDoS attacks.
They offer a free basic plan suitable for small websites and blogs. They also offer paid plans starting at $20 per month.
MaxCDN and CloudFlare are very different services actually. While MaxCDN focuses on serving your content through its CDN, CloudFlare focuses more on security and spam control.
Both use different technologies to serve content through their networks. MaxCDN serves content from your site's DNS using pull zones. CloudFlare, on the other hand, serves content through its own DNS, and you are prompted to change your site's DNS to point to their servers.
CloudFlare acts as a proxy between you and your site visitors, meaning you relinquish control, while MaxCDN acts as a reverse proxy, meaning you have all the control.
CloudFlare is better at optimizing your page speeds by preventing your site from malicious bots, attackers, and suspicious crawlers. MaxCDN is best at improving your speeds by serving your static content through their servers located all over the world.
Cons of using CloudFlare
Users who try CloudFlare have reported that although it helps page load times, the difference is not significant.
There are also user complaints that CloudFlare prevents some of your legitimate visitors from accessing your website. Instead, it displays a captcha page to visitors to prove they are legitimate users. This creates a bad experience for first time visitors who may never visit the site again.
Before you implement CloudFlare to improve your website speed, make sure it's not your web host that's slowing you down. If you think it could be your web host, then perhaps you should consider switching to a better WordPress host first. If you are going to use CloudFlare, we recommend BlueHost. They are one of the official partners of CloudFlare and one of the WordPress recommended hosting providers.
To set up CloudFlare, the first thing you need to do is sign up for an account. Visit the CloudFlare website and click on the signup link.
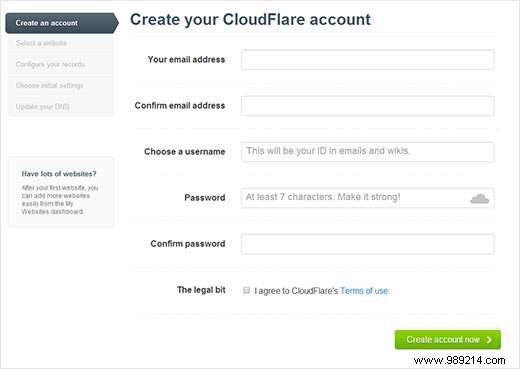
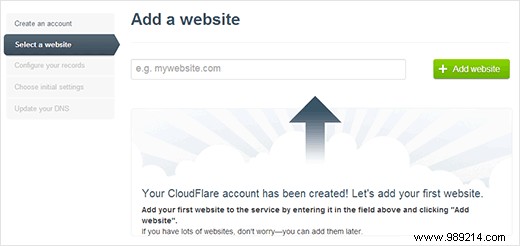
Provide the required information, and then click 'Create Account Now' button. In the next step, enter the url of your website.
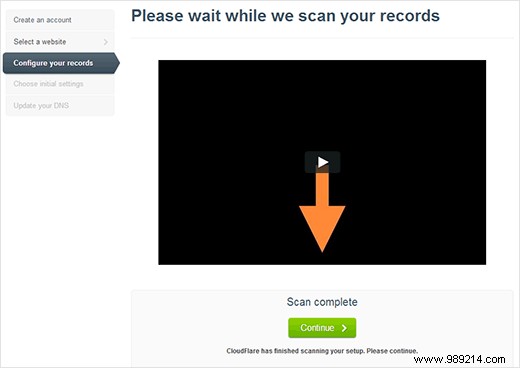
CloudFlare will now scan your website. This will take around 60 seconds and during this time you will be shown an informative video on how CloudFlare works and how you will proceed with the setup. We recommend that you watch this video. After the scan is finished, you need to click the Continue button to continue with the setup.
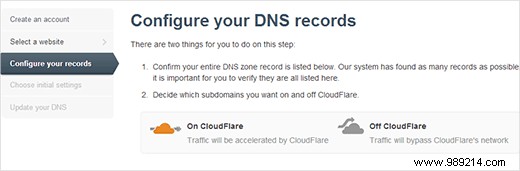
After the scan, CloudFlare will show you a list of all the DNS records that your systems found. This will include your subdomains as well. DNS records that you want to pass through CloudFlare will have an orange cloud icon. DNS records that will bypass CloudFlare will have a gray cloud icon. You should review the list to make sure your main domain, the www subdomain, is active on CloudFlare with an orange cloud icon.
CloudFlare will also add FTP and SSH subdomains for you. If you used your domain name to connect to FTP or SSH, from now on you will use ftp.yourdomain.com for FTP, and ssh.yourdomain.com for SSH... New subdomains will not go through CloudFlare.
If you have any subdomains that you'd like to pass through CloudFlare, you can set them up here.
Once you are satisfied with the DNS records, you should click 'I have added all the missing records, continue' button to continue with the configuration.
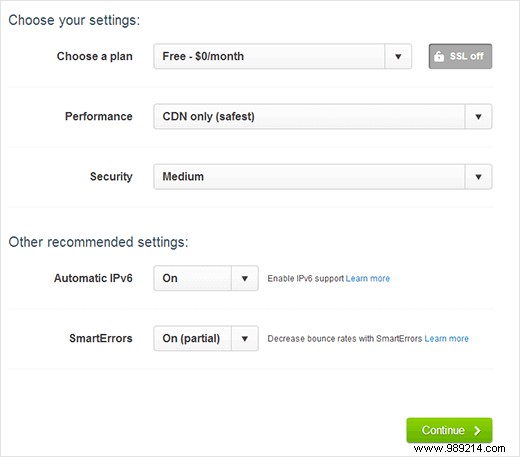
On the next screen, you'll be asked to choose a plan, performance, and security settings.
If you use SSL on your website, it's important to remember that SSL will not work with CloudFlare's FREE service. Leave the rest of the options to their default settings and click the Continue button to continue.
In the next and final step of your setup, CloudFlare will ask you to update your nameservers. You will be prompted to change your nameservers and point them to CloudFlare's nameservers.
Notice: Changing the nameserver can take a while to propagate throughout the Internet. During this time your website may be inaccessible to some users.
In order to change the nameservers for your domain and point to CloudFlare's nameservers, you need to log in to your hosting account. Since most web hosts provide cPanel to manage hosting accounts, we will provide you with instructions on how to change your nameservers using cPanel. However, if your web host does not have cPanel, you should ask them for instructions.
Once you've logged into the cPanel control panel, scroll down to the Domains section and click on Domain Manager.

On the next screen, you will be asked to choose the domain name you want to edit. Once you select the domain name you wish to edit, you will be shown the editing options available for that domain. You have to click on the Nameservers tab.
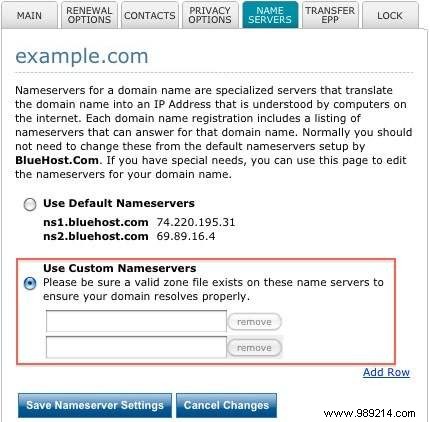
You must select Use custom nameservers and enter the nameservers provided by CloudFlare in the boxes below.
After that, you need to go back to the CloudFlare configuration page and click the "I have updated my nameservers, continue" button to finish the configuration.
That's it, your website is now served and optimized by CloudFlare.
Note:The screenshots above are from the Bluehost account. Your nameserver settings may be different if you are using a different hosting provider.
We hope this article helped you add CloudFlare's FREE CDN service to your WordPress site. If you liked this article, please consider subscribing to our YouTube channel.