As WordPress beginners progress in their career, their site grows too. When running professional and stable websites editing everything live is not the best option. Several of our users have asked us for a tutorial that explains the process of creating a staging environment. In this article, we will show you how to create a test environment for your WordPress site.
Note: This article is more suitable for users who want to go from beginner level WordPress development to slightly more advanced development. This article will help you with cowboy coding and learn best practices. This is what you will learn at the end of this article.
To work on a WordPress site, we recommend our users to install WordPress locally on their Windows or Mac computers. Once you are done and satisfied with your website, you can upload it from localhost to the live server.
There is a problem with this approach. What if something that worked on your localhost doesn't work on the live server? This would cause errors that can be a problem for established sites because they can affect search engine rankings, sales, first impression on users, etc.
Instead of uploading your changes to the live site, you can upload them to a storage site on the same server. A staging site is a separate development area on your site (usually a subdomain) with restricted access. This is where you can test your changes or use them for all of your development. Once you have thoroughly tested your site, you can upload it to your live site.
If you are a beginner and don't want to learn the complicated process highlighted in the article below, we recommend selecting a managed WordPress hosting provider like WPEngine that offers built-in storage functionality. Our friends at SiteGround also offer staging functionality on their much more affordable grow-geek plan.
The first thing you need to do is create a subdomain on your main domain. A subdomain will allow you to run your website in a separate folder, without affecting your main database, files, or uploads.
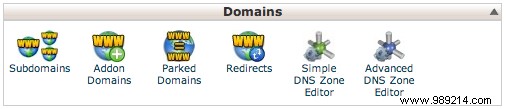
To do this, log in to your cPanel (other control panels will be similar, search for Domains or Subdomains ), under the Domains Sections, you need to click on Subdomains.
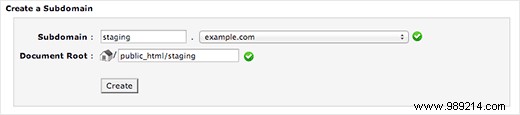
On the next screen, enter the name you'd like to use for your subdomain (usually staging or dev ) and then choose your primary domain from the dropdown menu.
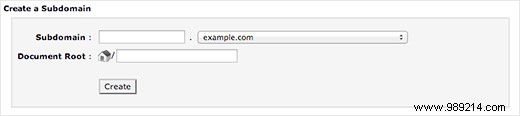
In cPanel, this should automatically fill in the Document Root text box with a location based on your subdomain name. You can change this if you want, but normally the default will be fine (public_html/staging).
Now you just have to click Create When you finish. You must confirm and display the subdomain in the table below.

You can verify that your subdomain has been set up by visiting it in your web browser. It should show something similar to this:

Now you need to create a separate FTP account for your test environment. A dedicated FTP account will only have access to your test directory preventing accidental changes to your live environment.

In cPanel, navigate to the FTP Account section. Complete the fields in the Add FTP account section.
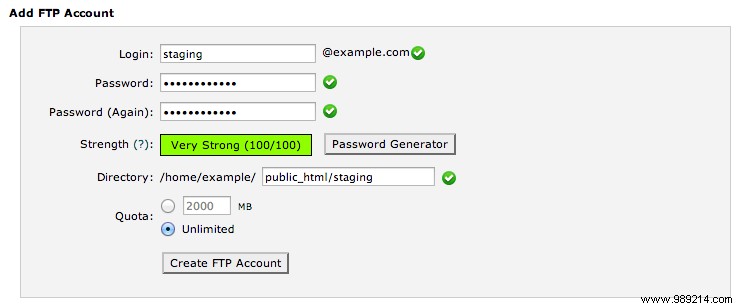
The Directory it must match the directory you specified when creating your subdomain. Click Create an FTP account to create your new account. This account will only have access to the directory you specified, not the entire server.
Now that you've set up your subdomain, the next step is to copy the data from your live site to your staging site. This will allow you to test the changes in your staging environment with the same data without affecting your live site.
The easiest way to do this is through phpMyAdmin . Login to phpMyAdmin via cPanel , and select your current live database. Once you have selected your live database, click on Operations tab in the menu bar.

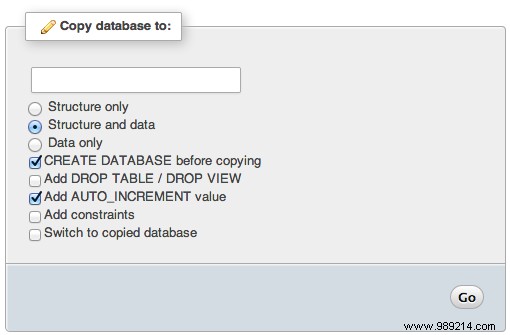
Here you have to look for the Copy the database to cash register. In the text box, enter the name of your staging database (if you haven't created it yet, be sure to CREATE DATABASE before copying is marked and given a name like example_staging). You must copy the structure and data, as well as make sure to keep the remaining settings as default. Click Go to run the copy. Remember that for larger databases this may take some time.
Once you have copied your database, you need to select it from the sidebar on the left. phpMyAdmin will now open your newly copied database. You need to click on SQL tab in the menu bar of phpMyAdmin .
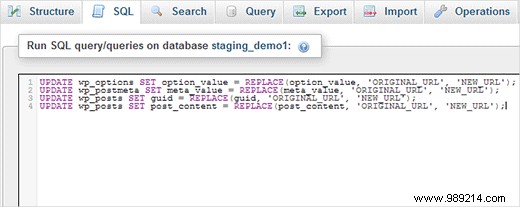
We will now replace all references from our live site to the staging site to make sure everything works fine when we use this database for staging. For this you need to execute the following SQL queries.
ACTUALIZAR wp_options SET option_value = REPLACE (option_value, 'ORIGINAL_URL', 'NEW_URL'); ACTUALIZAR wp_postmeta SET meta_value = REPLACE (meta_value, 'ORIGINAL_URL', 'NEW_URL'); ACTUALIZAR wp_posts SET guid = REPLACE (guid, 'ORIGINAL_URL', 'NEW_URL'); ACTUALIZAR wp_posts SET post_content = REPLACE (post_content, 'ORIGINAL_URL', 'NEW_URL');
Enter the above queries in the SQL query box, replacing the following values:
Click Go to run the queries. A confirmation message will be displayed when complete.
After copying your database, you need to copy your WordPress files, plugins, themes, and uploads. First download a fresh copy of WordPress from WordPress.org. Upload the WordPress contents to your staging site. Note , don't run the WordPress installation yet.
Once you have WordPress loaded, the next thing to copy over is media files, plugins, and themes. The following folders will need to be copied:
If they are small, you can download them from your live site via your FTP client and upload them to your storage folder. However, for larger folders, this can take a long time. cPanel's file manager allows you to copy folders directly to the server making the process much faster.
Login to the cPanel control panel and click on File Manager in the files section.

cPanel will launch the file manager. You need to navigate to your live site wp-contenido directory (usually /public_html/wp-content) where you can see your theme, plugin and upload folders.

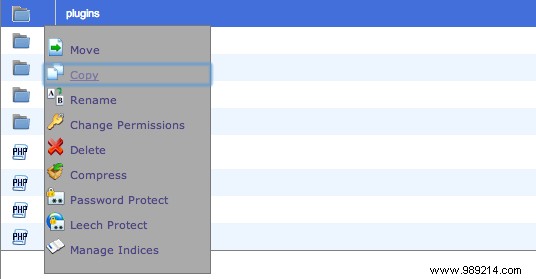
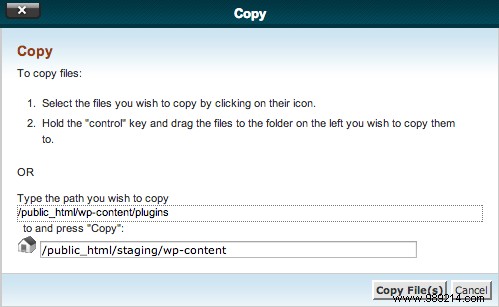
For each folder, you need to right click and select Copy . A dialog box will appear, choose the location where you want to copy the folder. We want to copy it to the directory we have created for the staging subdomain. It is also the directory where you uploaded WordPress in the previous step. / public_html / staging / wp-content /
This will copy each folder in your staging. wp-contenido directory.
You need to repeat this for each of the above directories (plugins, themes, and uploads).
Note: In some WordPress hosting environments you may not be able to use a file manager, in which case you will have to manually download these directories to your computer and then upload them back to the storage site or use SSH.
Once you have copied these directories, you are ready to connect your staging installation of WordPress to the database you copied earlier.
Access your staging site, through the subdomain we created earlier. If your staging directory does not contain a wp-config.php file, WordPress will try to create one by asking for your database connection details. If you have a wp-config.php file, be sure to edit it to use the new staging database connection details.
Once WordPress has connected to your staging database, it should detect that WordPress has been installed and prompt you to log in. Your login details will be the same as on your current live site.
Any changes you make to your test environment will now be independent of your live environment. This means you can change settings, install new plugins, edit theme files, and more without affecting your customers' experience.
Once you have logged in to your staging. WordPress installation, there are a number of settings that need to be configured before proceeding.
Make sure your domain is correct
Look at the URL of your admin screen. If it is your subdomain, then you have detected the new settings. Otherwise, the previously executed SQL queries will not have changed your site's URL within the staging database. Find the Site URL and house option_name is inside the wp_options table.
Make sure your media has copied
Visit the media section of your WordPress Administration and check if your images/videos/etc. they are in place. If so, then your uploads directory has been copied successfully. If not, make sure the uploads directory is in the right place (usually /public_html/staging/wp-content/uploads).
Disable XML Sitemaps in WordPress SEO
If you're running WP SEO, you need to make sure the XML Sitemaps option is disabled. This will help prevent search engines from indexing your test environment.

Restricted access to the site
To prevent users from accidentally visiting your staging site, you must install and enable Restricted Site Access. After installation, go to Settings> Reading to configure the plugin.
You also want to go in the Settings »Reading section and be sure to disable indexing of this site by search engines. You want to make sure you do this to avoid any duplicate content.
You can also password protect the entire directory with htpassword. The method shown in the tutorial is for /wp-admin/ but you can modify it for any folder on the site.
Update Permalinks
Visit Settings> Permalinks and click Save to ensure your permalink structure is up to date. If you're getting 404 errors on your staging site, then this is the cause.
Most professional developers like to use a version control system like SVN or Git to track their development progress. Using a version control system allows you to go back in time if something goes wrong because the entire history of your code is stored in one central location. It also makes collaboration easy as all changes are stored in a central location, developers have access to all changes made to a project.
Both GitHub and BitBucket are project hosting services, and both allow you to use Git for your projects. GitHub is more popular with developers of open source projects and has a larger community of developers. If the project you are working on is an open source WordPress plugin or theme, then you can host it on GitHub. Your project will be publicly viewable and other users will be able to see your source code. To create a private repository on GitHub you would need to upgrade to their paid plan.
On the other hand, BitBucket allows you to create private repositories for free. If you're working on a client site or your own personal site, you probably want to keep your work private. BitBucket makes it easy for you to do this.
Step 1. Installing Git
The first thing you need to do is download and install Git on Windows (or Mac).
Step 2. Creating your first repository
Now that you have Git installed, the next step is to sign up for a free BitBucket account. Once you have registered, you will enter the BitBucket control panel where you will need to click on Create new repository button.
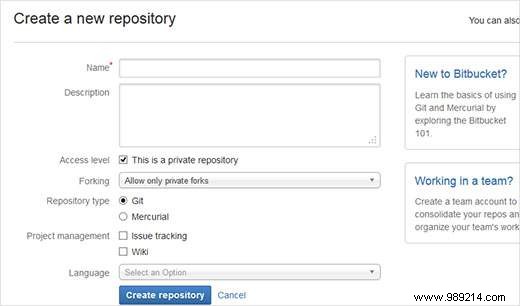
Enter a name and description for your repository something that will help you identify your project. To make your repository private, you need to check the box next to Access level . Lastly, make sure Git is checked as your repository type. You can leave the rest of the options unchanged and click the create repository button to continue. BitBucket will now create a blank repository for you.
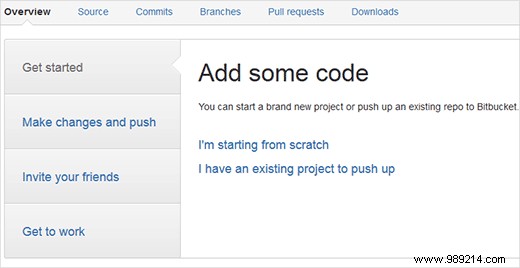
Since you'll be working on a local WordPress installation, click I have an existing project to upload.
Step 3. Add local directory to Git
You are ready to submit your local WordPress project to BitBucket. Run Git Bash on your computer. Yes, it is a command line tool and you will have to type commands, but don't worry, it is very easy.
If you don't want to use the command line, you can use GUI interfaces like Github for Windows (which also works for Bitbucket) and/or TortoiseGit.
You must first add your local WordPress projects folder as a repository in Git. Remember, you don't need to add the entire WordPress directory to the project. If you're working on a theme, you can add that theme directory as a Git repository.
In Git Bash, first go to your project directory by typing the path to your project directory and then add it to Git:
cd / C / xampp / htdocs / wordpress / wp-content / themes / myawesometheme git init
Now that you've added your project to Git, the next step is to add all the files to it.
git añadir .
After adding all your files, the next step is to do your first commit.
git commit -m "Agregando todos los archivos de proyecto como el primer commit"
Step 4. Synchronize changes with your Bitbucket repository.
Now the last step is to sync your local files with your BitBucket repository. Type this line in Git Bash to connect your local repository to your BitBucket repository.
git remote add origin https: //[email protected]/bitbucketusername/repositoryname.git
Push all your files to the BitBucket repository.
git push -u origin - all # empuja el repositorio y sus referencias por primera vez
Congratulations, you have successfully synced your local WordPress files with your BitBucket repository. Now we are going to make some changes to the files in your local repository. Once you're done making changes, you need to commit those changes to Git.
git añadir. git commit -m "Nuevas características agregadas" git push -u origen --todos
Now that you've learned how to use Git with BitBucket, it's time to push changes from your BitBucket repository to your staging site. This way you can work on your site locally and test your changes on your staging site without affecting your live site.
To do this, we recommend using Ftploy. The basic free account allows you to set up a project. It monitors changes made to your BitBucket repository and then deploys them to your web server. First you would need to sign up for an account on Ftploy. After that, you need to add your server details.
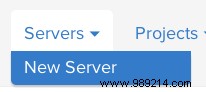
To set up a new server, select Servers »New Server From the navigation at the top.
Fill in the appropriate fields with the settings you created when you set up your test FTP account earlier.
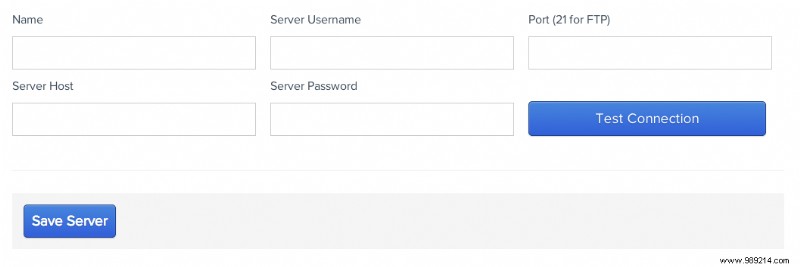
Click Test Connection to make sure FTPloy can connect to your server, then click Save Server.
To create a project, select Projects »New Project from the navigation menu, selecting GitHub or BitBucket when appropriate.
If you have previously defined your server, you can select it from the dropdown menu (otherwise, enter the details in the appropriate fields). In the Server Path field, enter the path to the theme directory (this will change depending on your repository structure, but /wp-content/theme/your-theme will be suitable if your repository only contains your theme).

When you push a change to that BitBucket repository, FTPloy will pick up the changed files and push them to the selected server.
If you're using FTPloy to push your changes from a repository to your staging server, you can set up a similar process for your live server. However, if bad or faulty code were to be pushed to your repository, it would be automatically pushed to your live site.
It is recommended to run an automated deployment system like FTPloy for a test server and then manually copy the required files to your live site when you are happy with the changes and have thoroughly tested them in your new test environment.
We hope this article has helped you learn how to create a staging environment for your WordPress sites. For troubleshooting, check out our guide to the most common WordPress errors and how to fix them. For comments and questions feel free to leave a comment below.