Do you want to learn how to create and add Cinemagraphs in your WordPress posts? Cinemagraphs are images with a part or area in motion while the rest of the image remains still. These images are very attractive and add a narrative element to your articles. In this article, we will show you how to easily create and add cinemagraphs in WordPress.
Cinemagraphs are usually GIF images in which a small part of the image moves while the rest remains still. They look very cinematic hence the name cinemagraphs..

They add a narrative element to images that makes them appear more engaging. They're particularly useful when accompanying long-form content, a podcast episode, or an audio story.
Creating cinemagraphs is a bit different than regular GIFs. However, if you have the right tools, with a little effort and some practice you can create stunning cinemagraphs from your own videos.
With that said, let's take a look at how to easily create and add cinemagraphs in WordPress.
To get started, you'll need the following items:
Let us begin.
First you need to have your video ready. You can use a video editing tool like iMovie to trim the video down to just the minimum clip you need for the cinemagraph.
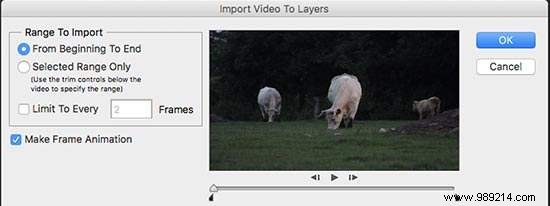
Next, you need to open Photoshop and import your layered video by clicking File »Import» Video Frames to Layers menu.

Select your video and then click the OK button to continue. Depending on the size of your video, it may take a while to fully import.
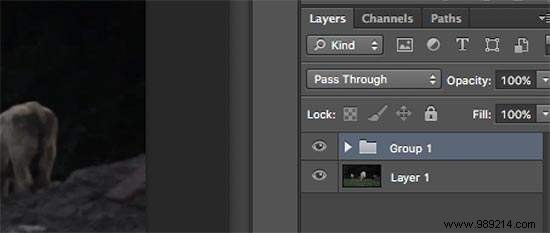
Once your video has been imported, you'll see the video frames as layers below the layers panel.

Now you should select all the layers except the first layer (Layer 1).
Go to Layer »New» Layer Group menu or press Command + G (CTRL + G on Windows) to add layers to a group.
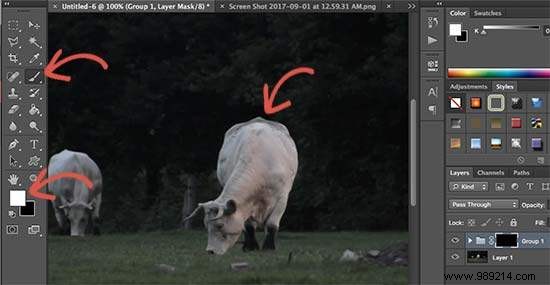
Next, you need to select the group and go to Layer "Layer Mask" Reveal All to add a skin to the group.
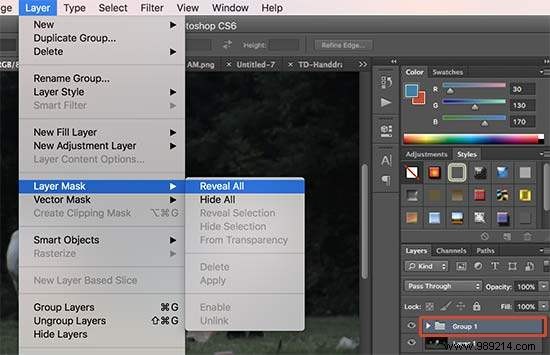
After adding the skin, press Command + I (Ctrl + I on Windows) to invert the color of the skin.
Now set the foreground color to white and then click on the Brush Tool. You need to use the brush tool to highlight the area you want to show in the loop.
After that, go to "Timeline" window To open all your layers in an animation format.
You will notice that all the frames appear transparent in the timeline except for the first frame.
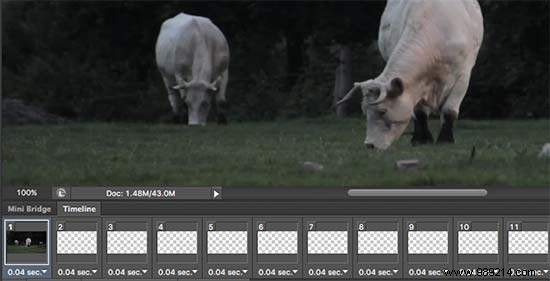
To change that, select the first layer (Layer 1) in the layers panel and click the Unfiy Layer Visibility icon and then hit the Match button.

Then click the timeline toggle icon and select all frames. After that, click the toggle button again to choose Copy Frames.
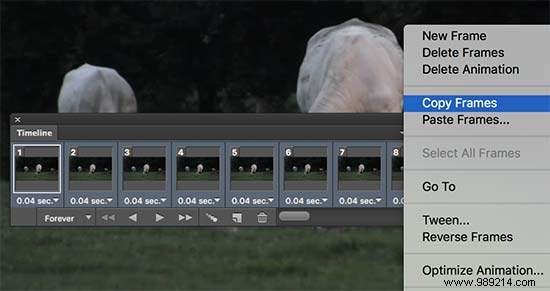
After copying the frames, click the toggle button and select the 'Paste frames' option.
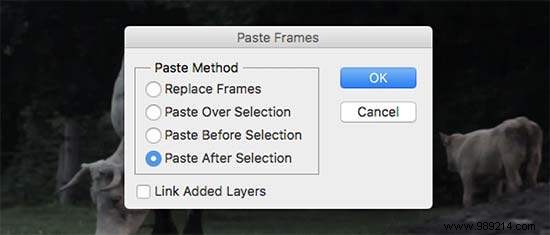
You will be prompted to choose a paste method. Select 'Paste after selection' and press the OK button.
Next, you need to click the timeline toggle icon one more time and select the 'Reverse Frames' option.

Your cinema animation is almost ready.
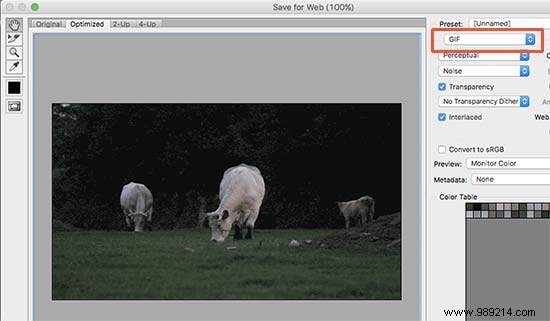
To save it to your computer, go to File »Save for Web option. A pop-up window will appear in which you need to select the GIF format and click the Save button.
That's all your Cinematograph is ready.
You can add it to your site just like you would any other GIF in WordPress. Simply edit the post or page where you want to add the cinemagraph and click the Add Media button.
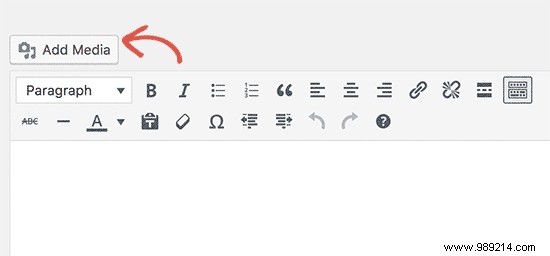
This will open the media uploader popup window, click the Select Files button to upload the GIF file from your computer.
Once uploaded, click the 'Insert in Post' button to continue.
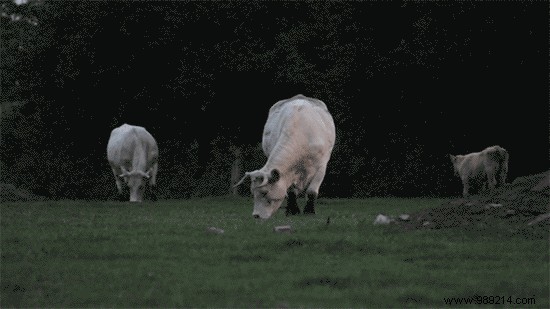
You will now see the image in your WordPress editor.
Don't forget to save or update the post. You can now click the preview button to see the cinemagraph in action. Here is the cinemagraph we created during this tutorial.
We hope this article has helped you learn how to create and add cinemagraphs in WordPress. You may also want to see our list of websites that offer royalty free images for WordPress users.
If you enjoyed this article, please subscribe to our WordPress YouTube Channel video tutorials. You can also find us on Twitter and Facebook.