Have you noticed the web push notifications used on popular websites like Facebook? Recently one of our readers asked if it is possible to add web push notifications in WordPress. Of course it is. In this article, we will show you how to add a web push notification to your WordPress site.
Web push notifications are selectable messages that are displayed at the top of the user's desktop. They can be displayed even when the user's browser is not open.
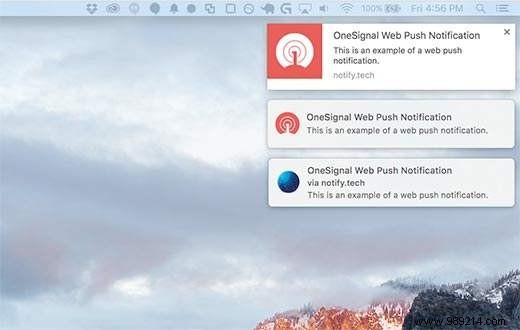
Aside from desktop, web push notifications also work on mobile browsers.
Popular sites including Facebook, Pinterest, LinkedIn and many others are already using web push notifications. It is proving to be more attractive than SMS, email marketing and other social networks. According to a survey, push notifications have a 50% open rate on mobile devices.
This means a more engaged audience for your WordPress site and a significant increase in your overall pageviews and returning visitors.
With that said, let's take a look at how to add web push notifications to a WordPress site.
OneSignal is a free service that allows you to add push notifications to any website, web or mobile applications.
The first thing you need to do is install and activate the OneSignal plugin. For more details, check out our step-by-step guide on how to install a WordPress plugin.
Upon activation, the plugin will add a new menu item labeled OneSignal to the WordPress admin bar. Clicking on it will take you to the plugin settings page.
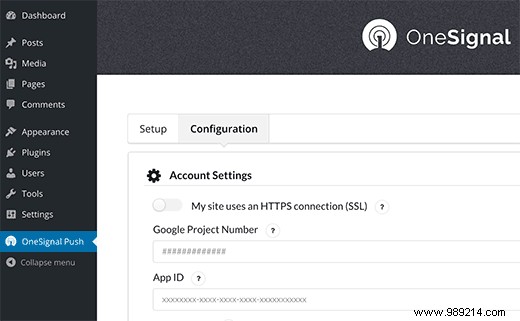
The settings page is divided into Settings and Configuration tabs. The settings tab is actually detailed documentation on how to configure OneSignal push notifications in WordPress. It has the same steps that we will show you in this tutorial.
To set up OneSignal, you will need to add different API Keys and Application IDs in the plugin settings.
Let us begin.
First you need to visit the Google Services Wizard website.
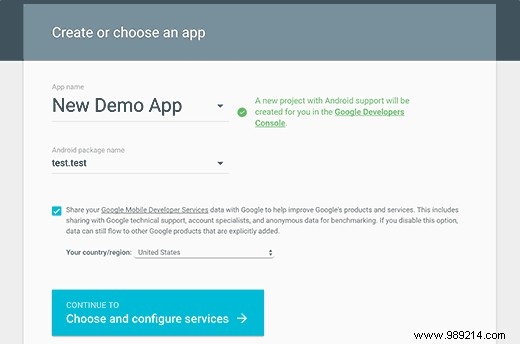
Just provide a name for your app and add an android package name. OneSignal does not use the Android package name, but it is a required field.
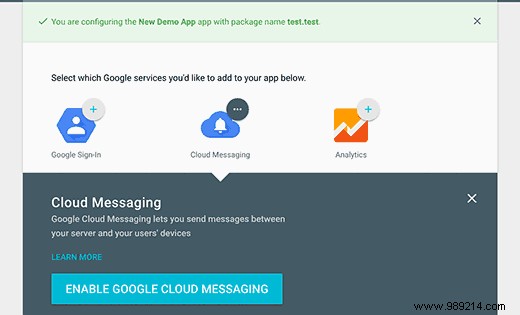
Next, choose your country and region, then click the 'Choose and configure services' button.
This will take you to the next screen where you will be asked to select the Google services you want to use with your app. You need to click the 'Enable Google Cloud Messaging' button.
You will now see your Server API Key and Sender ID.
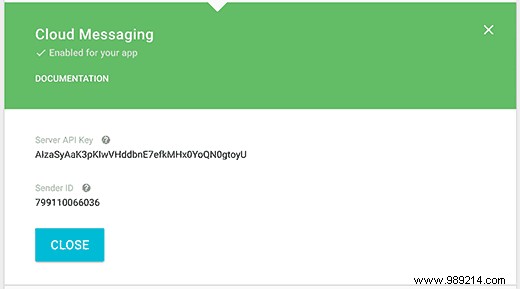
You need to copy your Referrer ID and paste it into the WordPress Plugin Settings tab in the Google Project Number field.
You should also copy the API key from the server and paste it into a text file on your computer. You will need this API key later in this tutorial.
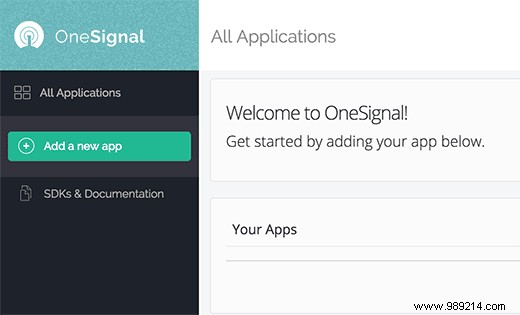
We will now configure push notifications in Chrome and Firefox. You must first visit the OneSignal website and create your free account.
Once you have created your account, you need to log in and click the 'Add a new app' button.
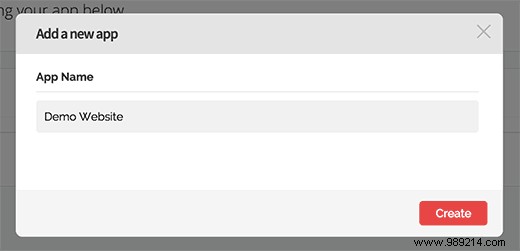
You will be prompted to enter a name for your app. You can use whatever name you like and then click the 'Create' button to continue.
On the next page, you will be prompted to select a platform to configure. You need to select 'Push Website' and then click the next button to continue.
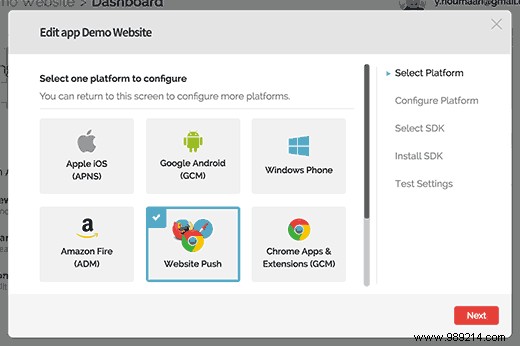
After which you will be prompted to select the browser platform. You will see Google Chrome and Mozilla Firefox in one box and Safari in another box.
You have to click the box for Google Chrome and Mozilla Firefox. We'll show you how to set up Safari later in this article.
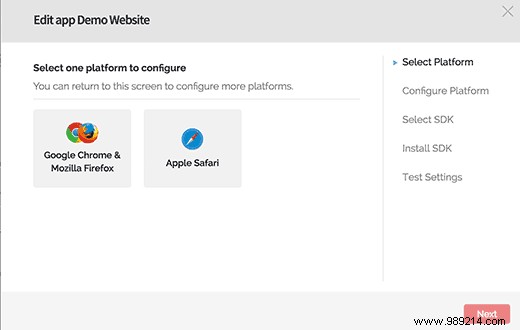
Click the button below to continue.
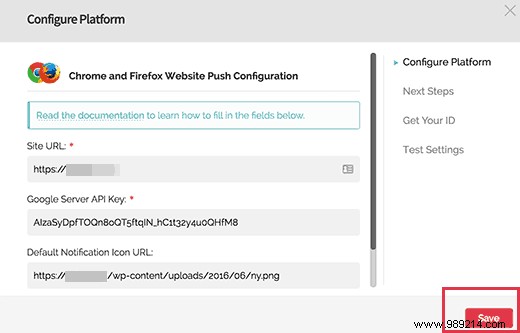
In the next step, you will be asked to enter your WordPress site URL, Google server API key, and the URL for your default notification icon image.

If your website does not support SSL/HTTPS, you need to check the box next to 'My site is not fully HTTPS' option. You can also configure SSL on your website if you wish, but it is not required.
Google Chrome does not support web push notifications for non-ssl or http websites. OneSignal solves this problem by subscribing users to a subdomain on their own https domain.
Check 'My site is not fully HTTPS' The option will display the HTTP fallback options. You'll need to choose a subdomain for your app and enter the Google Project Number or Sender ID you generated in the first step.
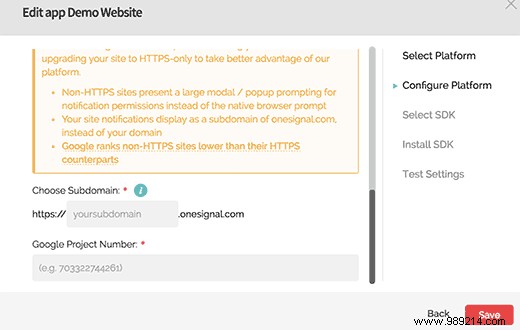
Click the Save button to continue. You can now exit this dialog. You will be prompted with a notice that your setup is not yet complete and can be resumed later. Click Yes to close the dialog.
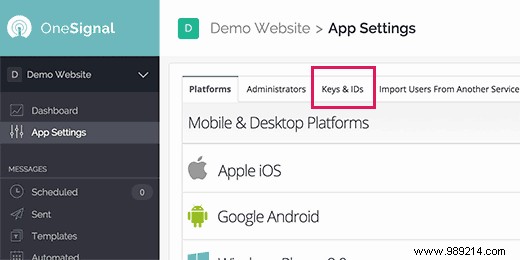
Now you need to get OneSignal keys for your website. From the app dashboard, click App Settings.
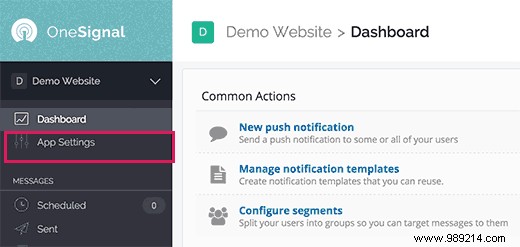
This will take you to your app's settings page. You need to click on the Keys and IDs tab.
This will display your OneSignal App ID and Rest API Key.
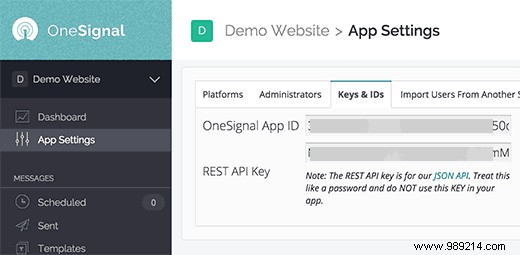
You need to copy and paste them into the OneSignal WordPress plugin settings tab on your site.
Remember that we bypassed the Safari web push notification settings. Now we will show you how to set up Safari web push notifications.
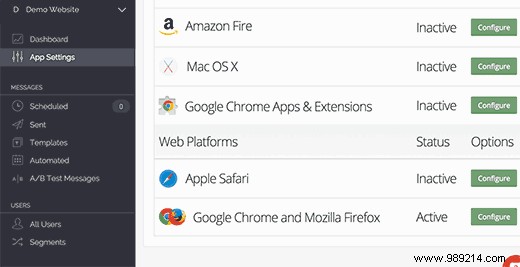
Sign in to your OneSignal account and go to the settings page of the app. Scroll down to web platforms and click the settings button next to Apple Safari.
A dialog box will appear asking you to enter your site name and site URL.
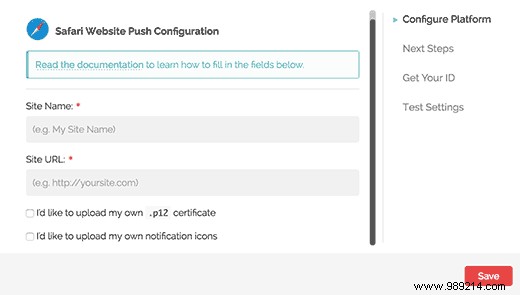
Then you need to check the box next to 'I'd like to upload my own notification icons' option.
You will now see an option to upload different icon sizes. These are square images, please use Photoshop or any image editing program to create icons in the exact sizes.
Click the choose file buttons to upload all your icons.
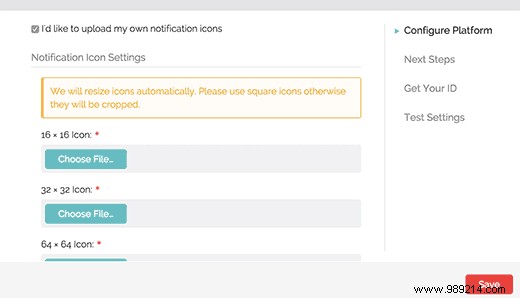
Click the Save button and then close the dialog.
Refresh the Application Settings page and scroll down to the Web Platforms section. This time you will see 'Web ID' in Apple Safari.
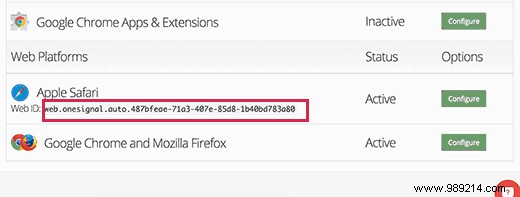
You need to copy this web ID and paste it into the Settings tab of the OneSignal plugin on your site.
That's it, you have successfully configured OneSignal web push notifications for your WordPress site.
By default, the OneSignal plugin will add a subscribe icon to your WordPress site. Visit your website in a supported browser and then click the subscribe button.
You will see the default message "thank you for subscribing".
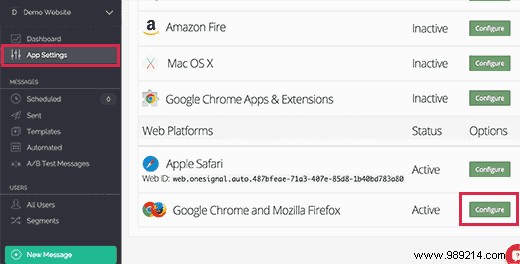
Now sign in to OneSignal account. Click on your app name and then on App Settings.
Scroll down to the web platforms section and click the settings button next to Google Chrome and Firefox.
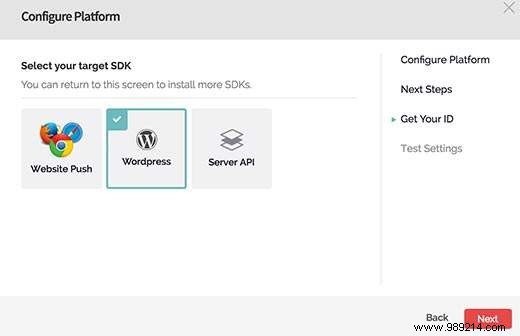
You will see the platform setup screen that you completed earlier. Just click the Save button and then click Continue.
You will be prompted to select the target SDK. You need to select WordPress and then click Next.
Since you only have one subscriber at the moment your subscriber id will be automatically populated.
Click the button below and you will reach the 'Test Settings' step.
Click 'Send Test Notification' button.
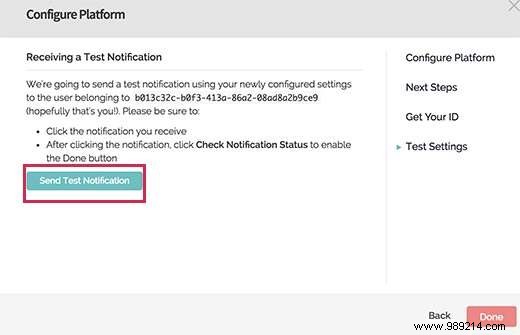
One Signal will now send a web push notification.
The appearance of the notifications may vary depending on the browser you used to subscribe. Cuando aparezca la notificación en la pantalla de su computadora, debe hacer clic en ella.
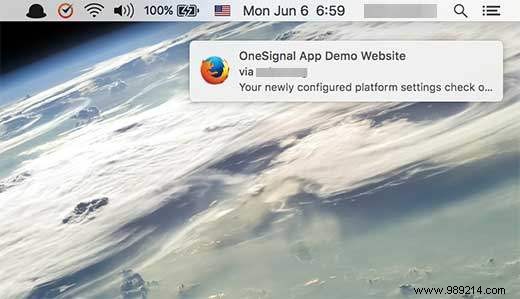
Le llevará a la pantalla de confirmación, que muestra que ha configurado correctamente las notificaciones push de la web de OneSignal para su sitio web.

Vuelva a la pantalla de configuración en el sitio web de OneSignal y haga clic en 'Verificar estado de notificación 'botón.
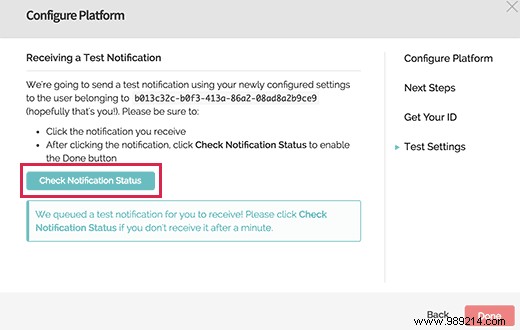
Ahora verá otro mensaje de éxito que indica que ha agregado con éxito notificaciones web push a su sitio de WordPress.
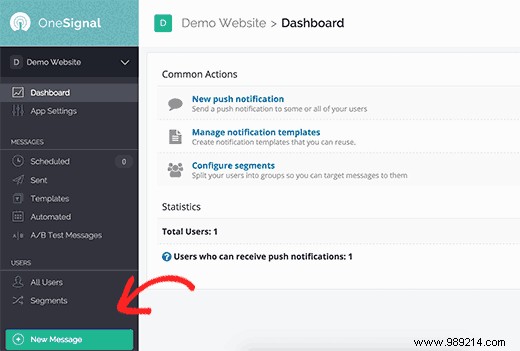
El complemento de notificaciones push de la web de OneSignal en su sitio de WordPress enviará automáticamente una notificación a todos los suscriptores cuando publique una nueva publicación..
También puede enviar notificaciones manualmente desde su Panel de aplicaciones de OneSignal. Inicie sesión en su cuenta OneSignal y haga clic en el nombre de su aplicación.
En el menú de la izquierda, haga clic en el botón 'Nuevo mensaje'.
Esto te llevará a la nueva pantalla de mensajes. Puedes ingresar un título y algún contenido para tu notificación..
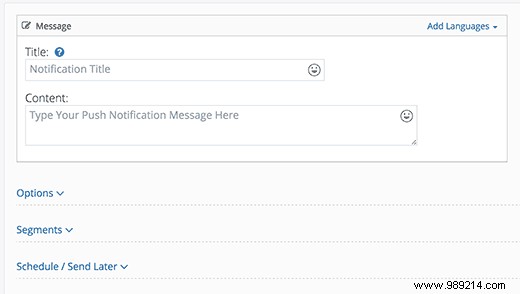
También puede hacer clic en Opciones, Segmentar, Programar / Enviar más tarde para personalizar aún más su notificación de inserción web.
Por ejemplo, puede vincularlo a una página en particular en su sitio, enviarlo a un segmento particular de sus usuarios o programarlo para que se envíe a una hora específica.
Esperamos que este artículo te haya ayudado a agregar la notificación de inserción web a tu sitio de WordPress. También puede querer ver nuestra lista de los mejores complementos de membresía para WordPress.
If you enjoyed this article, please subscribe to our WordPress YouTube Channel video tutorials. You can also find us on Twitter and Facebook.