Do you want to display rotating testimonials on your WordPress site? Testimonials are a great way to show social proof and build credibility. That's why you see so many online businesses proudly displaying customer testimonials on their websites. In this article, we will show you how to easily add rotating testimonials in WordPress.

The first thing you need to do is install and activate the Testimonial Rotator plugin. For more details, check out our step-by-step guide on how to install a WordPress plugin.
Upon activation, you need to visit Testimonials »Add Rotator page. This is where you will set up the carousel that will display rotating testimonials on your website.
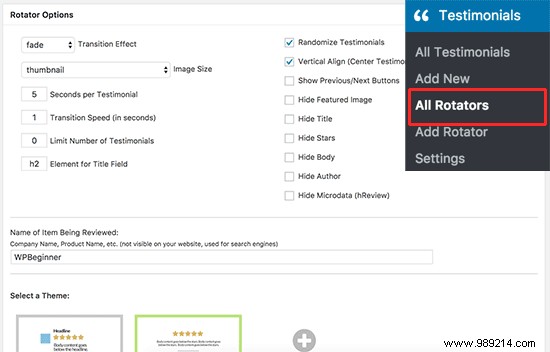
You can select how you want your testimonial carousel to behave. You can choose the animation, the length of each testimonial, show/hide elements, and more.
After that, you need to enter the company or product that these testimonials are associated with. This information will not be displayed, but will be used to add rich snippet metadata for search engines.
Lastly, you can select a theme for your carousel. By default, the plugin comes with two themes to choose from. You can purchase additional themes from the plugin author if you wish.
Once you're done, click the publish button to save your changes.
Now that you've created the carousel, it's time to add testimonials. You can add testimonials by going to Testimonials »Add New page in your WordPress admin area.
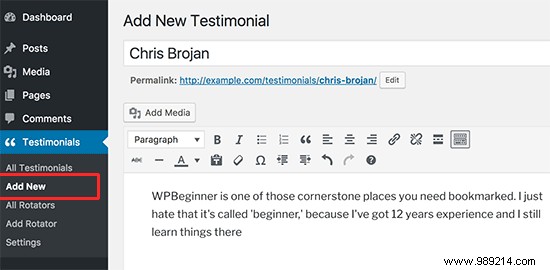
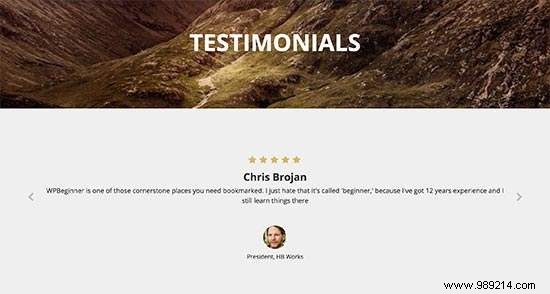
You need to add the client's name in the title field and their testimonial in the post editor.
Next, you need to scroll down to the 'Testimonial Options' section.
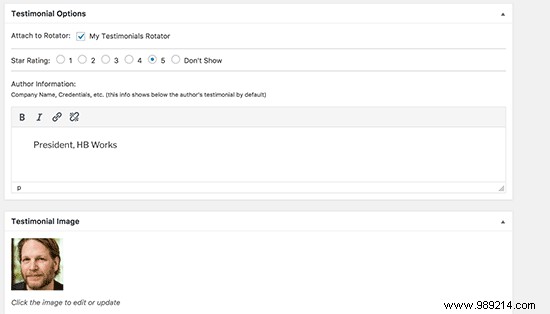
You can add the testimonial to the slider you created earlier. After that, you can select a star rating, the client's job title or company, and add a photo of the client.
Once you're done, click the publish button to save the testimonial. Repeat the process to add more customer testimonials.
After you've added a few testimonials, you're ready to add them to your WordPress site.
Go to Testimonials »All Rotators page and copy the 'User Rotator Settings' shortcode next to the rotator you created earlier.
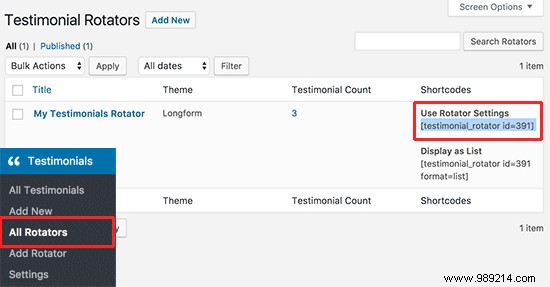
You can add this shortcode to any WordPress post or page to display customer testimonials. You can also add it to a sidebar widget, check out our guide on how to add shortcode in sidebar widget.
You can now visit your website to see your rotating testimonial in action.
We hope this article helped you learn how to add rotating testimonials in WordPress. You may also want to see our step-by-step guide to WordPress SEO for beginners.
If you enjoyed this article, please subscribe to our WordPress YouTube Channel video tutorials. You can also find us on Twitter and Facebook.