Have you ever wondered how you can add custom icons for your custom post types in WordPress? If yes, then you are in the right place. In this article, we will show you how to add icons for custom post types in WordPress.
WordPress started using an icon font called Dashicons as early as WordPress 3.8. These font icons look great on any device or screen size. Well, you can take advantage of these icons to assign custom icons to your post types.
If you don't like the video or need more instructions, continue reading.
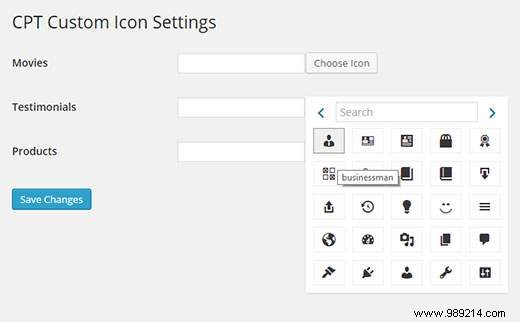
The first thing you need to do is install and activate the CPT Custom Icon plugin. Upon activation, simply go to Settings »CPT Custom Icon Settings where you will see your custom post types listed. Next, click the 'Choose Icon' button next to a custom post type and then select a font from the menu.
If you're new to registering a custom post type, we recommend using the Custom Post Type UI plugin to create and manage custom post types and taxonomies.
Adding an icon to a custom post type created with the CPT UI plugin is very simple. It supports Dashicons by default, so you must first visit the Dashicons website and select the icon you want to use for your post type.
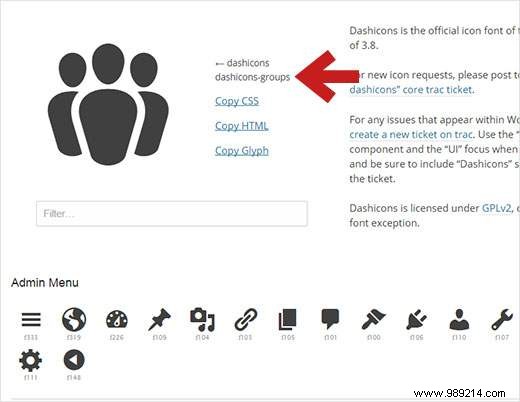
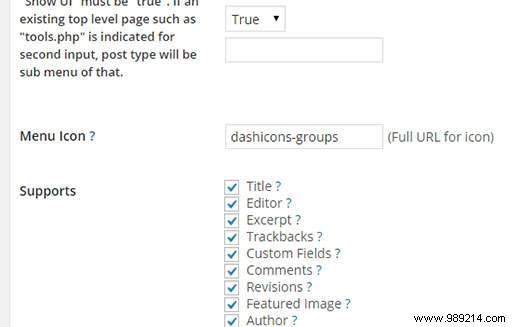
Clicking on an icon in the list will display a larger version of the icon at the top. Next to it, you will see the icon's CSS class. It will be something like dashicons-groups, dashicons-calendar, dashicons-cart, etc. You need to copy the CSS class and edit the custom post type you want to edit in the CPT UI. All you need to do is click on the Advanced Options link and scroll down to the Menu Icon section, then paste the CSS class and save your changes.
You can also create an image icon yourself and upload it by clicking Media »Add New . After upload, click the Edit link and copy the URL of the image file. Now simply paste this URL into the menu icon field in the CPT UI settings.
If you created a custom post type by placing code in your site-specific plugin or functions.php file, then you can add menu icons manually. Once again, simply visit the Dashicons website to select an icon and copy the CSS class. After this, add it to your custom post type code like this:
'menu_icon' => 'dashicons-cart',
You can also add the full URL of an image file that you want to display as an icon, like this:
'menu_icon' => 'http://www.example.com/wp-content/uploads/2014/11/your-cpt-icon.png',
Here is a complete code snippet that creates a custom post type called products with a menu icon:
// Registrar la función de tipo de publicación personalizada custom_post_type () $ labels = array ('name' => _x ('products', 'Post Type General Name', 'text_domain'), 'singular_name' => _x ('Product', 'Nombre singular del tipo de publicación', 'dominio_de_tipos'), 'nombre_de_menú' => __ ('Productos', 'dominio_de_tipo'), 'parent_item_colon' => __ ('Elemento principal:', 'dominio_de_trabajo'), 'all_items' = > __ ('Todos los elementos', 'text_domain'), 'view_item' => __ ('View Item', 'text_domain'), 'add_new_item' => __ ('Add New Item', 'text_domain'), 'add_new '=> __ (' Add New ',' text_domain '),' edit_item '=> __ (' Edit Item ',' text_domain '),' update_item '=> __ (' Update Item ',' text_domain '), search_items '=> __ (' Search Item ',' text_domain '),' not_found '=> __ (' Not found ',' text_domain '),' not_found_in_trash '=> __ (' Not found in Trash ',' text_domain ' ),); $ args = array ('label' => __ ('Products', 'text_domain'), 'description' => __ ('Post Type Description', 'text_domain'), 'labels' => $ labels, 'support' => array (), 'taxonomies' => array ('category', 'post_tag'), 'hierarchical' => false, 'public' => true, 'show_ui' => true, 'show_in_menu' => true, 'show_in_nav_menus' => true, 'show_in_admin_bar' => true, 'menu_position' => 5, 'menu_icon' => 'dashicons-cart', 'can_export' => true, 'has_archive' => true, 'exclude_from_search' = > falso, 'publicly_queryable' => true, 'capacity_type' => 'page',); register_post_type ('Productos', $ args); // Enganche en la acción 'init' add_action ('init', 'custom_post_type', 0); We hope this article helped you add icons for your custom post types in WordPress. You can also check out how to use icon fonts in the WordPress post editor.
If you enjoyed this article, please subscribe to our WordPress YouTube Channel video tutorials. You can also find us on Twitter and Google.+.