Want to create custom meta boxes for your WordPress posts, pages, and custom post types? Custom meta boxes are commonly used to provide a better user interface for adding custom fields (metadata) to your content. In this article, we will explain what a custom meta box is, and how you can easily add custom meta boxes to WordPress posts and post types.
The custom meta box is an easier to use interface to add custom fields (metadata) in your posts, pages and other custom post types.
WordPress comes with an easy-to-use interface that helps you create content like posts and pages, or custom post types.
Typically, each content type consists of the actual content and its metadata. Metadata is information related to that content, such as the date and time, author name, title, and more. You can also add your own metadata using custom fields.
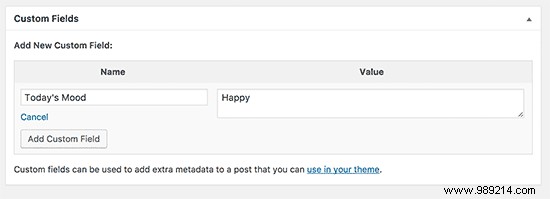
However, adding metadata using the default custom fields box is not very intuitive. This is where custom meta boxes come in.
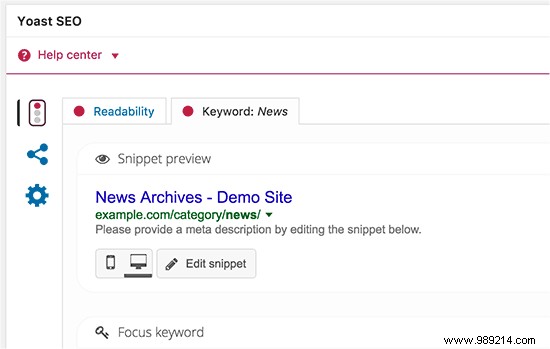
WordPress allows developers to create and add their own custom meta boxes on post editing screens. This is how the most popular plugins add different options on their post editing screens.
For example, the SEO meta and description box within the Yoast SEO plugin is a custom meta box:
With that said, let's see how you can easily add custom meta boxes to WordPress posts and post types.
First, what you need to do is install and activate the Advanced Custom Fields plugin. For more details, check out our step-by-step guide on how to install a WordPress plugin.
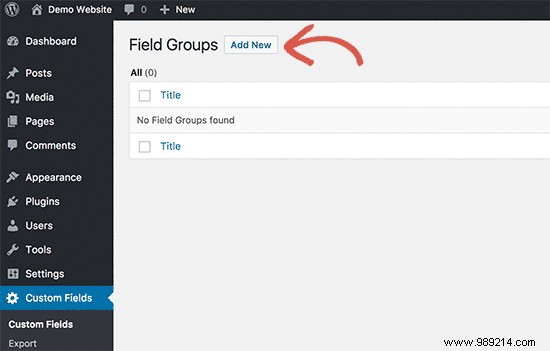
Upon activation, the plugin adds a new menu item called "Custom Fields" to the WordPress admin bar. Clicking it will take you to the custom fields page.
This page will be empty as you haven't created any custom fields yet. Go ahead and click the 'Add New' button to continue.
You will be taken to the 'Add New Field Group' page.
Here you need to provide a title for your field group. This title will be used as the title of your meta box.
After that you can start adding your fields. Simply click the '+ Add Field' button to add your first field.

This will open the field configuration form. First you need to provide a label for your field. This tag will be displayed in your meta box before the field.
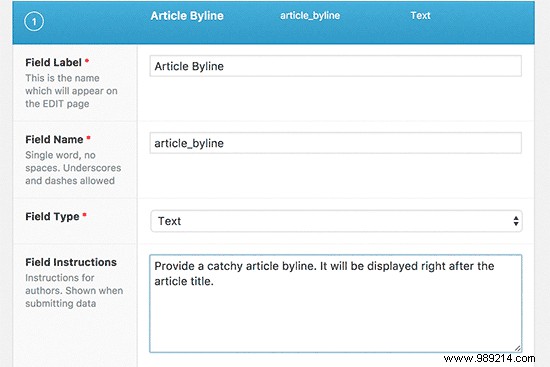
After that you need to select the field type. The Advanced Custom Fields plugin allows you to choose from a wide range of options. This includes text, textarea, radio buttons, checkboxes, full WYSIWYG editor, images and more.
Next, you must provide field instructions. These instructions will tell users what to add to the field.
Below that, you will find other options for your field. You should carefully review these options and adjust them to suit your needs.
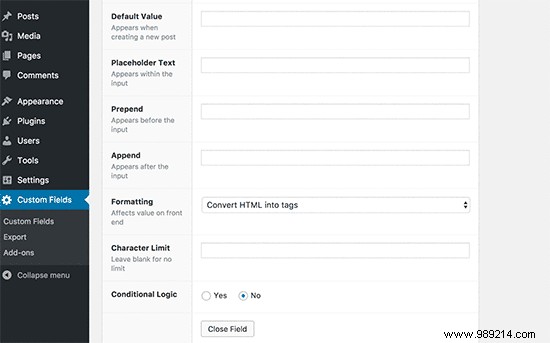
Then click the close field button to collapse the field.
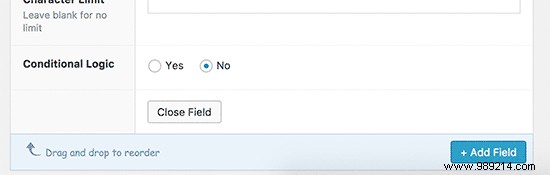
If you need to add more fields to your metabox, click the '+ Add Field' button to add another field.
Once you are done adding fields, you can scroll down to the location section. This is where you can define when and where you want your meta box to be displayed.
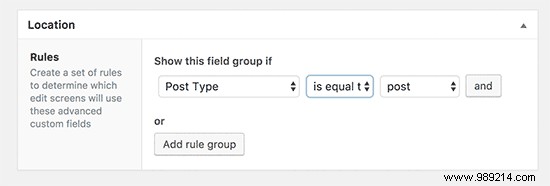
Advanced Custom Fields come with a handful of predefined rules for you to choose from. For example, you can select post types, post category, taxonomy, front page, and more.
Next comes the meta box options settings.
First you must choose the order number. If you have multiple field groups defined for a location, you can select the order number for them to be displayed. If you're not sure, leave it as 0.
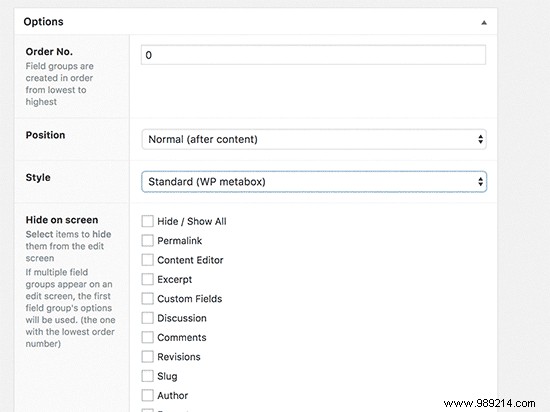
Next, you need to choose the position of the meta box on the page. You can choose to display it after the content, before the content, or in the right column.
Below that, you will need to choose a style for your meta box. You can choose it to be like all other WordPress meta boxes, or you can choose to make it transparent (no meta box at all).
If you are not sure, select the Standard option (WP Meta box).
Lastly, you will see a list of the fields that are normally displayed on a later editing screen. If you want to hide a particular field on your post editing screen, you can check it here. If you are not sure, then it is better to leave them unchecked.
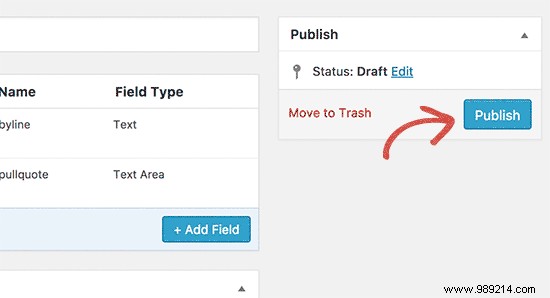
Once you're done, click the publish button to make your field group go live.
Congratulations, you have successfully created your custom meta box for your WordPress post or post type.
Depending on your settings, you can now visit your post or post type to see your custom meta box in action.

You can use this custom meta box to add metadata to your posts or post types. This data will be stored in your WordPress database when you save or publish the post.
So far, we have successfully created a custom meta box and displayed it on our post edit screen. The next step is to display the data stored in those fields in your WordPress theme.
First, you need to edit the custom field group you created earlier. On the 'Edit Field Group' page, you will see your custom fields and their names.
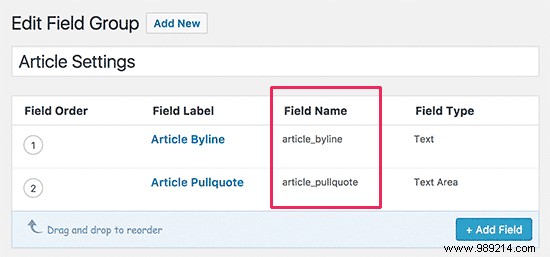
You will need the names of these fields to display them on your website.
Advanced custom fields allow you to do this in two different ways.
First, you can use a shortcode to display a custom field in your post.
[campo acf = "articulo_linea"]
You can also display them by adding code to your WordPress theme files. If you haven't done it before, check out our beginner's guide on how to copy and paste code in WordPress.
You will need to edit the theme file where you want to display the data for these fields. For example, single.php, content.php, page.php, etc.
You will need to make sure that you add the code inside the WordPress loop. The easiest way to make sure you're entering code inside the loop is to look for a line in your code that looks like this:
You can paste your code after this line and before the line that ends the loop:
Your custom field code would look like this:
This code will display the data entered in the item line field of our custom meta box.
Notice how we wrapped the code in an h2 header with a CSS class. This will help us format and style the custom field later when adding custom CSS to our theme.
Here's another example:
Don't forget to replace the field names with your own field names.
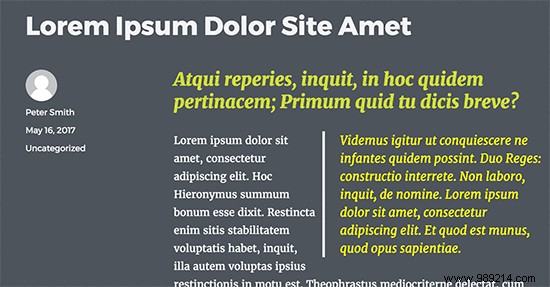
You can now visit the post where you have already entered the data in your custom fields. You could see your custom metadata displayed.
Advanced Custom Fields is a very powerful plugin with many options. This tutorial only scratches the surface. If you need more help, don't forget to check the plugin's documentation on how to extend it.
We hope this article helped you learn how to add custom meta boxes to WordPress posts and post types. You can also check out our step-by-step guide on how to increase WordPress speed and performance for beginners.
If you enjoyed this article, please subscribe to our WordPress YouTube Channel video tutorials. You can also find us on Twitter and Facebook.