As you can see now, more and more bloggers are adding weekly email newsletter service on their blog. A large portion of your audience subscribes to the weekly newsletter because it summarizes the value of the week's blog activities and has exclusive tips just for subscribers. There are many email newsletter solutions like Aweber, one of the most recommended, but they all charge money. The solution that we are going to mention here can in no way be compared with the features provided by premium service like Aweber, and should not be considered as the best system. Rather, our solution is to offer bloggers an affordable and functional method of creating a newsletter using the open source software we all love, WordPress.
In this tutorial, we will use WordPress and Feedburner with some plugins to create a simple email newsletter service for your WordPress blog. You can track the performance of your newsletter by checking how many subscribers you have, how many clicks each link receives, and much more.
Note:The codes referenced in this article will vary across themes, as each designer has their own coding style. So look for something similar or along the lines of that code. This is by no means an advanced tutorial, but knowledge of HTML and CSS is recommended.
In the first step of this tutorial, you will need to create a new category for your posts in WordPress. You can create a new category by visiting Publications> Categories Tab in the WordPress admin panel. You can name the category you want. For example, we'll call it an E-Newsletter.

One of the things you need to make sure to do is make a note of the Category ID of this new category you created. It will be very important that you know this identification. Throughout this tutorial, we will use the [Replace with your category ID] parameter. and wherever you see this tag, you need to replace it with the category ID of this new category.
Here is you can find the category id. Just go to Posts> Categories. Hover over the category you created and look at the status bar.
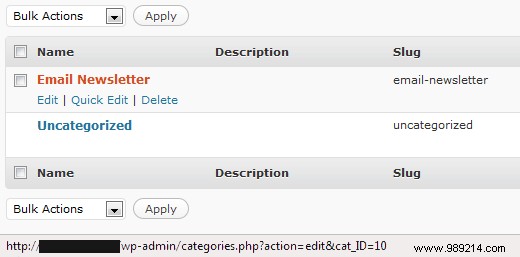
So, for example, the category ID of the category we created will be 10. Be sure to replace every code that looks like this. [Replace with your category ID] with your category ID.
Blogs typically have a list of categories in their sidebar, header, archive pages, footer, and other places, depending on the layout. What we aim to do in step 2 is to exclude our E-newsletter category from all these category lists. In other words, we are hiding our category so it is not shown to normal site users because the material in this category is for newsletter subscribers only. You'll need to look in your template and see where the category list is most often sidebar.php . Locate the similar code:
Categorías'); ?>
and Replace it with the following:
Categorías'); ?>
Make sure to insert your category ID in this code. Some themes have the above code in other files as mentioned, so you should check where your categories are showing and replace it with the above.
Now no user can see their category in the list, but there is much more we need to do.
All E-newsletter publications The category remains visible to all users of the site. They can see it in RSS, search pages, home page and archives. Instead of individually adding the code to each file, we will use the plugin called Advanced Category Excluder (ACE), which will make the job much faster and easier for new WordPress users.
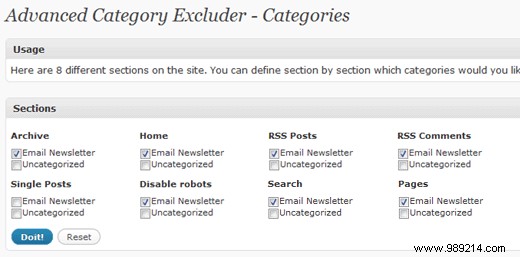
When you are in the ACE plugin settings, be sure to check your Newsletter category in all boxes except Individual Posts.
The only code you might need to change is in your template is in your single.php and that's only if you have navigation as the default WordPress theme that makes the user able to go to the next and previous. If your theme has that then look in your single.php request a code related to navigation and replace it with the following:
Your secret category has its own feed. If you are using the SEO friendly URL structure as we suggest, then your feed URL will look like this:
If you are using the default URL structure, your feed URL will look like this:
Once you have your URL, you need to create a new feed (record) in FeedBurner. If you don't already have an account, create an account and then enter your feed URL in a field that looks like the following:

Enter your URL and click Next. You will see a screen like the following:
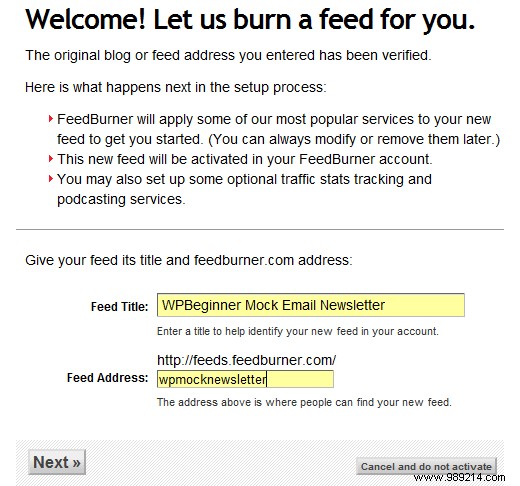
Enter the details and click Next and your source is now set. Now it's time to jump to our next step where we'll set up an email service.
Once you have the Feed setup, you will need to click on Publish tab and then click on the E-mail subscription Tab to activate it. Like the following screenshot:
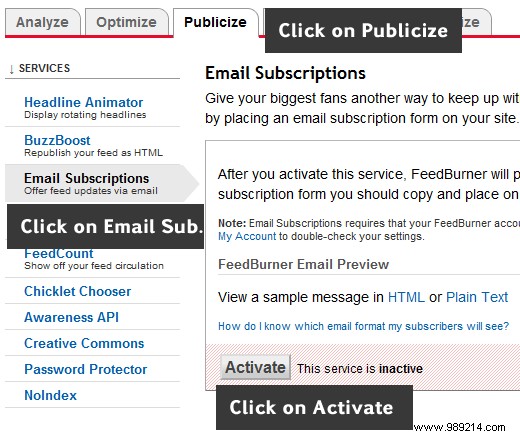
Once you've activated the service, you'll see some code that you can copy and paste into your theme file to display a form for users to insert their email and subscribe.
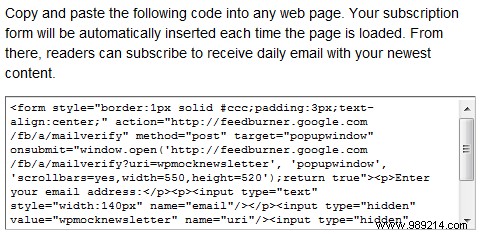
You can customize the style of the form to fit your needs. Put it wherever you like on your site, but it's wise to put it in a conspicuous place where people will actually see it and subscribe to it.
Before you send out the newsletter, there is a WordPress setting you need to change to keep your readers happy. You should allow full text in your RSS feeds, so your readers don't see an excerpt, they see the full article. That is the point of having a newsletter. To change this setting, you will need to go to Settings> Reading in your WP Admin Dashboard and click on Full Text instead of Summary.

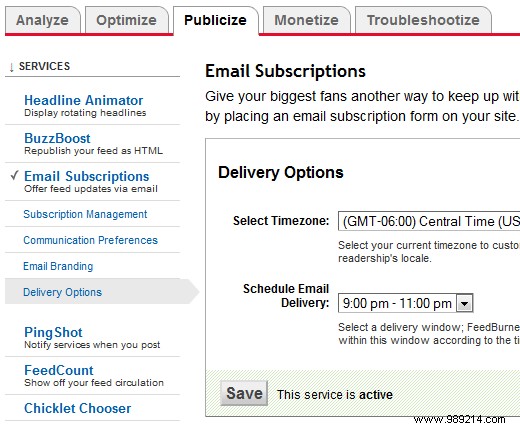
We are now at the final step of this tutorial. To send a newsletter, all you need to do is publish a post in your secret category. As we have it set up, your WordPress blog will notify FeedBurner that a new post has been published, and an email will be sent to all your users at a delivery time you choose. It won't be sent instantly, so it gives you a chance to edit your entry before it goes out. To control what time the article is delivered, you can go to your FeedBurner Admin Area> Publicize Tab> Email Subscription> Delivery Options
One of the ways if you want to send the newsletter instantly is to change the sending option after each publication, considering that you only publish them weekly.
This method is nowhere near the capabilities of premium services like Aweber, but this is a functional method that can be used. Our method is affordable, and it gets the job done. But you have to remember that a user can always choose to unsubscribe from your email newsletter and subscribe via RSS once they know what the URL of the feed is. There are other ways, like creating a whole new subdomain blog just for the ezine that some users prefer. We recommend that you try this on a test account and then implement it on your site if you like it.