Photo sharing services are available in abundance these days, with Facebook and Flickr being the main competitors. While most of my friends and family are on Facebook, I still stick to Google+ when it comes to photo sharing. I can give you not one, but many reasons why I prefer Google over Facebook and other similar services.
The auto-download feature whenever I'm connected to Wi-Fi saves me time. Auto Awesome effects created by Google+ are fun to see and share and Stories they create are like the icing on the cake. On top of all that, the unlimited storage space for photos uploaded under 2048px is like winning the lottery.

But with all those photos that are automatically uploaded by the apps, it's still recommended to create albums from time to time. These albums make it easier to organize photos and make sharing a walk in the park.
So find out how to create albums for photos automatically uploaded to Google+ using an online interface or your smartphone.
Open Google+ and go to Photos section using the sidebar. Here you will be able to see all the photos you have uploaded from your smartphone or computer. While the default video is Highlights which only shows some of the important photos of the day, the All Photos The tab will show you all the downloads you have already made.
Now, to create a custom scrapbook using some of these photos, hover your mouse pointer over one of the photos and select it by checking it. To select multiple photos, you can use the Shift key in combination with the left click.
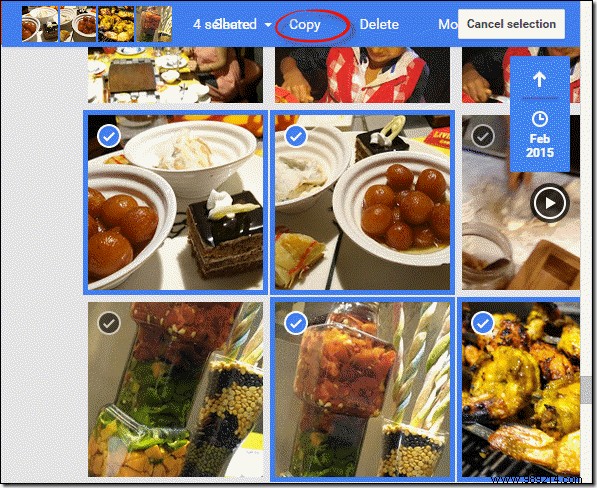
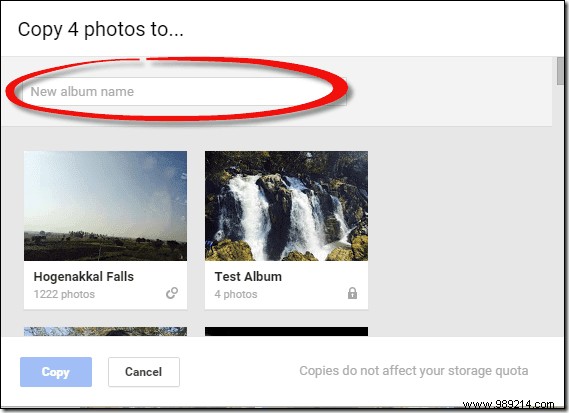
Now that the selection is made and you are ready to create an album, click on the Copy Button you see at the top with the Share and Move . The webpage will open a new frame and ask you to either create a new album with the selected photos or add them to an existing one.
Once you have the photos, you can easily share them on the Google+ timeline or get a viewable URL and just email them to your friend. The great thing about these albums would be that they will include the Auto Awesome Photos and GIFs created by Google just for you.
Now let's see how to get the same from your droids and iOS.
Cool Tip: Find out how to properly configure Google+ automatic backup on Android.
Assuming the Google+ app is already installed on the device, navigate to the photos section. Just like on the web, select the photos you want to include in the album. If you've used the web version before, selecting photos on mobile can feel a little grumpy, especially when you need to select multiple photos and you don't have the Change button to fall back on.
However, once you have selected the images, press the Copy next to the share button and the app will ask you the same question… i.e. the name of the album. Create a new container or add an existing one and save the settings. Settings can be mirrored for Google+ apps on iOS.
Cool Tip: Once the album is created, you can open the ‘web’ album and click on the Organize option to set album cover. The cover is the first photo the viewer will see in the share invite, so make sure it's one of the coolest.
This is how you can easily create albums from the photos automatically uploaded to Google. These albums will not only make sharing easier, but will also help you organize your photo collection. The Auto Awesome effects are icing on the cake.
If you haven't started using automatic Google+ backup, I recommend setting it up as soon as possible. As always, don't forget to share your thoughts on this.