Are you unable to update the Minecraft Native Launcher ? If so, this article will definitely help you solve it. This is an error message that most users receive when downloading the latest Minecraft updates through Minecraft Launcher. Some users have also tried to install updates again, but they received the same error message each time.
ContentsUnable to update Minecraft Native Launcher1]Run Minecraft Launcher as administrator2]Temporarily disable your antivirus3]Repair Minecraft Launcher4]End processes running in the background (solution for Minecraft Dungeons Native Launcher)5]Rename file launcher_profiles_microsoft_store .json6]Check permissions7]Change Xbox Game Pass game install location to drive C8]Uninstall Minecraft and download latest version from official siteWhy can't I update my Minecraft?How to update my Minecraft Launcher on PC?
When you receive this error message, restart your Windows 11/10 computer and reinstall updates. Sometimes an error occurs due to a minor issue that can only be fixed by restarting the device. Minecraft JAVA Edition users are advised to install the latest version of JAVA and then install the update.
If you still can't update Minecraft Native Launcher, try the following fixes:
Let's see these solutions in detail.
If the error was occurring due to admin rights, running Minecraft Native Launcher as admin may fix the issue. To do this, simply right-click on the Minecraft launcher and select the Run as administrator option. After running it as administrator, try installing updates and see if it works.
Sometimes antivirus software generates false positive indicators and prevents legitimate programs from running. Such kinds of false positive indicators can be avoided. This could be your case. Therefore, we suggest that you temporarily disable your antivirus and try to install updates. If it works, let the updates install completely.
Whether this solution works or not, don't forget to re-enable your antivirus.
A possible cause of this error is corrupted files. Over time, some files can get corrupted and this is a very common problem. That is why in the Windows operating system there is an option to repair installed programs. This option is available in the Control Panel. If you encounter the error for this reason, repairing the Minecraft launcher will fix it.
The steps to repair the Minecraft launcher are simple.
After repairing the launcher, check if the problem still persists.
Stop all Minecraft processes running in the background, then try to install the update. It should work. We have listed the steps below:
taskmgr and click OK. This will launch Task Manager.After completing all instances of Minecraft, run the native Minecraft launcher and install the update.
the launcher_profiles_microsoft_store.json is a JSON file that contains all of Minecraft Launcher's cached settings, profiles, and user data. This file helps to update old versions of Launcher to newer versions. Rename the launcher_profiles_microsoft_store.json folder at launcher_profiles.json file may solve the problem.
You will find the launcher_profiles_microsoft_store.json file in the following location on your computer:
C:\Users\username\AppData\Roaming\.minecraft
Copy the path above and paste it into the address bar of your file explorer. After that press Enter. In the path above, replace the username with your username.
The Minecraft launcher must have permission to read, write and modify the Minecraft Launcher folder in the C drive. To verify this, go to "C:\Program Files (x86) .” Now right click on the Minecraft Launcher folder and select Properties . Click on the Security tab and check what permissions are allowed for the Minecraft Launcher folder.
Allow read, write and modify permissions by clicking on the Edit button next to the "To edit permissions, click Edit ” and check if you can install the update via Minecraft Native Launcher. If that doesn't work, grant all permissions and check again if you can install the update.
If this trick works, revert the changes after installing the update.
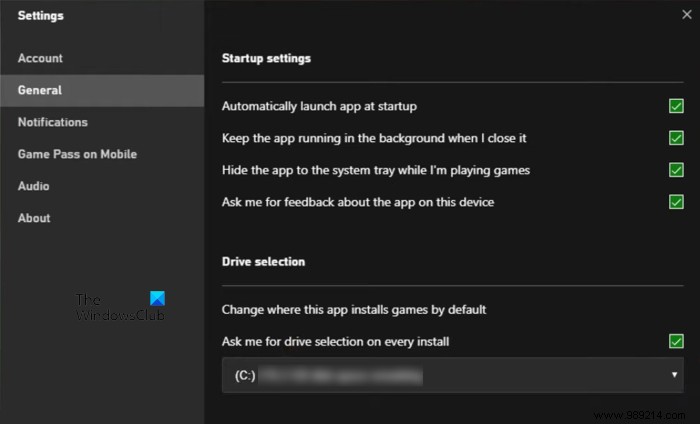
This solution is for users who have installed Minecraft Launcher from Xbox. Change the Xbox Game Pass game install location, then reinstall the latest version of Minecraft Launcher from Xbox.
The steps to change the Xbox Game Pass game install location are listed below:
If none of the solutions above solve your problem, uninstall Minecraft from your computer and download the latest version from the official Minecraft website. If you have multiple disks (SSD or HDD), install Minecraft on your main disk.
That should help.
If your internet connection speed is slow, you may experience issues while updating Minecraft. Another reason for Minecraft not updating is antivirus software. It is possible that your antivirus is blocking Minecraft due to which you cannot update it. To fix this, just disable your antivirus temporarily, then update Minecraft.
To update Minecraft Launcher on Windows 10 PC, open Microsoft Store and click on the three horizontal dots at the top right. Select Downloads and Updates . Now click on the Get Updates button. After that, Windows will scan all installed apps for updates. If the update is available for any app (including Minecraft), it starts installing updates.
If you are a Windows 11 user, open Microsoft Store and click on Library on the left side, then click on the Get Updates button.
If you have Minecraft JAVA Edition on your PC, open Minecraft Launcher and it will automatically download the latest version (if available). Alternatively, click the arrow to the right of the play button, then click Latest Version .
That's it.