Some websites often use the getDisplayMedia() or the Desktop Capture Extension API to capture the screen. In some situations, it can be intimidating to perform confidential or banking tasks using the Google Chrome Navigator. If you want, you can block screenshot on Google Chrome using the Recording or Group Policy Editor .
To allow or block screen capture on Google Chrome using the Group Policy Editor in Windows 11/10, follow these steps. To use the GPEDIT method, you must first install the Group Policy Template for Google Chrome. You can download the template from chromeenterprise.google.
To learn more about these steps, keep reading.
At first, you need to open the Local Group Policy Editor on your computer. To do this, press Win + R to display the Run prompt, type gpedit.msc, and hit the Enter button. Then navigate to the following path:
Computer Configuration> Administrative Templates> Google Chrome> Allow or deny screenshot
Here you can find a setting called Allow or deny screenshot . You need to double click on this setting and choose the Disabled optional.
Then click on the OK button to save the change.
However, if you want to allow screenshot, you have to open the same setting and choose the Not Configured or Allowed optional.
For your information, you can allow certain origins to capture your screen on Google Chrome. In other words, only specified origins can capture your Google Chrome screen. For this you need to open the Allow desktop, window and tab capture by these origins setting, choose the Allowed option and enter an origin like this:
Once done, click the OK button to save the change.
To allow or block screen capture on Google Chrome using Recording Follow these steps:
Let's see these steps in detail.
First, you need to open the registry editor. To do this, press Win + R > type regedit and hit the Enter button. If the UAC prompt appears, click the Yes button.
Then navigate to the following path:
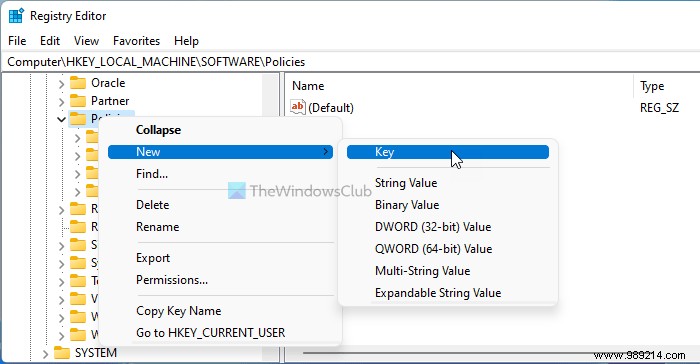
HKEY_LOCAL_MACHINE\SOFTWARE\Policies
Here you need to create a subkey. To do this, right-click on the Policies key, select New> Key and set the name as Google .
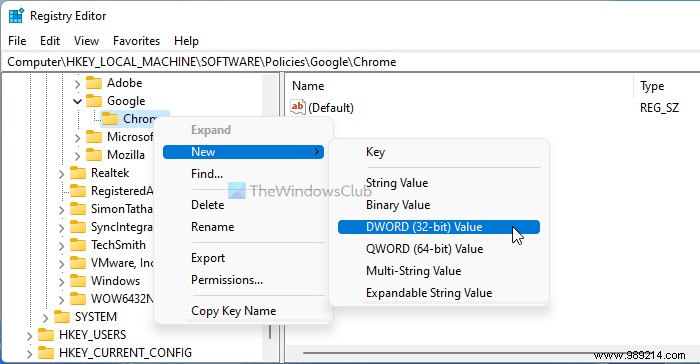
Then right click on the Google key, select New> Key and name it Chrome . Next, you need to create a REG_DWORD value. To do this, right-click on the Chrome key, select New> DWORD (32-bit) Value and name it as Screen capture allowed .
By default, it carries a value data of , and you need to keep it to block screenshot on Google Chrome. However, if you want to allow it, you need to double click on this REG_DWORD value and set the value data as 1 .
Then click on the OK button and restart your computer. Alternatively, you can also remove the REG_DWORD value. To do this, right click on ScreenCaptureAllowed, select the Delete option and click on the Yes button.
Like the GPEDIT method, you can allow certain origins to allow screenshotting in Chrome. For this you need to right click on the Chrome key, select New> Key and name it like TabCaptureAllowedByOrigins . Next, right click on TabCaptureAllowedByOrigins> New>String Value and name it as 1 .
Double-click it to set the value data as original names. For your information, we have already mentioned the origins above.