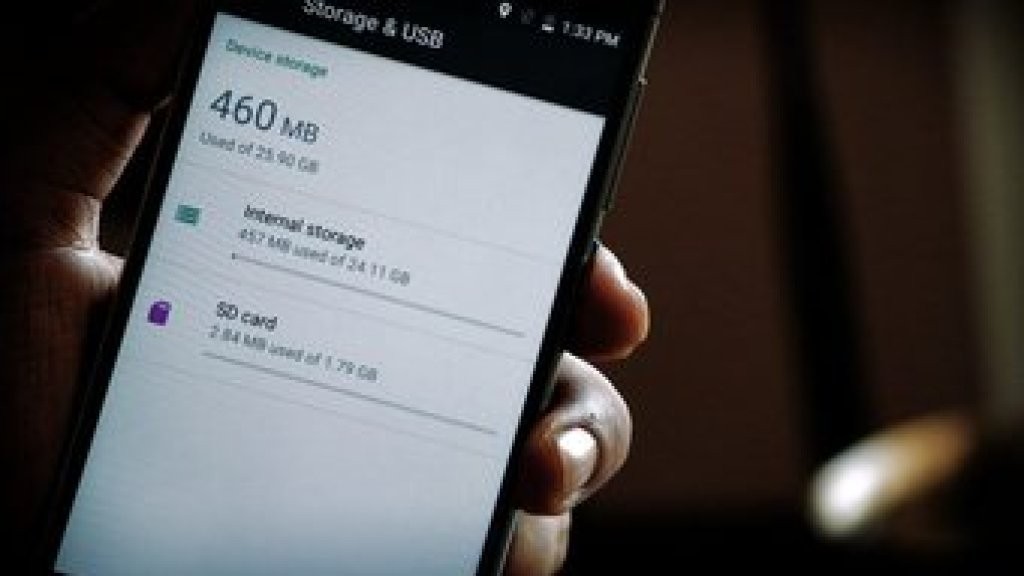
While we all love our Androids, there's one message that keeps plaguing us from time to time:low internal storage. This issue is especially prevalent in budget phones, where the internal storage is mostly located on the underside. And to top it off, the operating system consumes a quarter of the internal memory.
SummaryConditions for this trick to work1. Format the SD card2. Format as internal storage Samsung and Xiaomi devices, please stand up This is the Wrap
The best way to increase Android's internal storage is to borrow it from the SD card. Yes, it can be done, but some of these conditions must be met. And it really is the only way. You can't just get storage out of thin air and add it to the device...it has to come from somewhere and external storage is the only savior here.
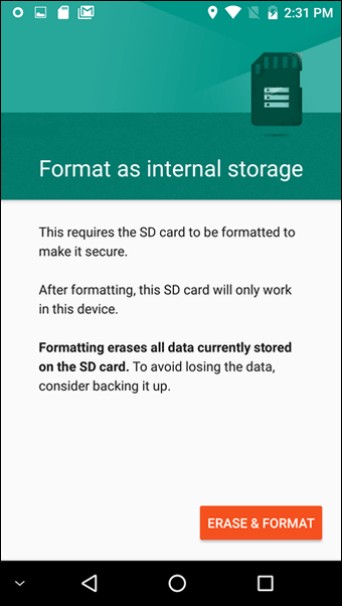
The first step in the process would be to format the SD card. Make sure you have backed up data before you start formatting.
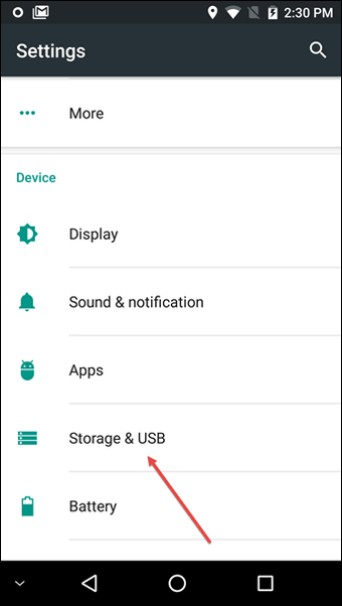
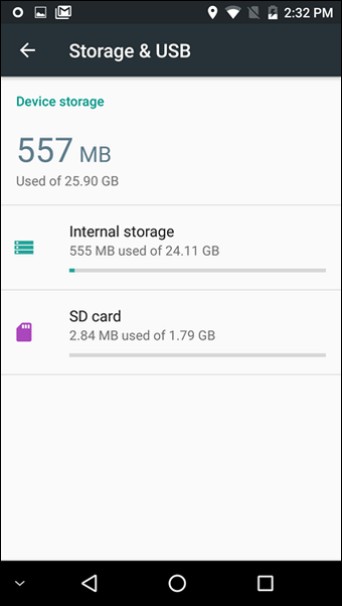
Publish the format, go to Settings> Storage and USB . Depending on your phone specifications, here you will be able to see the free space on your device.
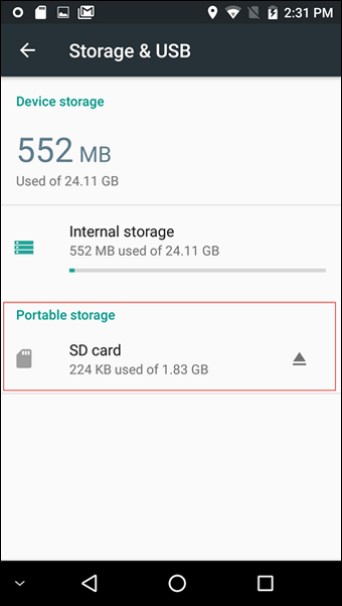
Go to Portable Storage and once inside, tap the hamburger menu in the top right corner. A menu will appear showing two options – Display and Settings. Tap Settings .
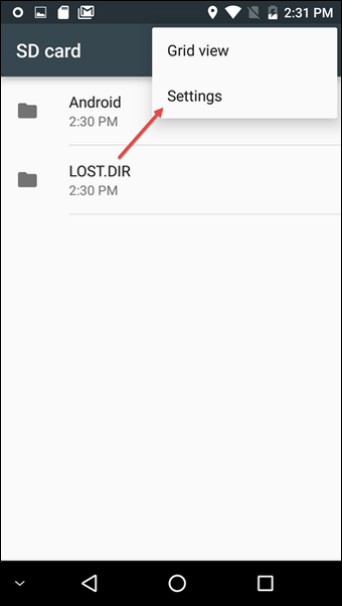
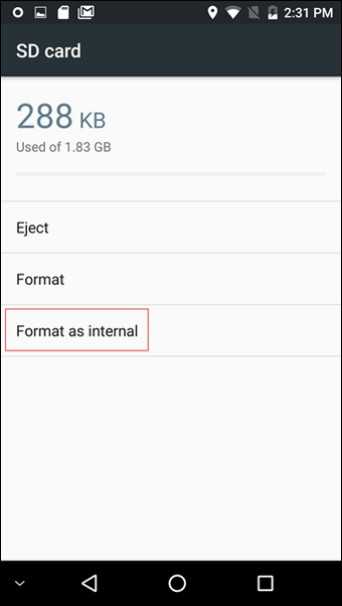
The Settings menu only has a handful of options. Our weapon of choice here is the option called Internal Format . This option will erase all data on the SD card and move the SD card as part of the internal memory.
The whole process takes about five minutes, depending on how your phone is configured.

Once done, you will see that the device storage shows a cumulative of both memories, with the portable storage option removed.
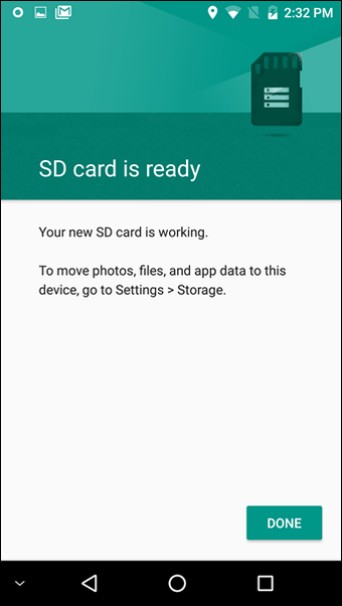
Thus, it will only take you a few minutes to increase the internal memory of the phone.
As the phone treats the SD card as a part of the internal storage, an unexpected ejection can lead to an unstable phone and force quit apps.However, not all phones have an option to change external storage to adoptable storage like Samsung and Xiaomi devices. So for devices that haven't come with this feature, never fear, we have a nifty trick to do just that.
First, you will need to enable USB debugging option in developer options and also install Android Debugging Bridge (commonly known as ADB tools) on the computer.
To enable the Developer option, open the About page under android settings and tap the Build number 5 times until you see a toast notification that Developer Options has been enabled.Once everything has been configured, go to the ADB shell and run the command below.
sm disk-list
Write down the device ID in the command prompt window. So now to use the entire SD card as internal storage use the below command (xxx,x being the device ID).
sm partition disk:xxx,x private
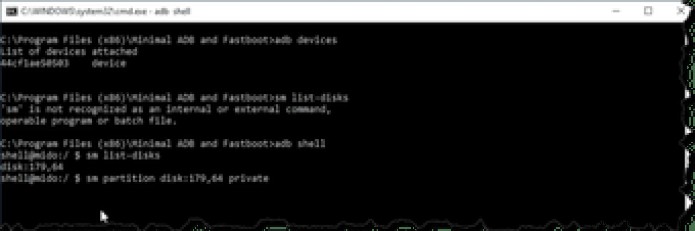
That's it, as simple as possible. Now head over to your phone and you can see the two storages are unified and your phone has higher internal storage.
Also read: Cache or App Data:Which to Clear on Android and When?
So here is how to increase phone memory. We are not magicians and above this trick can only be done if only your device supports it. So don't despair when "Low Internal Storage" pops up next time, instead fix it using this simple trick.