Mobile photography is the next big thing and when it comes to perfecting those images, few apps do it better than VSCO.
Contents1. Adjust the intensity of filters2. Try Movie Filters3. Overlay filters4. Nail skin tone in portraits5. Change the angle6. See the original image7. Separate focus and exposure (iOS)8. Theme your downloads and save the recipe9. Edit RAW images (iOS)10. Bookmark your favorite presets Embellish your memories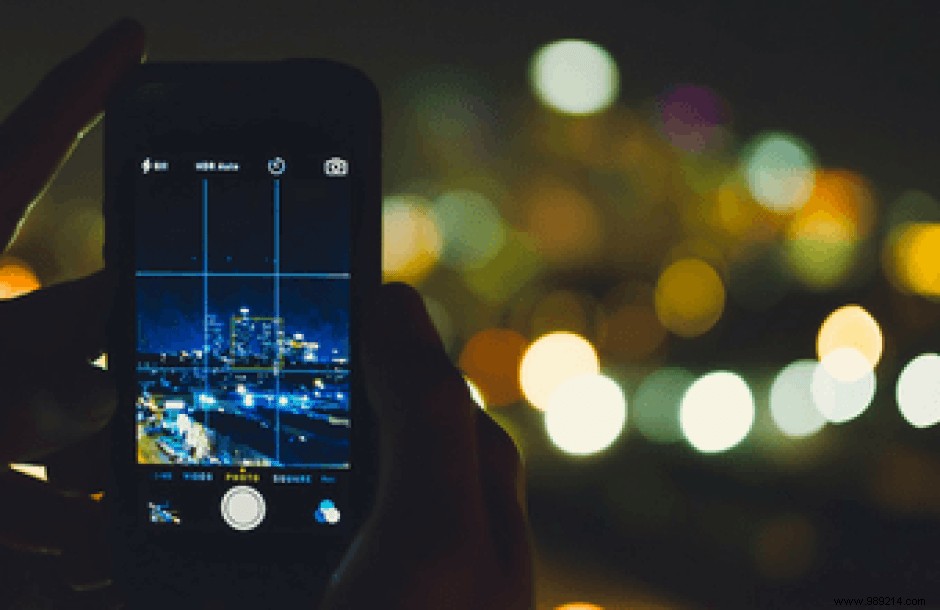
VSCO is a powerful tool that breathes new life into otherwise plain images with its brilliantly designed filters. However, this top mobile photography app is not just about its filters, it has lots of handy tools that can make your photos look really good.
In this article, we decided to explore some cool VSCO tips and techniques to prepare your photos for Instagram!
Let's check them out.
Yes, we said that VSCO is not just about filters, but it would be a shame not to explore them.
This application is known for its subtle filters which do not overpower the original image. That being said, image editing is a matter of personal preference, so if you find a filter a little too powerful, you can easily adjust the intensity.
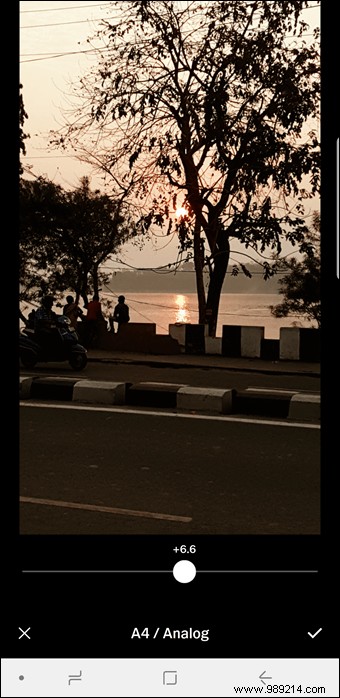
To do this, apply the filter of your choice. Once done, tap the filter icon again which will bring up the intensity slider. Drag the slider to the left to decrease the intensity.
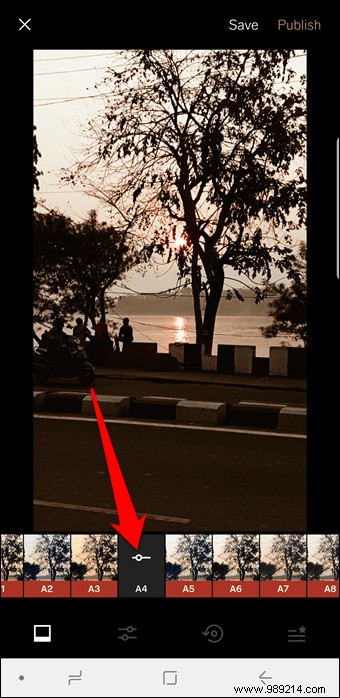
The VSCO app contains a multitude of professional camera presets. Part of the new VSCO X series, Film X filters give your photos the look of classic film rolls.
Moreover, these filters also allow you to adjust the strength, character and warmth of the photo. More so, the better if you have some RAW image files to edit.


Tap a filter to apply it, then tap the filter again. Balance the photo as per your convenience.
Why use just one filter when you can use two? Conventionally, VSCO only lets you use one filter at a time, but sometimes one filter isn't enough to do the image justice.

To do this, apply the first filter of your choice, adjust the intensity and save the image in the Gallery. Once done, import the saved image back into VSCO and apply the second filter.
Ultimately, layering filters is an art. So don't go overboard with them.
Cool tip :If you have a dark image, increase the exposure of the image to bring out the finer details of the photo.The key to a good portrait is the skin of the subject. You wouldn't want a portrait that's too washed out or garishly complexioned. G4 to G9 filters are made for portraits. However, if you're not getting the look you want, your next best bet is the E-series.
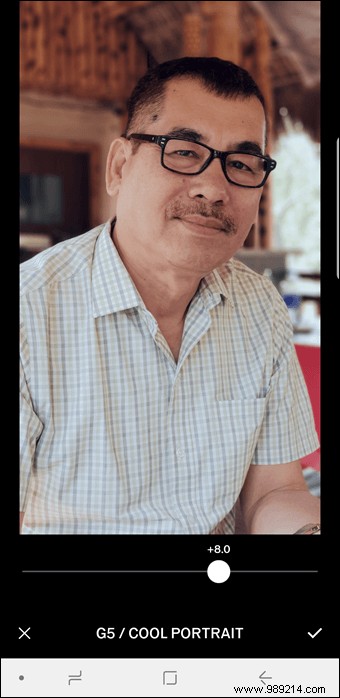
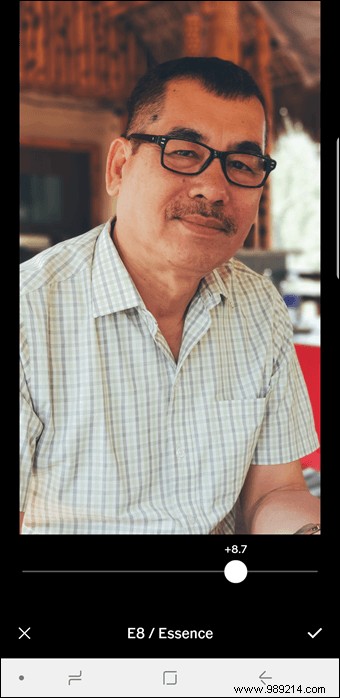
With minor tweaks and modifications, these filters can produce very beautiful portraits.
Apart from that, you can also check out the inbuilt Skin Tone Slider to preserve the original skin tones. Tap the second icon from the left, select Skin Tone and drag the slider.

Swiping left gives a magenta hue, while swiping right will give a slightly golden warmth.
Not all the photos we take end up with a straight frame. Sometimes you found a slightly tilted brick wall or a tilted horizon in your photos. Before heading out to capture the same photo again, use the Straighten and Crop tool to correct perspective.
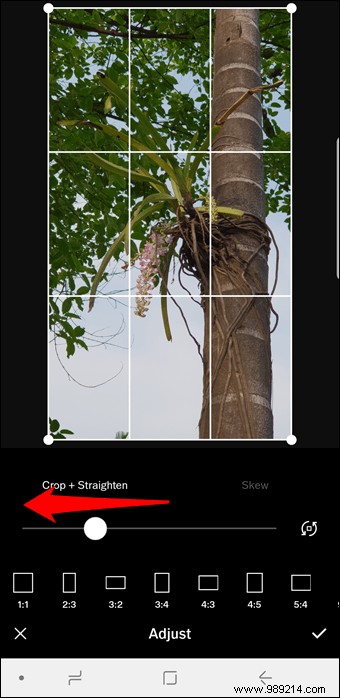
Tap the Tools icon (second from the left) and tap Adjust. Choose the Crop + Straighten tool to modify the image. This can be used on sloped horizons, brick walls, shores, etc. However, the above tool can only correct the problem with angled frames.
For correcting angles and alignment and perspective issues, the Skew tool is the best bet. These tools change the angle of the photo and alter the focus.
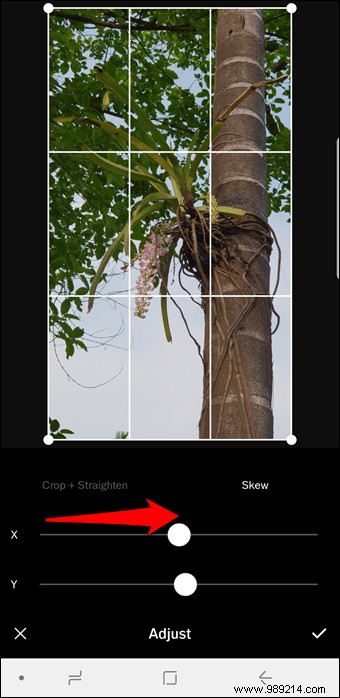
Depending on the image, you can use X-skew or Y-skew to stretch the image. While the X-Skew stretches the image horizontally, the Y-Skew stretches the top and bottom edge of the image.
Want to know if you overdid the filters? You can compare the newly edited image with the original and no, you don't need to open the gallery.
Long press the image and you will see the original image. Simple, see.
The iOS app for VSCO has many advantages and the ability to separate focus point and exposure level is the best. Simply tap the camera interface with two fingers to separate them.
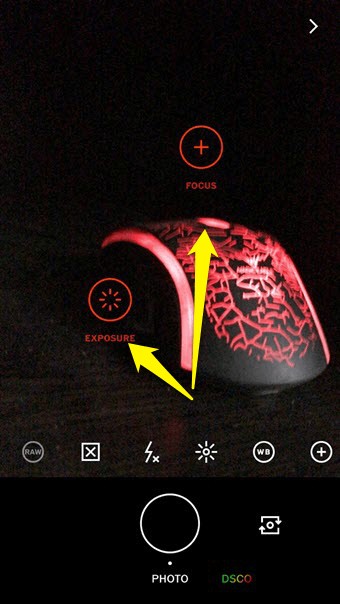
Once you see the two circles, drag them to the desired position and click elsewhere. This feature is especially useful in landscape photography where you cannot control shadows or brightness.
Be it your Instagram uploads or your VSCO uploads, the theme of a bunch of photos makes your feed visually appealing. Luckily, VSCO's filters and editing tools make theming easy and simple.
Once the color has been chosen, all you have to do is arrive at the right presets (filter+parameters) and save the recipe. To do this, tap the third icon from the left and tap the plus icon.
Next time when you upload an image, just tap on the saved recipe (make minor adjustments) and upload it. Now that's called using your Instagram chops!
Cool tip: For a bright blue theme, the best option is the C1 filter with minor changes to Intensity, Exposure, and Saturation.Shooting in RAW mode has many advantages. For one, since RAW files capture more information than normal JPEGs, editing these files is a bliss. Now, while many phones let you capture images in RAW format, VSCO lets you edit those RAW files.
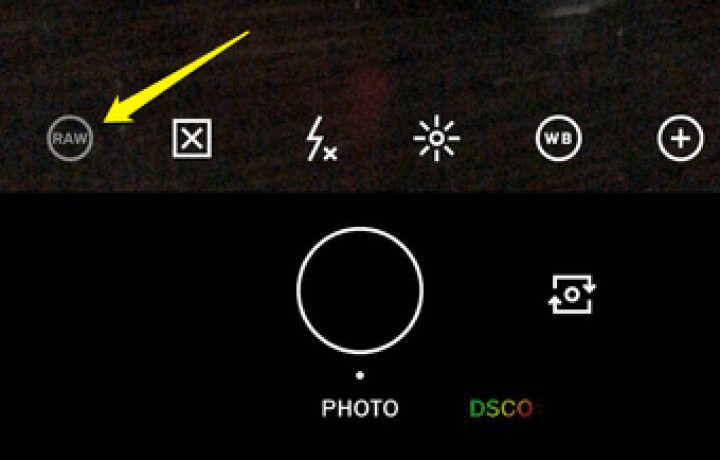
However, before you sit down to edit, you need to set the parameters correctly.
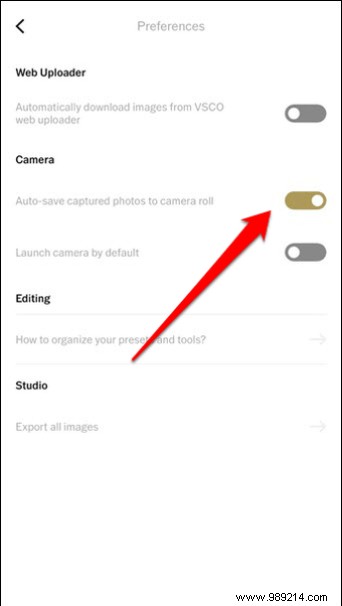
Go to Settings> Preferences and enable the option "Automatically save captured photos to Camera Roll".
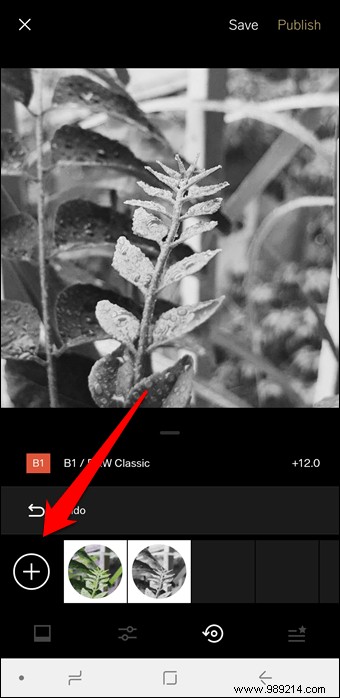
We all have a set of favorite presets and tools that we use almost daily. I often wondered if I could easily access my favorite filters, instead of having to scroll through rows of filters. Fortunately, with VSCO, it is possible.
Not only can you change the position of the presets, but also change the locations of the tools. Also, if you don't use a series of filters at all, you can hide them completely.
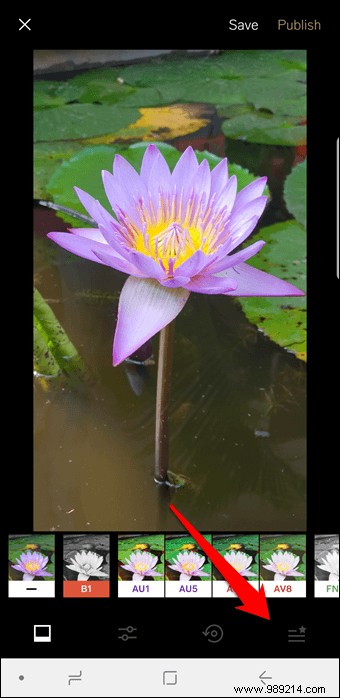
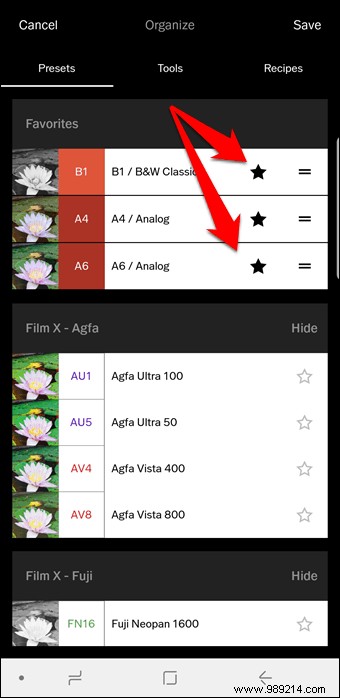
Open the edit page and tap the last icon from the left. Tap the Star icon to favorite the filter. Similarly, to lower their priority, uncheck the filters. Save the arrangements and that's it. Life is easy, I told you!
Phone photography is very different from conventional photography. Call it a lack on part of the phone's camera, mobile photos often don't end the way we want. Sometimes the angle is skewed, while other times the overall flush goes for a throw. In a word, the image we have in mind is very different from the one we have in hand.
This is exactly why an application like VSCO becomes a must. Definitely the best filters app.
So which filters do you prefer? Well, I'm an A4/A6 devotee!