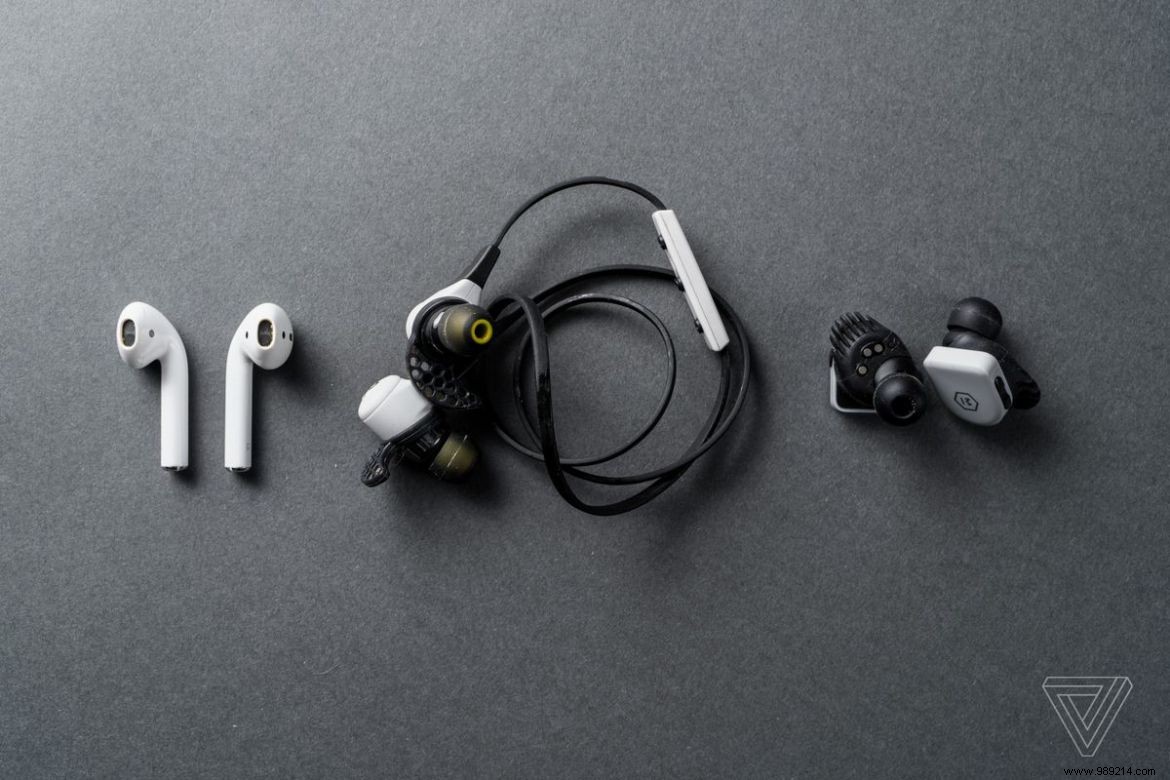
Headphones have been the listening choice of many for centuries, and wireless headphone sales took off when Apple removed the headphone jack from the iPhone 7 and released AirPods . Since then, seemingly every brand under the sun, and even some risen from the depths, have released true wireless headphones. Some are small and cheap. Some are big and expensive. Some have one-size-fits-all hard plastic designs. Some have user-replaceable rubber tips that fit ears of different sizes. But one thing that unites all headphones is that, eventually, they become gross, with a buildup of earwax and debris that can affect sound quality and reduce overall volume. Therefore, you should take the time to clean them from time to time.
ContentsA quick word of cautionStarting with the basicsForced airToothpicks, cotton swabs and other scraping and brushing toolsThe latest tools for hard-to-reach cleaningHere we review some of the different ways to clean your earbuds, including hard plastic earbuds and soft rubber tips, using basic tools and methods that anyone can use with ease. Our goal is to make your earbuds clean and nice with minimal risk of damage.
It's important to keep in mind that most manufacturers advise cleaning headphones with only a clean microfiber cloth or dry cotton swab. Instructions from major manufacturers like Samsung and Apple advise against using rubbing alcohol or other liquids. A simple alcohol wipe may be fine on some surfaces if kept away from speaker grilles, mic holes, or charging ports, but it does present some dangers. If you attempt to use wet processes or cleaners, you do so at your own risk. And this may seem obvious, but it's worth emphasizing:never immerse the headphones or charging cases in any type of liquid to clean them.
A "less is more" approach is always the way to go when cleaning electronics. So let's start by reviewing the easiest and least risky ways to clean buildup from most headphones. Start with the most basic cleaning tools and work your way up until the headphones are clean enough. There's no need to get invasive with a toothpick if a puff of air takes care of it, right? Always start small before jumping to extremes and use only what the job requires.
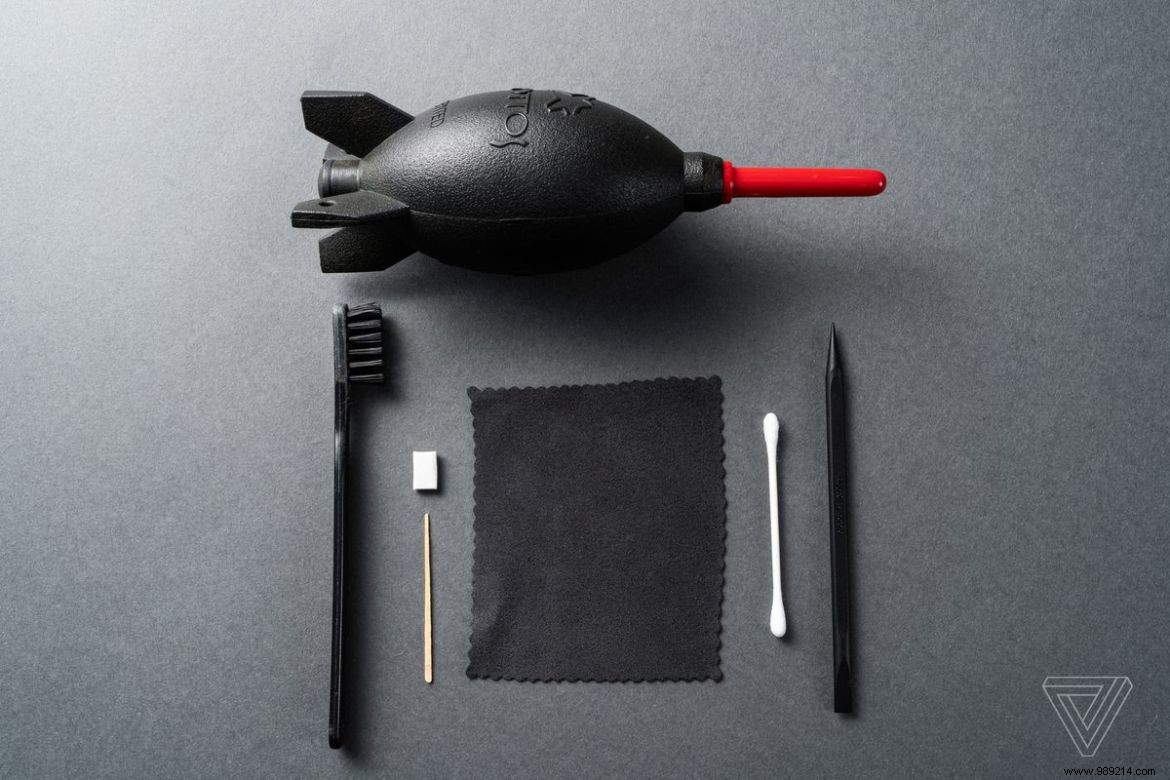
Many of the tools mentioned here are common household items. You can buy headphone cleaning kits that have a lot of similar tools, but you might already have what you need.
While blowing air from your mouth into your earphones may remove some dust or flaky earwax, it will likely be insufficient and you may inadvertently deposit tiny bits of saliva on something that gets into your ears - not exactly hygienic. Try the following tools:
For hard plastic headphones, face the dirty speaker grilles away from you and toward the floor. Try aiming the fan up and into the headphone speaker grilles, away from your face. You want to avoid debris potentially flying towards your eyes (it doesn't hurt to wear basic goggles or goggles – no one will judge you), and you also want gravity on your side.
For headphones with removable soft rubber tips, carefully remove them and hold the tip down. Blow air into and through the earbud opening, pointing down and away from you. Then flip them over and blow air on the other side before moving on to the earpiece itself and blowing out any debris that has reached the speaker grilles. Once the rubber tips are removed, they become the only part of the headphones that you can safely clean with liquids. If you choose to clean the loose eartips with water, let them dry overnight to make sure no moisture remains before putting them back on the headphones.
If this basic process is sufficient to remove debris and leave your headphones sufficiently clean, apply a clean, dry microfiber cloth to all surfaces and buff away any remaining dirt. If the buildup is hardened and not moving, keep your compressed air or fan nearby while we get more invasive to try and break up the grime.
Don't forget the charging case: Forced air and a microfiber cloth will often be enough to clean off any dirt transferred from the wireless earbuds to its charging case.
A puff of air is rarely enough for a stuck buildup, especially if you have overly waxy ears (I'm here for you; and lord, do I sympathize). The next step is to use a small tool to break up any earwax or debris buildup without risking damage. You are about to pick or probe an electronic item, so exercise caution and caution. Consider the following tools:
Note that we choose tools here that are soft (cotton, brushes) or firm but not too hard (wood, plastic), as the metal could scratch or damage the speaker grilles or the plastic shell. plastic of an earphone. As usual, we want to start with the least invasive and progress as needed.
For hard plastic headphones, start with the cotton swab and try to break up and wipe any debris or wax in the speaker grills. Tilt them down for gravity to help your cause. If the swab is not strong enough, reach for a toothpick, spudger, or wooden skewer and carefully break up the embedded build-up in the corners and edges of the top cavity -speaker.
For soft rubber tips, a toothpick can be one of the best tools - it can poke through the hole in a loose earbud tip and scrape the inner wall. Also, be sure to clean the exposed speaker with a cotton swab, brush, or toothpick if wax gets on it. If your headphones have a rubberized fin or comb to help secure their fit in your ear, it may be best to clean them with the toothbrush. A pipe cleaner can also be very useful for these soft rubber mouthpieces, but due to its metal rod core it should not be used on much else.
Once you've broken up the stubborn buildup, blow more air from a can or fan and see if that finally clears the debris. Bring a polishing cloth to all surfaces and hopefully you now have headphones that are clean enough.
Bonus tip: Keep a water-soaked paper towel or sponge handy, and you can carefully wipe up all the gross stuff as it builds up on your toothpick while minimizing the mess. Be prepared to clean your workspace when you're done, as you might be surprised at how much debris comes out when deep cleaning long-neglected ear cups.
If you've broken off some of the dirt, but it's proving difficult to remove with forced air or a brush, there are a few other tools to try. The following can be used in tandem with all of the previously mentioned tools:
Using tape or putty to help remove debris from deeper crevices can hopefully be all you need to completely clean every nook and cranny of your listeners. Masking tape or painter's tape is sticky enough to pick up dirt but light enough to leave no residue on the surface like stronger tapes would.
If dirt is very deep in an earphone tip and hard to reach, the tape may not reach it. This is where putty (the type used in arts and crafts to securely attach objects to the wall) or a cleaning gel can come in. Warm up the putty by kneading a small amount in your hands and rolling Apply it to the affected area.
At this point, the combination of all these tools should remove most dirt from the ear cups. Some particularly dirty heads may require repeated and alternating use of a combination of air, scraper and putty. The key is to work at it little by little until the headphones are clean.
The more frequently you clean your headphones, the less dirt and buildup there is and the less tools and elbow grease you need. Keeping the headphones from getting too dirty ensures that they will last longer and hopefully be less prone to reduced sound quality or breakage.
As often, a little preventative care can help you avoid costly repairs or replacements down the road. So be sure to store your wireless headphones in their charging case when not in use, protecting them from extra buildup like pocket lint, and remember to check and clean them occasionally. in time.