I don't know what else to call it:Windows 11 upgrade situation is a confusing mess. Depending on when your PC was built, the components you chose, and how it was configured, chances are Microsoft is trying to talk you out of installing the free upgrade, which is available a day earlier today. Millions of people will likely be told their systems are incompatible, and Microsoft reserves the right to withhold security updates if you're installing on older systems.
ContentsHow to enable TPM How to enable Secure BootI can't enable Secure Boot and I'm not at all sure I have UEFI. "CPU is not supported for this version of Windows. » Help! How to dual boot Windows 11 or clean install the OSBut as far as we can tell, Windows 11 is largely Windows 10 with a new layer of painting, and chances are your Windows 10 computer will run Windows 11 just fine. Do we recommend it? Not necessarily, but this article might help you determine if your PC is ready for the ride.
Here is a basic checklist of what you are likely to need and how you might meet each requirement.
Before we go any further, why not try Microsoft's official PC Health Check tool? (Direct download here.) If you pass, you're probably already good. Just wait for the official Windows update and you should be good.
But if not, your first steps should probably be to enable your TPM and Secure Boot settings.
As we discussed in June, you probably already have a Trusted Platform Module (TPM) on your PC, built into your desktop or laptop motherboard or CPU. (If you don't, there are hacked ways around it, but let's start by saying yes.)
Windows may be seeing your TPM, and you can easily check it by running the aforementioned PC Health Check tool or pressing Win + R , typing tpm.msc in the window that appears and pressing Enter to see what type of TPM might be present and if it is "ready to use".
If not, don't give up yet! It may just be disabled in your BIOS and you'll need to find it.
Once you're in the BIOS, the TPM setting goes by a variety of names. (My desktop motherboard called it "Intel PTT" (Platform Trust Technology), but it could be "AMD PSP fTPM" or just "Security Device".) If you don't see a obvious place to check, Microsoft suggests look for a submenu called "Advanced", "Security", or "Trusted Computing".
Oh, and depending on your BIOS, you may need to use the arrow keys on your keyboard to move around and maybe even the PG UP/PG DOWN buttons to turn things on and off again . (I apologize if you know this, but it's no longer safe to assume.)
I understand? Great! But don't exit the BIOS just yet.
If you only have TPM 1.2, not TPM 2.0, you're still out of luck:Microsoft will allow you to modify a registry key in Windows to allow upgrades “if you recognize and understand the risks”. If so, press Start , type regedit , search for "HKEY_LOCAL_MACHINESYSTEMSetupMoSetup", and look for a value named Allow upgrades with unsupported TPM or CPU , and set its value to 1 . If it doesn't already exist, right click and create a new DWORD value with that name, then set the value to 1.
Once you're in your motherboard's BIOS, you should probably also be able to locate a submenu for Secure Boot. It may be buried in a "Security", "Startup" or "Authentication" tab.
Slide it to "On", if it isn't already.
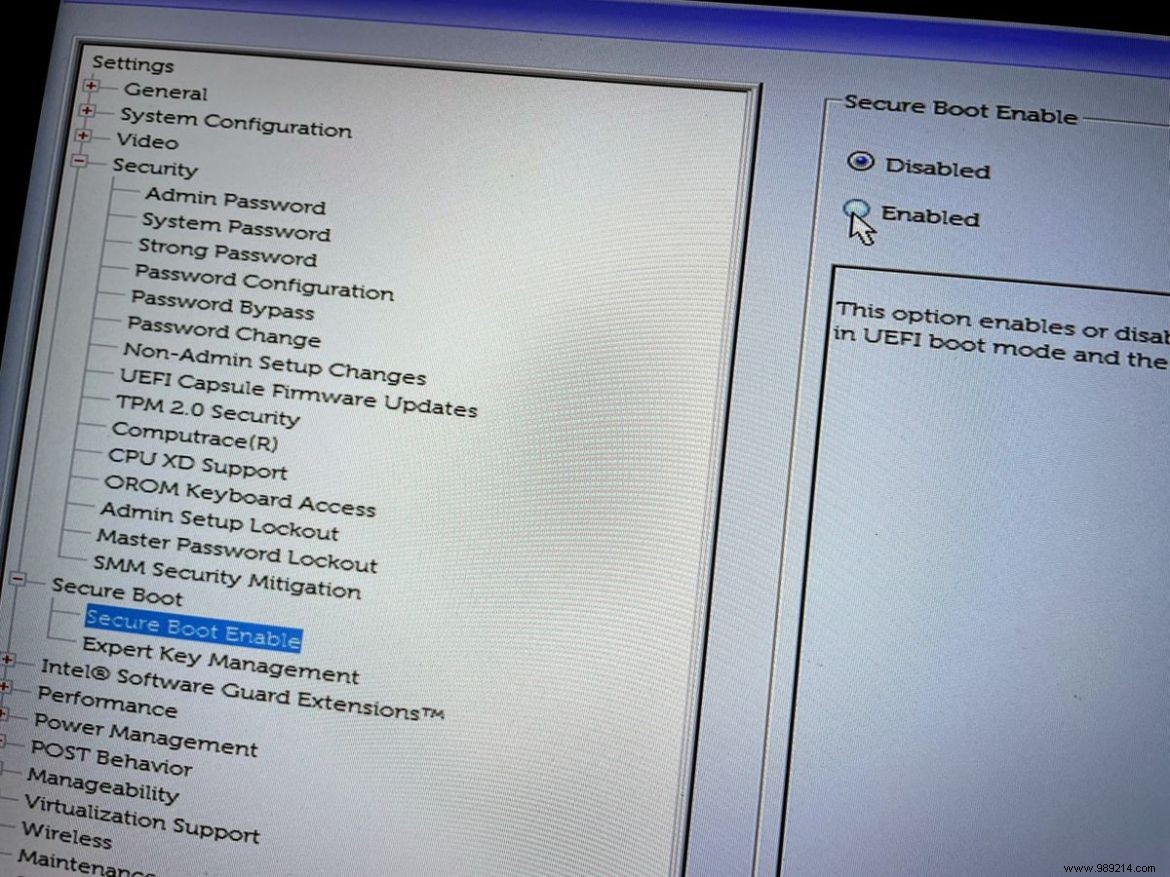
Photo by Sean Hollister / I/O Means
If you want to check if Secure Boot is already enabled from Windows (maybe saving you a trip to the BIOS), there are also several ways to do this:in addition to the Microsoft's PC Health Check tool (direct download), you can hit Start and type System Information , and launch this app to see a variety of things, including Secure Boot toggle status and your current BIOS mode.
Unless your PC is very old, you probably have the option a UEFI BIOS, but you might not be using it right now. You may be using a "legacy" BIOS that uses Master Boot Record (MBR) partitioned disks instead of the modern GUID Partition Table (GPT) standard required by Windows for UEFI.
If this sounded like a load of alphabet soup, you might want to stop here! Microsoft has an MBR to GPT converter tool, but messing with partition tables basically puts your disk data at risk. This tool did not work for an Edge member of staff, who then used a different method that ended up erasing his entire partition. (Sorry Cam!)
If you don't care about your data, you might as well do a clean install of Windows 11. And if you care about that data, why not try dual booting Windows 11 at the place ? Also, these may be your only easy options if your processor is too old.
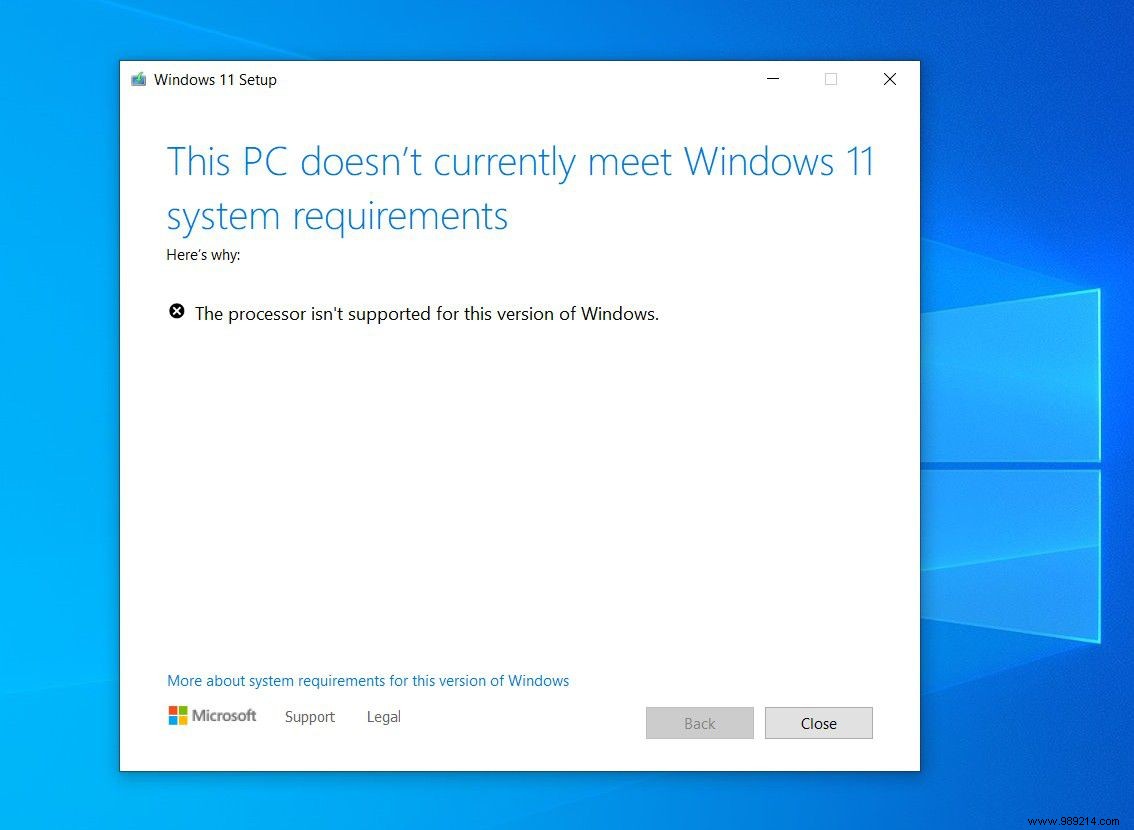
While there is always tricks to bypass Microsoft restrictions — a Edge Writer tricked Windows 11 Updater into using a Frankenstein-style combination of old and new ISOs.
Turns out there's a simple workaround for this:just change a registry setting!
Otherwise you will need to create a new drive partition or overwrite an existing partition to perform a clean install or dual boot. More on those below.
You can find official Microsoft lists of supported processors at these links:
Generally, 8th Gen or newer Intel processors are supported, as is AMD Ryzen 2000 and newer.
Whether you're starting from scratch or just dipping a toe in the water with a double boot, the process should be pretty much the same:you'll need to clear some space, download the ISO or the Windows 11 tool, burn it to a bootable drive and use it to install Windows.
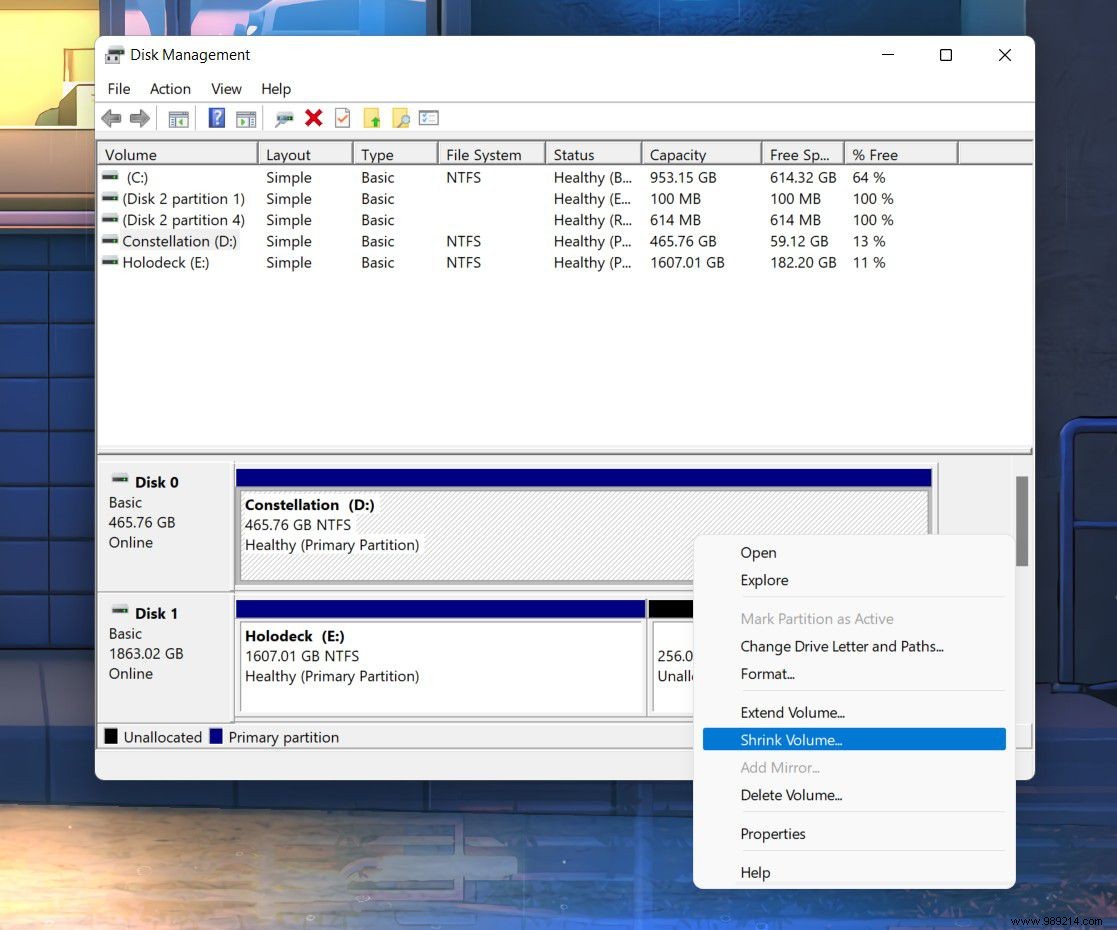
For dual booting, you don't need a second drive in your PC - you can simply shrink your existing partition with Microsoft's disk management tool. Hit Start , start typing "Create and format hard disk partitions" and press Enter to launch it. Make sure your disk has enough space, then right-click and choose Reduce volume. You'll want to shrink it by at least 65,536MB (64GB) so there's plenty of room for Windows 11 – I gave my laptop 128GB (131,072MB) just to be sure. However, you can't shrink more than you have, and you might want to give your current OS some space to breathe.
To actually install this ISO, all you need is an external USB drive – an 8GB USB 3.0 stick should work just fine – and software to burn it to disc. Microsoft has its own media creation tool which we'll link to soon, and I'm a big fan of Rufus for burning my bootable USBs using downloadable ISOs as well.
Experienced users may want to try AveYo's Universal MediaCreationTool, which can also download the image and bypass the TPM for you.
If all goes well, you will restart your computer with this USB stick plugged in to start the process. You may need to press a key like F12 while your system is booting and manually select your external drive, if it doesn't load automatically.
Now make sure you choose the right place to install Windows 11 - if you shrink your drive to make room for a dual boot, you'll be telling Windows to install into unallocated space, and if you overwrite an existing drive for a clean install (oh file loss!), you'll choose that drive instead. For a desktop computer with multiple drives, you may want to turn off and unplug the others before deciding where to install. It's too easy to hit the wrong button and wipe data, and we'd hate to see that happen to you.
Once you have dual booted, it's not too difficult to switch between the two operating systems. Hit the windows to bring up the start menu, type UEFI and choose Change advanced startup options , then select Restart Now . Once you reboot into the advanced boot menu, choose Use another operating system and it will present your choice of operating system.
Update October 7: You may need to create a new DWORD value named "AllowUpgradesWithUnsupportedTPMOrCPU" in your registry editor if it does not already exist. Added a link to this guide to do it .