Many people today use assistive software at home and in the office to help them with their daily tasks. There are many different designs to buy, but did you know you can make your own? Amazon Developer lets you use Alexa software to build your own Amazon Echo with Raspberry Pi.
ContentsMaterialsSign up for an Amazon developer accountCreate your device on Amazon DeveloperCreate your security profileClone the Alexa sample appUpdate the installation script by adding your credentialsRun the installation scriptAll three terminalsTerminal 1Terminal 2Terminal 3Test itFor this project you will need:
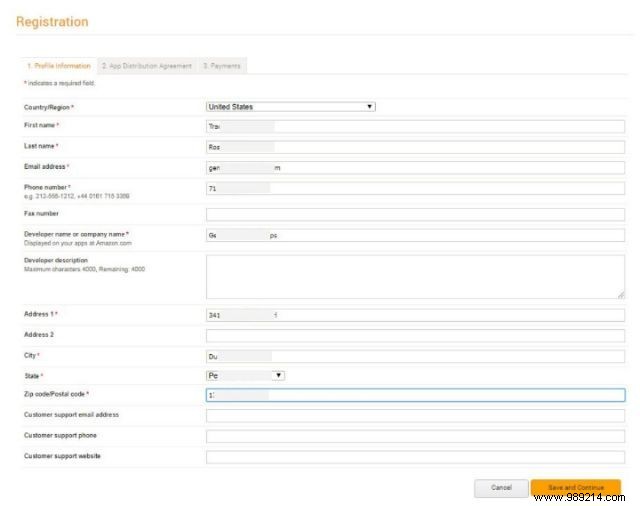
If you need an Amazon developer account, create one for free on their page. Read the AVS (Alexa Voice Service) terms and agreements here.
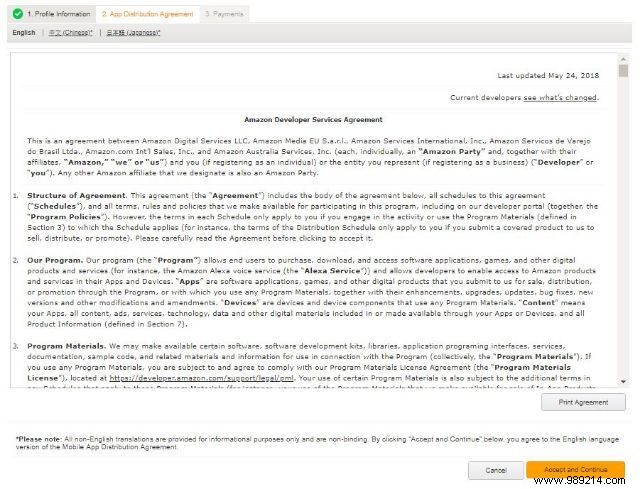
Read and accept the Application Distribution Agreement.
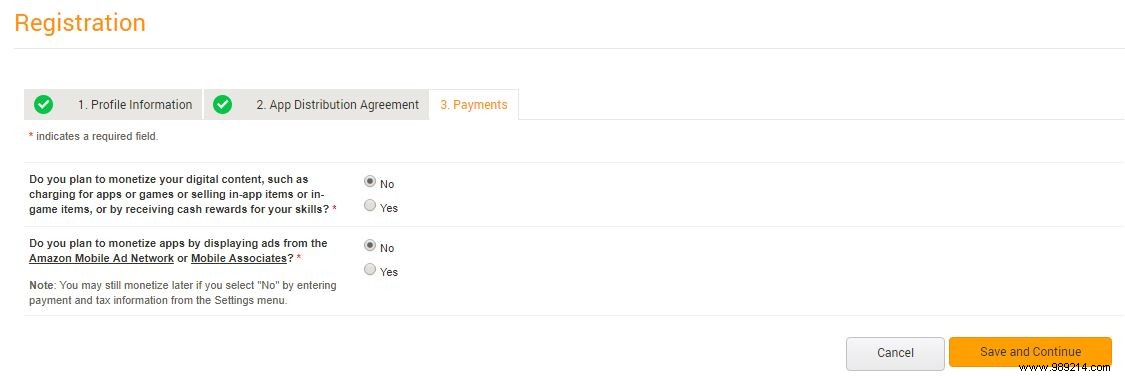
Select if you choose to monetize your apps.
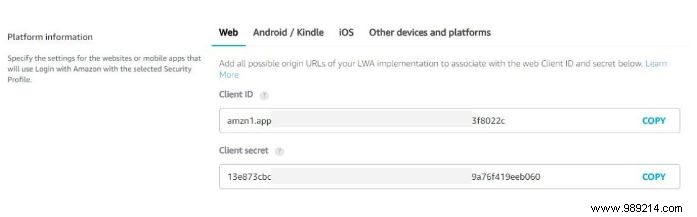
After registering your Amazon developer account, create an Alexa device and security profile. Note the following parameters carefully during setup:ProductID, ClientID and ClientSecret, as you will need to enter them again later.
From the top menu, select "Alexa Voice Service".

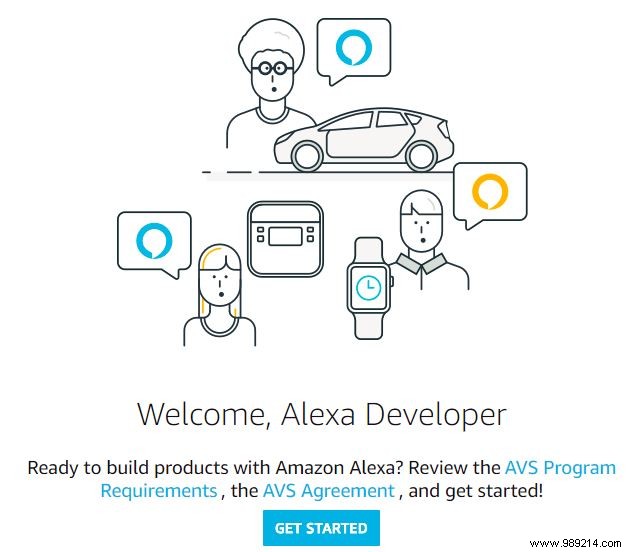
The "Welcome Developer" screen will appear.
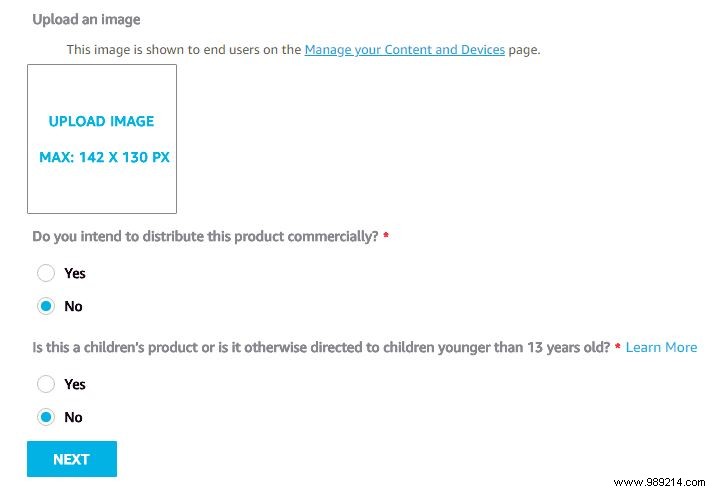
The first screen asks questions about the product you are building.
1. First, name your device.
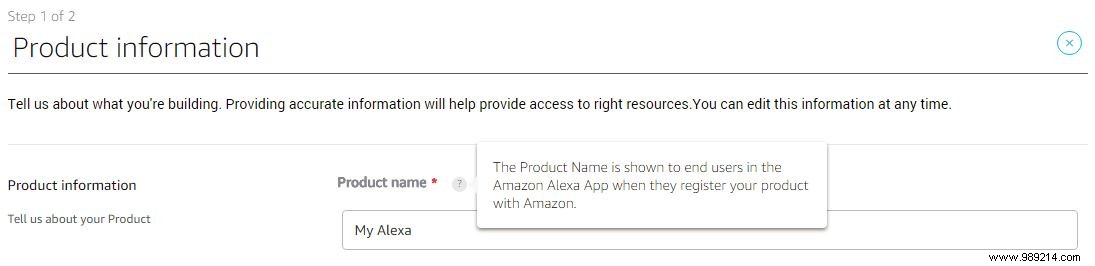
2. Next, enter a Product ID without spaces or special characters.
Note :You will need it later. Save it somewhere.

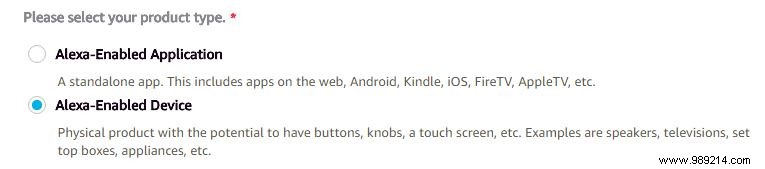
3. Select Alexa-enabled device for the product type.
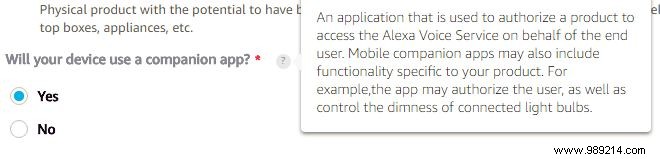
4. Alexa needs a companion app. Select yes for this question.
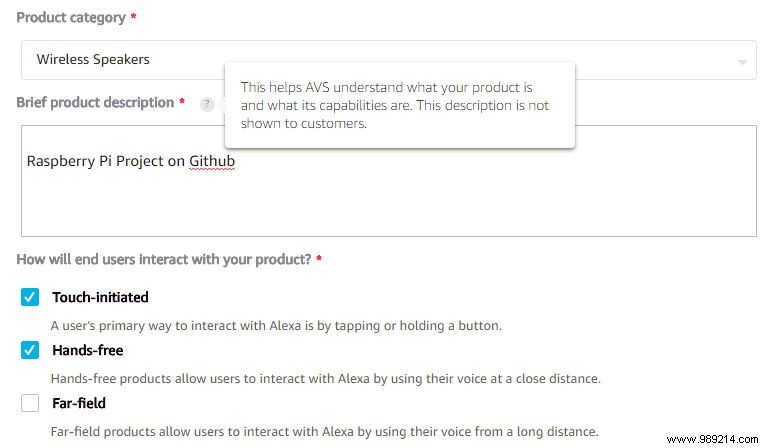
5. Choose Wireless Speakers from the drop-down menu.
6. Type "Raspberry Pi project on Github" in the description box. This is information for AVS and is not visible to others.
7. Check the two options "Touch Initiation" and "Handsfree".
8. You can upload an image for your device, but let's skip this step for now.
9. Check “no” for questions about commercial distribution and children's products.
10. Click "Next".
On this page, you create a new LWA (Login with Amazon) security profile to identify user data and security credentials with this project.
1. Click "Create New Profile".
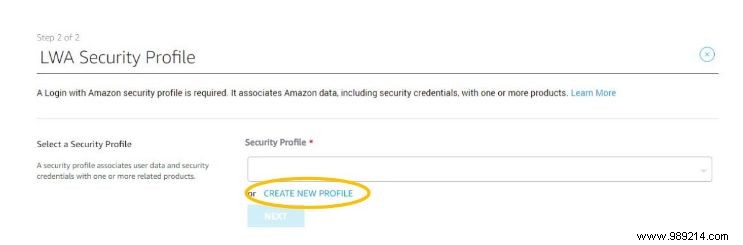
2. Create a name for the profile. It could be something like "Alexa Security Profile".
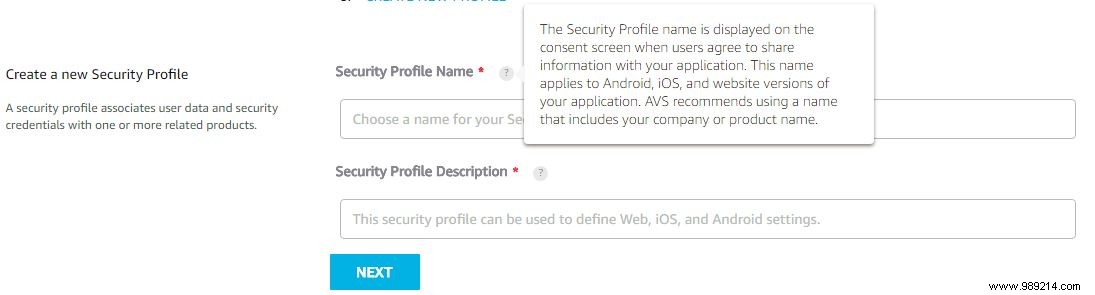
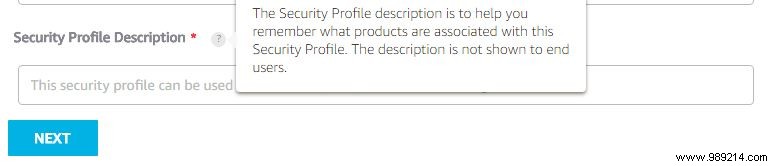
3. Enter a description for the profile. You can choose "Alexa Security Profile Description".
4. Click "Next".
5. Amazon generates a Customer ID and Customer Secret for you. These are the other two values you will need later. Keep them nearby.
6. Enter your Allowed Origins and Allowed Return URLs. We are setting up http and https routes for this project, so type the following in your "Authorized Origins" field - "http://localhost:3000".
7. Click "Add".
8. Type "https://localhost:3000" in the same box where you typed the first one.
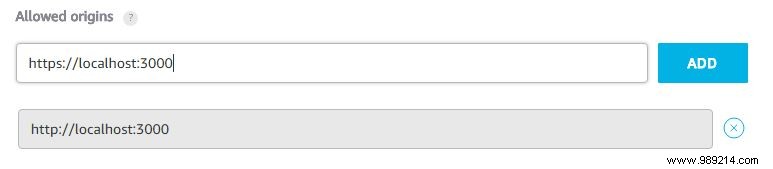
9. Click "Add" again.
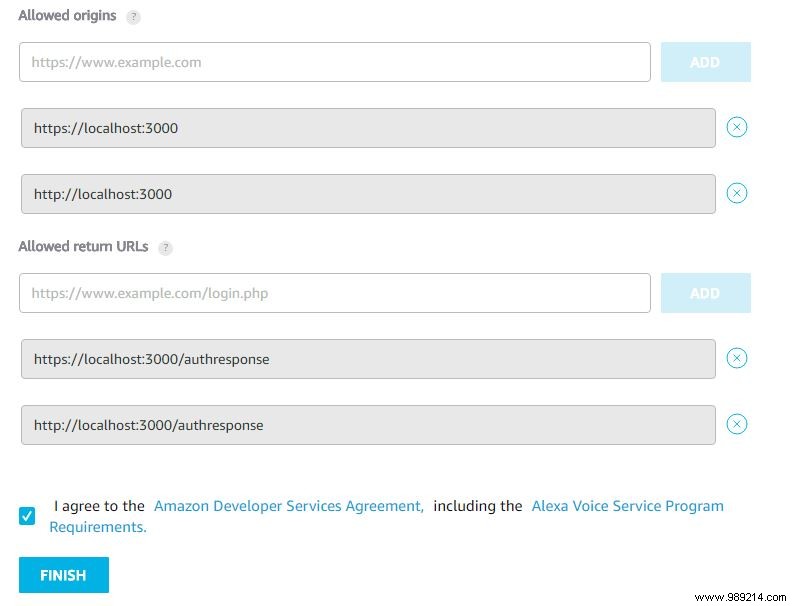
10. Do the same for Allowed Return URLs, but enter the following two URLs:
http://localhost:3000/authresponsehttps://localhost:3000/authresponse
11. The page should look like this before you click Finish. Make sure that none of your URLs are still in the field where you entered them. They appear on a gray background once you've added them.
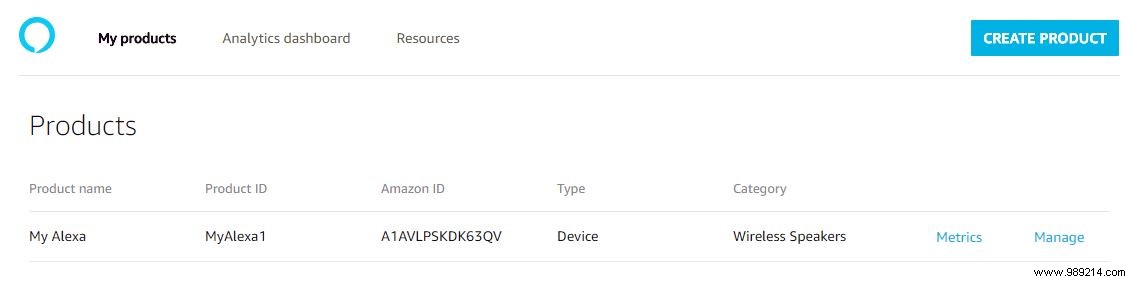
12. Once you click "Finish", this screen will appear. Your project has been created and is ready to be installed.
1. Open Terminal.
2. Type the following:
cd Desktopgit clone https://github.com/alexa/alexa-avs-sample-app.git
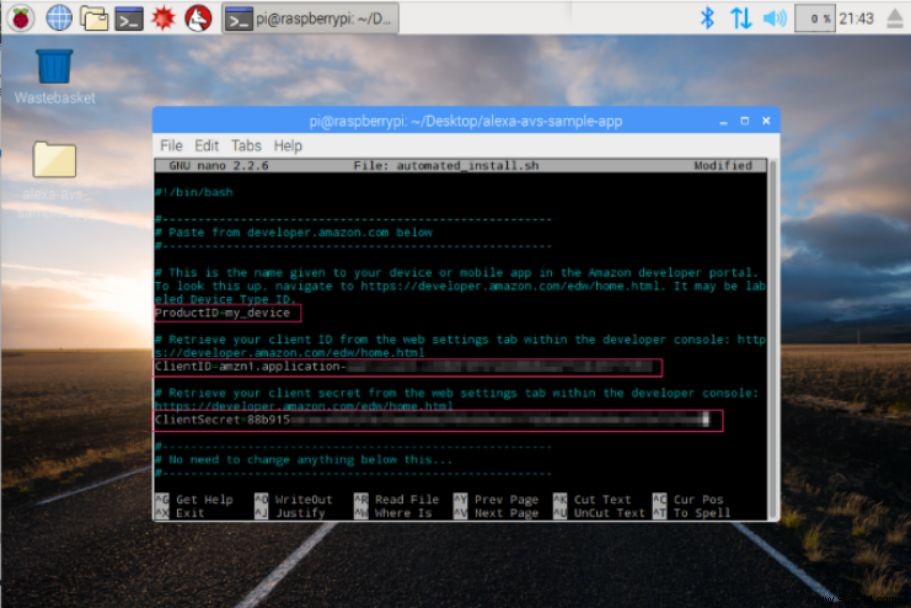
Before running the install script, update the script with the credentials you saved from Amazon:ProductID, ClientID, ClientSecret.
1. Type the following in Terminal:
cd ~/Desktop/alexa-avs-sample-appnano automated_install.sh
2. When it runs, this screen appears. Use the arrows on your keyboard to navigate and replace the ProductID, ClientID and ClientSecret fields with your values.
The changes should look like this:
ProductID="Your Device Name"ClientID="amzn.xxxxx.xxxxxxxxx"ClientSecret="4e8cb14xxxxxxxxxxxxxxxxxxxxxxxxxxxxx6b4f9"
3. Type Ctrl + X to quit the script. Type Y then Enter to save your changes.
To run the script, open Terminal and run the following commands.
While running this script, you will be asked to answer a few simple questions. These are to ensure that you have completed all necessary setup on Amazon before installing the program.
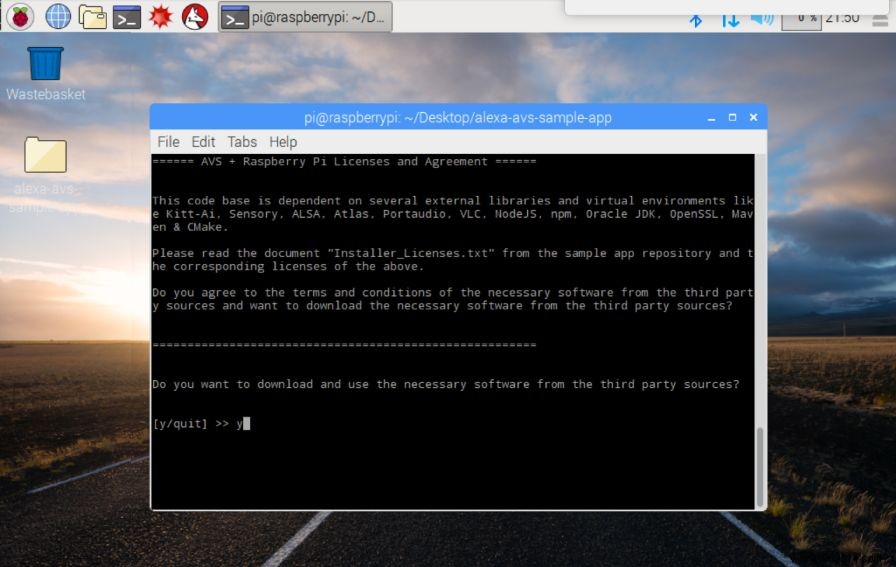
Installation takes about 30 minutes, so grab a snack.
Once installed correctly, your terminal window will look like the following image.
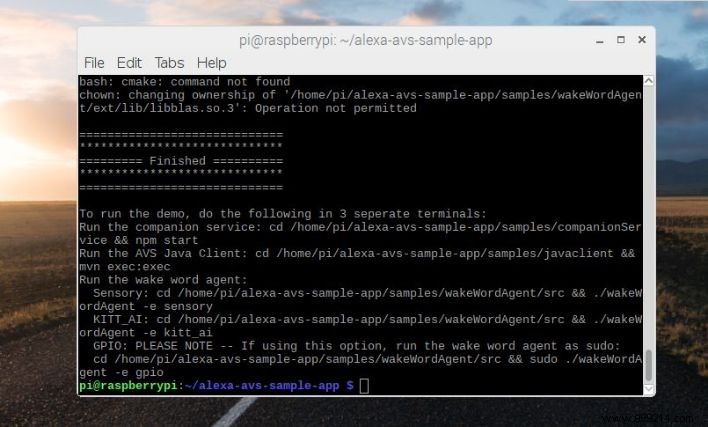
You need to complete three steps to run the Alexa app. Each of them must run in a separate terminal window, and you must run them in the correct order.
There were some programs I needed but didn't have. I installed these programs over time. In case you have the same problem, I've included a note about it at each step.
This window runs the web service to authorize your app with AVS (Alexa Voice Service)
Open Terminal and type the following commands:
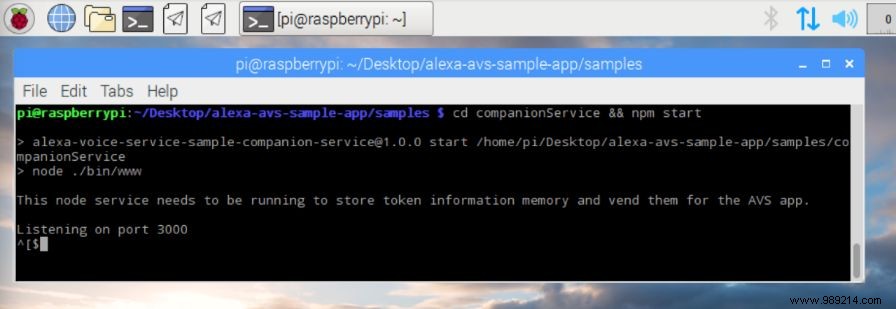
cd ~/Desktop/alexa-avs-sample-app/samplescd companionService &&npm start
Note :npm is a package manager for the JavaScript programming language. If it's not available when you run the command, you can get it here.
When the scripts are finished, the window looks like this, showing that Pi is listening on port 3000.
Do not close this window. It must remain open during the following steps.
This window communicates with AVS.
Type the following in another terminal window.
cd ~/Desktop/alexa-avs-sample-app/samplescd javaclient &&mvn exec:exec
Note :mvn is short for Apache Maven. If you don't have it, click here to get started.
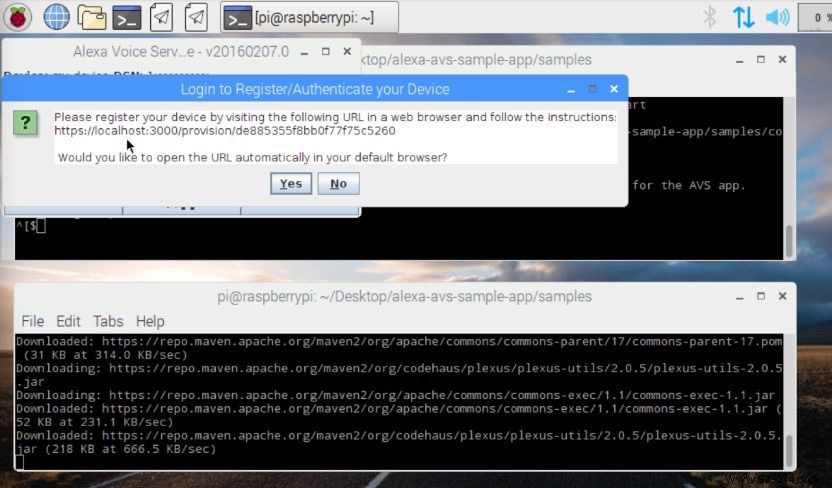
When you run the client, a dialog box appears saying:"Please register your device before..."
Click Yes.
With some browsers, you will receive a warning that the connection is not secure. Skip it by clicking the "advanced" button. Then, on the next screen, click "Switch to localhost (unsafe)".
Now login to Amazon using your developer credentials.
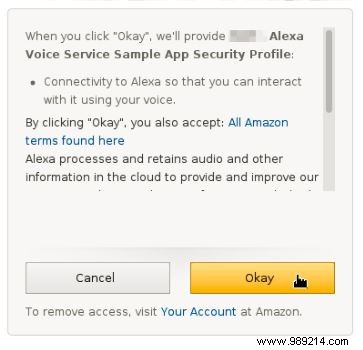
The next screen asks for permission to use the security profile you created earlier for the device you are registering. Click OK.
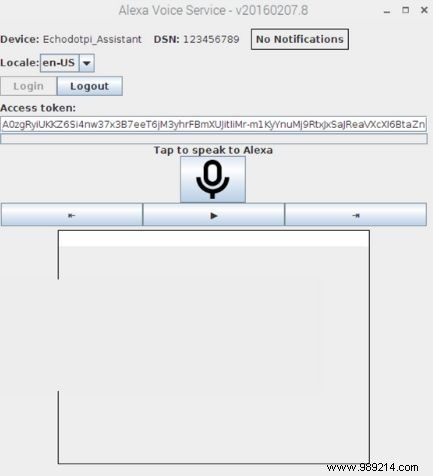
You will be redirected to a URL starting with "https://localhost:3000/authresponse" which looks like the following image.

Return to the open dialog box and click the OK button. The client is now able to accept requests from your Alexa device.
Keep the terminal open and the voice service dialog open.
This window installs the app that wakes up Alexa using her wake word. Skip this if you don't want to use voice to launch Alexa.
Open a new terminal window and use one of the following commands to bring up a wake word engine using Sensory or KITT.AI.
To use the Sensory Awakening Word Engine, type:
cd ~/Desktop/alexa-avs-sample-app/samplescd wakeWordAgent/src &&./wakeWordAgent -e sensory
To use the KITT.AI wake word engine, type:
cd ~/Desktop/alexa-avs-sample-app/samplescd wakeWordAgent/src &&./wakeWordAgent -e kitt_ai
Speak to Alexa by saying the wake word "Alexa". Wait for the beep before giving your command. For example, try it by saying "Alexa". Wait for the beep, then ask, "What time is it?" »
If it responds correctly, you have a working Alexa device!
Check out Amazon's Alexa webpage for more ideas. This Alexa can do everything an Echo can do!