Every consumer-grade monitor you buy has its default image settings set by the manufacturer to look absolutely terrible in your office. Indeed, monitor makers know that properly calibrated screens look washed out under bright showroom lighting. To get the most out of your monitor, therefore, dim the gaudy default settings to suit milder home lighting conditions.
SummaryCall up your display settingsMaking good use of user presetsUsing the free calibration tool1. Adjusting black levels2. Optimal contrast adjustment3. Fine-tune contrast and brightness settings4. Sharpness and gammaEnjoy your calibrated screenRead on to learn how to optimally calibrate your screen with nothing more than your eyes and freely available calibration tools.
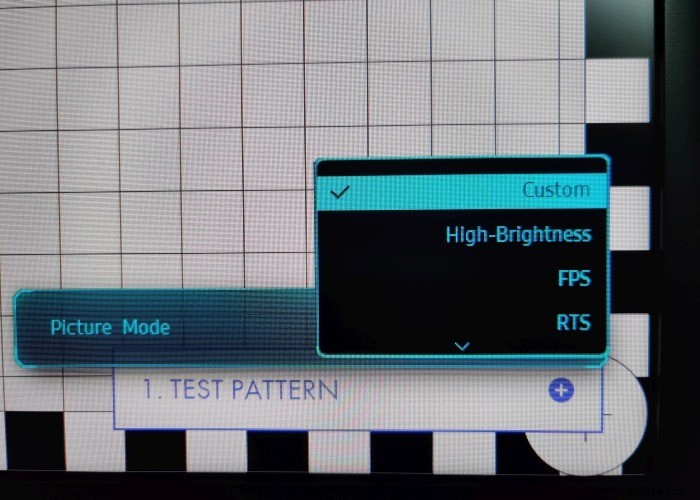
Remember that the calibration of your monitor is relevant for a specific lighting condition. A screen calibrated for a daylight setting will not be suitable for dark nighttime lighting conditions. It is therefore recommended that you calibrate your display to your desired lighting conditions and save the settings to user presets. This way you can quickly browse to the correct calibrated preset for your desired ambient lighting conditions.
Finally, make sure to leave the monitor on for at least thirty minutes before calibrating it. This ensures consistent and accurate results.
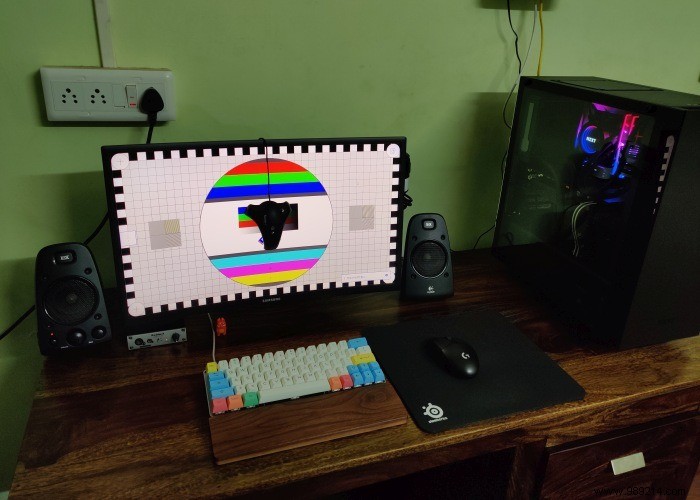
There are plenty of free monitor calibration tools out there, but few are as handy and comprehensive as the Lagom Monitor Test Suite. There is no app to install here. Going to the Lagom Monitor Calibration website presents a number of pages with different calibration templates along with an introduction on how to use each one. This guide will ignore most of these calibration pages and focus only on the ones that matter.
Just be sure to view the page in fullscreen mode, which can be activated by pressing the F11 button key in most browsers.
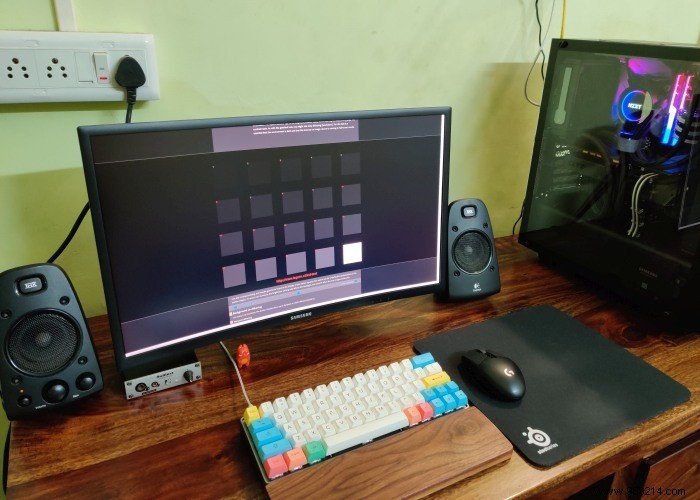
We start with the black level pattern. This displays shades that range from a single level above black, which is the darkest labeled 1, to the purest white identified as 255. Lower your screen's brightness setting to the point that the background (around shades) changes from gray to black.
If the background already appears black on your screen, increase it until it turns slightly gray, then decrease it one step until it is black again. You know you've set the brightness level correctly if further reduction has no effect on the background.
This is where we fine-tune your screen to strike a good balance between resolution of black details and overall accuracy of black reproduction. Pay attention to the first ten samples labeled 1 through 10. With the brightness setting adjusted to make the background black, it's very unlikely you'll be able to tell the difference between the background and the ten samples on a ordinary LCD screen. If you can do it, you can skip to the next step.

If you have a regular LCD monitor, you will need to increase your monitor's brightness level until you can differentiate at least six samples from the background. Increasing the Brightness setting may improve resolution of black detail, but it will come at the expense of accurate black reproduction. Blacks will appear gray as a result.
Where you leave the brightness adjustment on your monitor depends on your personal preference, whether you prefer to keep blacks accurate or want your screen to resolve detail better in darker scenes.
Next comes the white saturation pattern. This pattern is essential for reducing your monitor's white levels or its ability to resolve brighter details. The secret to doing this is to adjust your screen's contrast setting to the correct level. To do this, set the contrast levels to the highest possible setting on your screen without causing the white test image to bloom around the edges.
You're looking at shades ranging in values from 200 to 254, with a pure white background of 255. With the contrast set to the highest possible value while avoiding bloom, you'll notice that the brightest shades in the bottom row will have disappeared. Reduce the contrast level on your monitor one step at a time until you can see the last four samples labeled 251 through 254. You will find your optimal contrast setting once the sample labeled 254 becomes visible.
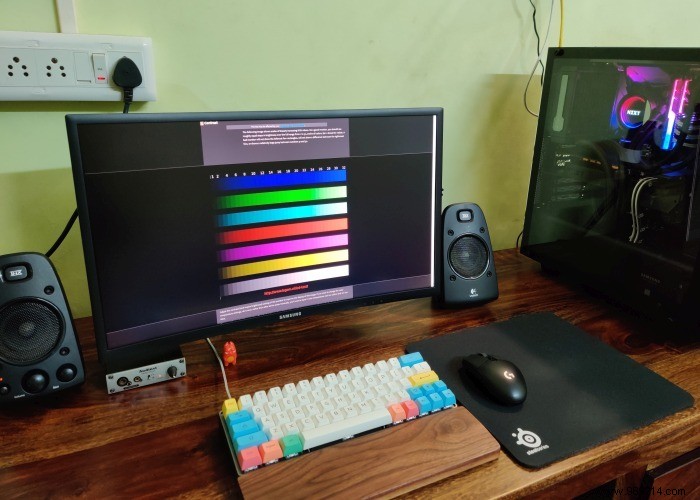
Some screens will not be able to distinguish between the white background and all the samples in the bottom row. In this case, stop reducing the contrast level when the last possible sample (254) is visible. This is the optimal contrast setting and the limit of your display's ability to resolve detail in brightly lit scenes.
The contrast test pattern is handy for fine-tuning your brightness and contrast settings. Increase your screen brightness setting if you don't see the darkest gradient swatch labeled 1 on the left side. Be sure not to increase the setting to the point where the black background begins to appear gray.
Note your current contrast setting and check if the last three gradient swatches on the right side labeled 30, 31, and 32 stand out from each other. If not, try increasing or decreasing the contrast setting until the resolution between these samples improves. If that doesn't make much of a difference, you're better off going back to the original contrast setting you noted earlier.
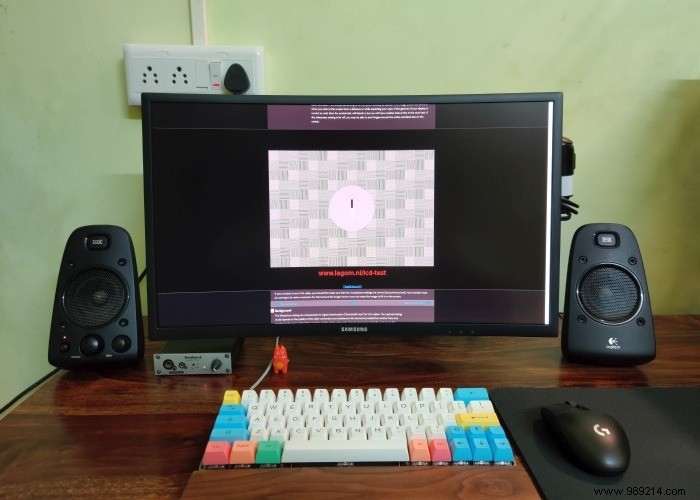
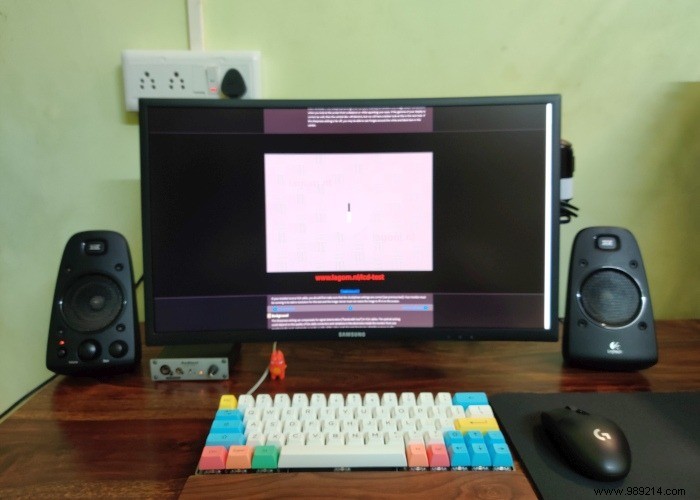
The sharpness model is best viewed from as far away from the screen as possible. The idea is to look at the pattern from a distance and adjust the sharpness setting on your screen until the image appears uniformly gray. The two images above and below show how the sharpening pattern blends in at the correct sharpness setting, when viewed from a distance.
You have calibrated your screen using only your naked eyes and a free but powerful calibration tool. This level of calibration is sufficient for productivity, gaming, and movies, but you'll need a colorimeter if your display is a professional monitor intended for accurate color work on a computer.