A few weeks ago, we discussed the possibility of building a laptop computer and the challenges that consumer hardware manufacturers would face when creating adequate interchangeable parts in such a small form factor. However, there is one particular option that I left out and it might work for some people. While you can't build a very high-end laptop like you would a full-featured home desktop system, you can build a laptop with the essentials using a Raspberry Pi board.
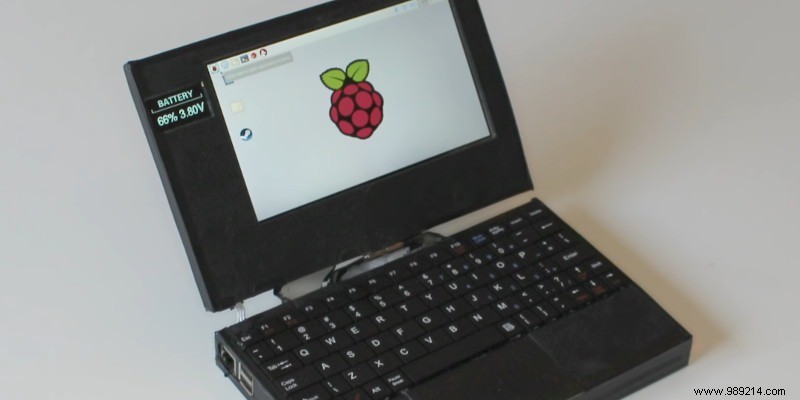
SummaryThe easy wayDifficulty:DifficultDifficulty:ExtremeBe realistic!If you just want to avoid all the frustrations that come with DIY projects, you can just opt for a purpose-built rig that houses a Raspberry Pi and turns it into a slim and sleek laptop. The good folks at pi-top deliver just that, giving you everything you need to build a system from the single board computer.
A word of advice:this is not a future-proof system, and it uses the Raspberry Pi 3 Model B+ board. There is no guarantee that the new 4 B model will be compatible with this chassis.
The pi-top is here for enthusiasts looking for a modular form factor with a convenient sliding rail to adapt their experiments to a laptop environment or simply to build an affordable laptop that meets simple needs.
>Alternatively, if you don't mind the separate parts, you can just get a portable external monitor, power bank and Bluetooth keyboard, hook them up to your Pi and you have a perfectly portable computer.
If you like to up your DIY game, you probably don't find it appealing to slap a Raspberry Pi on a pre-made case. You may not end up creating a magnificent system, but what you want is to create something that belongs to you.
Creativity Buzz suggests using an 11 x 17 cm surface for the project, as it provides just the minimum space required for the components that would fit inside the laptop. Since you will be using a power bank as a battery, you will need to make a few small modifications to fit it into a power switch and at the same time ensure that it is supplying power to the main board. You might not need a significant amount of technical skill to build this laptop, but it does require some experience tinkering with electronics.
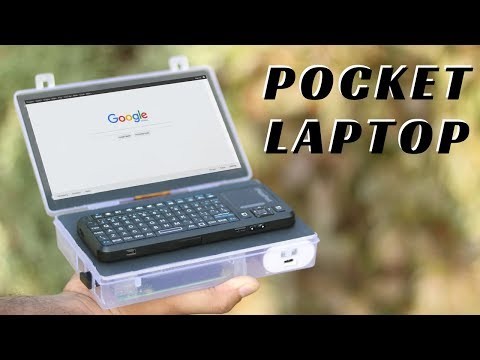
Be sure to use a power bank that can be placed to show you the battery level on the outside of the box. Creativity Buzz uses a semi-transparent box, which allows components with LED indicators to shine their light through it. If you don't do this, you run the risk of not knowing how much battery you have left, because using this method the power bank is not sending signals to the board.
If you fancy taking things to a level that would make most people give up before even trying, you can make a much more functional laptop using both a Raspberry Pi board and an Arduino controller. The two can combine to create a miniature platform that can be used to program other electronic components centered around Arduino in a highly portable environment.
Rather than buying a full-scale laptop for this purpose, if you're looking to work on projects that don't require the full-scale product that a commercially available laptop brings, this can actually be a great DIY project for you.
As the following video from popular DIY channel Build It shows, you can build a laptop using mostly cardboard and plastic. If you have a 3D printer, making the case might actually be easier. However, Build It suffered the entire project without one, making building this laptop more tedious.
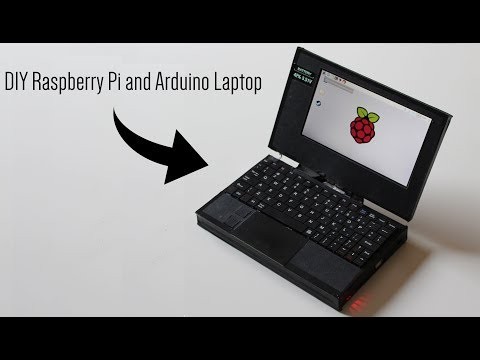
As with the previous project, you need a portable power source and a 7-inch screen (the video demo uses a screen specifically compatible with Raspberry Pi boards). That's where the similarities end, as Build It decided to use a much more sophisticated setup.
Instead of taking apart a power bank, this DIY project uses 18650 Li-Ion batteries (the same type found in e-cigarettes and larger flashlights). If you want to do the same, make sure you are using INR type batteries and not finicky ICR types. The former has more stable chemistry and has a high discharge tolerance, which is useful when powering computer hardware. The latter requires expensive protection circuitry which could be another point of failure for the batteries.
Alternatively, you can use IMR batteries, but they are not as stable as INR.
The Arduino controller in the Build It setup is also used for the laptop, providing a platform via a power bank controller that reads battery charge and transmits the signal to a small OLED display, showing at the user the battery charge in absolute terms and a percentage.
At the same time, the I/O pins of this same controller are exposed on the side of the laptop, allowing the user to easily connect headers from other projects to the controller. But more importantly, the project also includes a trackpad that acts similar to that of a conventional laptop, which allows easy manipulation of the mouse cursor.
This is all made possible by an additional controller (Arduino) connected to the Raspberry Pi system. Given the complexity of this laptop, it can be quite frustrating to build it, even for people used to doing their own DIY projects. very difficult. If you're new to electronics, this might make you want to pull your hair out from its roots.
As you can probably see by now, the possibilities offered by microcontroller and microprocessor-based single board computers like Raspberry Pi and Arduino are virtually endless. If you really want to build a system centered around a Raspberry, the only limitations to what you can do depend on the materials at your disposal and your confidence in your own abilities to produce the system. Before embarking on a project like this, you'll need to be realistic about your expectations and what you can accomplish.
This will help avoid frustrations along the way and provide a more rewarding and ultimately successful experience. Remember that conventional laptops are still far more capable and practical in many ways than any system you can build with a Raspberry Pi. However, if the pride of building something from the ground up is this you're looking for – and you're not looking to produce movies with your device – then this type of project might be for you!