The Google Chromecast is one of the most popular streaming devices out there – and it's easy to see why! Simply plug your Chromecast dongle into an HDMI port on any compatible TV, monitor, or projector, and you're ready to start enjoying your content on the big screen.
ContentsWhat you'll needRaspbian:check for the latest versionInstall Git, Make, OMXPlayer and OpenMaxAllow remote connections:enable SSH Stream from your Android device to your Raspberry PiBut what if you don't want to invest in a Chromecast?
You can configure your Raspberry Pi to act as an inexpensive Chromecast-style streaming device. Although you can't implement the same protocols as Chromecast, you can get very similar end results.
In this tutorial, you'll learn how to turn your Raspberry Pi into a Chromecast alternative, using the free Raspicast software and the Raspicast mobile app for Android.
To complete this tutorial you will need:
After completing this tutorial, you can connect your Raspberry Pi to a TV, projector, or any display with a compatible port, but this step is optional.
Before you begin, make sure you're using the latest version of Raspbian.
Connect your Raspberry Pi to a power supply to start it. Once it is started, click on the "Terminal" icon in the toolbar.
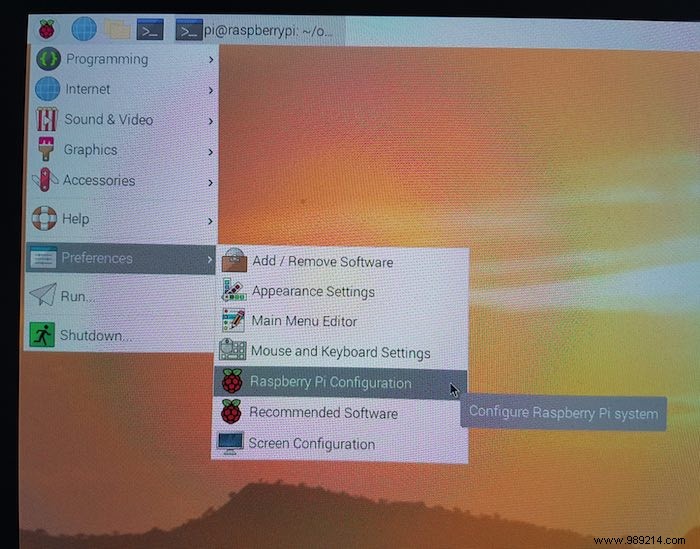
3. Select the "Interfaces" tab.
4. Search for "SSH", then select the "Enabled" radio button that comes with it.
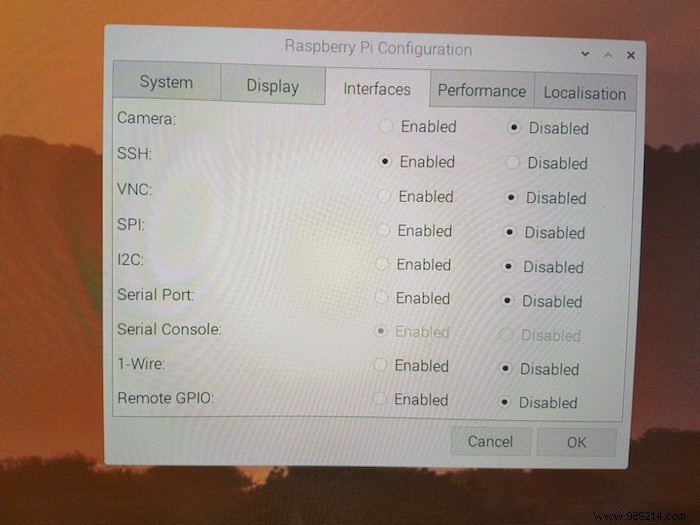
5. Save your changes by clicking "OK".
6. Reboot by selecting the Raspberry Pi logo in the toolbar, then navigating to "Shutdown -> Reboot".
When your Raspberry Pi restarts, SSH will be enabled.
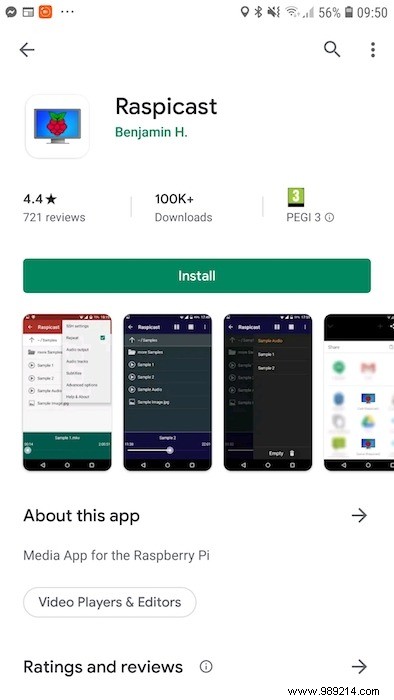
Next, you need to install the Raspicast mobile app on your Android smartphone or table. After installing this app, you will be able to stream any compatible image, video or audio file from your Android smartphone or tablet to your Raspberry Pi.
1. Download the free Raspicast app on your Android device.
2. Launch the app.
3. When prompted for a "Hostname", enter the IP address of your Raspberry Pi. If you do not already have this information, you can retrieve it by opening a Terminal on your Raspberry Pi and running the following command:hostname -I

4. Enter your Raspberry Pi username and password. The default Raspbian username is "pi" and the default password is "raspberry".
5. Press "OK".
6. To stream any video, image or audio file, just tap on “Stream”.

7. This file will now stream to your Raspberry Pi.
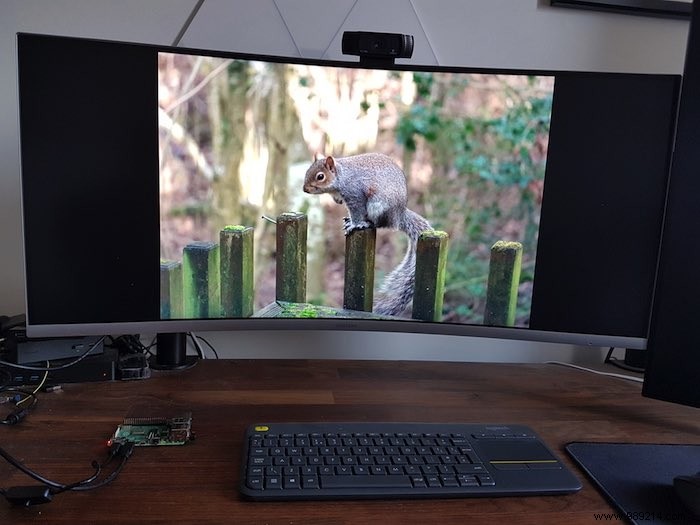
Your chosen content will appear on any monitor or display connected to your Raspberry Pi, so now that you've set up Raspicast, you're free to connect your Raspberry Pi to any compatible display. Many apps and websites also support Raspicast, so if there's media you want to stream, it's always worth hitting "Share" and checking to see if Raspicast is listed as an option.
Hope you can now enjoy your favorite videos and photos on your big screen TV. You can add more to the fun by installing Kodi and Netflix on Raspberry Pi or even a Plex server. With Raspberry Pi, you are spoiled for choice.