Virtual Private Networks (VPNs) can provide an extra layer of security and privacy for your online activity. Whether you work on a public Wi-Fi network and want to escape prying eyes, or are concerned about privacy in general, a VPN can provide many benefits.
ContentsSet up a VPN in Windows 10Set up a VPN in Chrome OSSet up a VPN in macOSSet up a VPN in iOSSet up a VPN in AndroidIn a nutshell, a VPN establishes a secure and encrypted connection between your device and a private server , hiding your traffic from being seen by others. Of course, the VPN itself can still see your traffic, which is why you should choose a VPN from a company you trust. (A good rule of thumb is to avoid free VPNs, because if they don't charge you a fee, they can be monetized in a less desirable way.) Plus, law enforcement can get their hands on it. on your information through the VPN company. . However, for the most part, a VPN gives you a way to hide your online activity from others.
Note that getting a VPN is just one of the steps you can take to secure your web browsing. Others include enabling two-factor authentication and using a password manager.
In addition to their security benefits, VPNs can come in handy when trying to access sensitive information, or if you're traveling in Europe and want to stream Netflix or Amazon Prime titles that don't are permitted only in the United States. Some even claim they can let you bypass firewalls in heavily regulated countries like China.
At home, you can configure your VPN through your router, which takes a few extra steps, but not all devices connected to your router will need to be configured individually; it can also slow down all passing traffic. However, for this article, we're going to focus on VPN apps that you can load onto your laptop or phone so you can use the internet safely when you're away from home.
Most VPN apps these days support the OpenVPN protocol, which simplifies setup by allowing access to the app to configure settings for you. But whether your device is using macOS, Chrome OS, Windows 10, iOS, or Android, if you want a quick overview of what's involved before selecting a service, or prefer to do some manual setup, we've broken down the steps into instructions. simple for you.
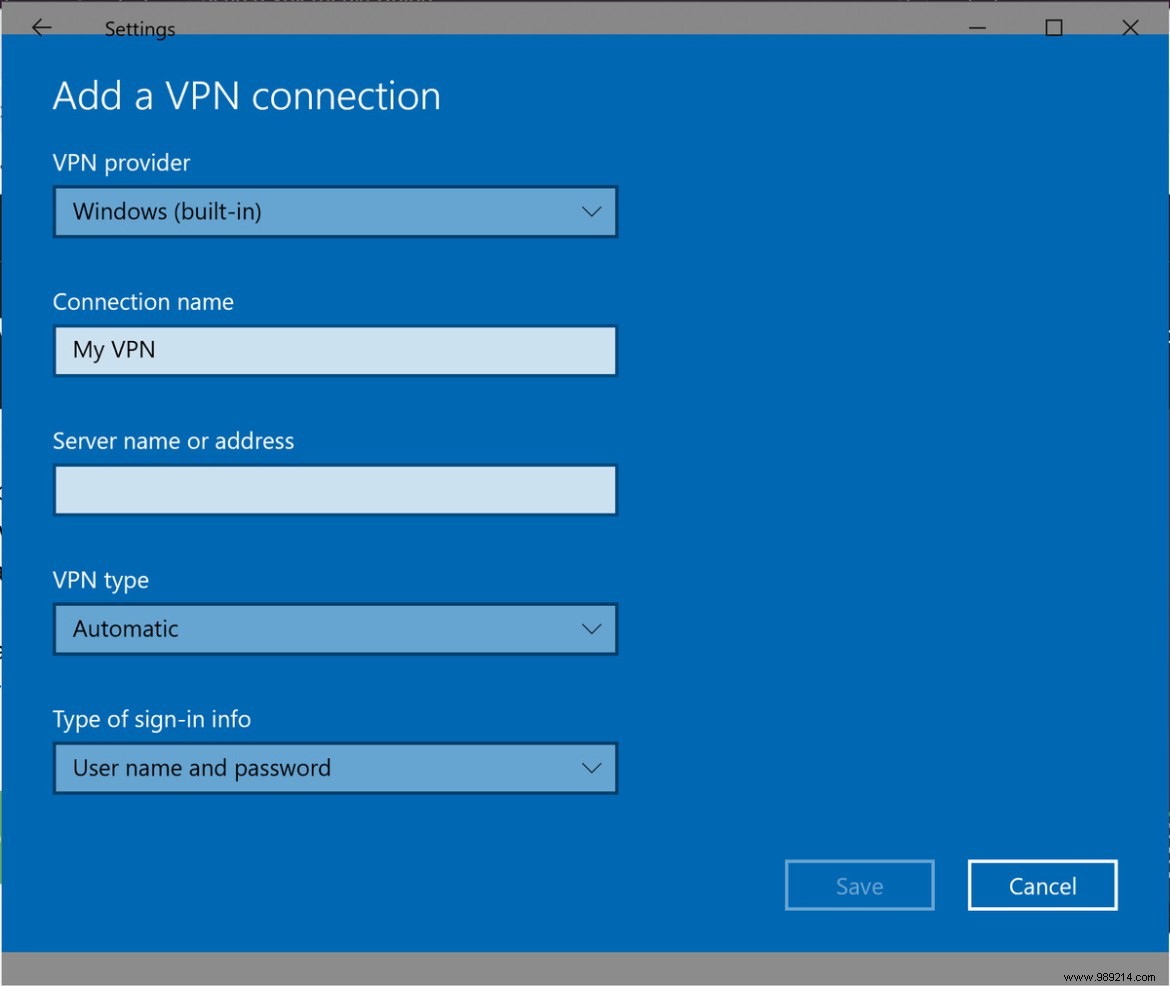
The first step is to create a VPN profile, which you will fill in with the details of your particular VPN service.
While using a VPN with a Chromebook used to be a hassle, these days there are several (like ExpressVPN or NordVPN) that have versions specifically for Chrome OS. To get started, you can head over to the Google Play Store and get the VPN app from there, or download one from the VPN's website. No matter what you choose, after you open your VPN app, it should ask you for instructions on how to fully configure it.
If you have to do it manually, you can. Chrome natively supports L2TP/IPsec and OpenVPN. To install a VPN that works with one of these formats:
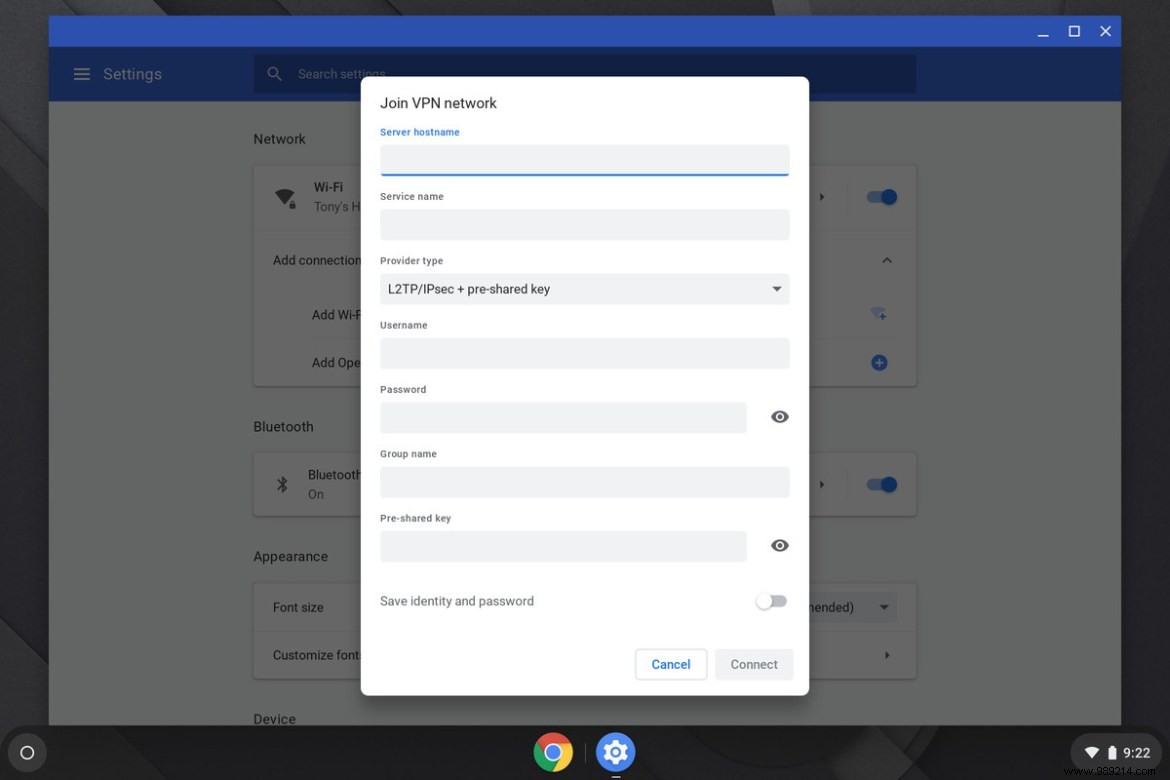
Some VPNs, especially those issued from a workplace, require a certificate, which you will need to import first. If necessary:
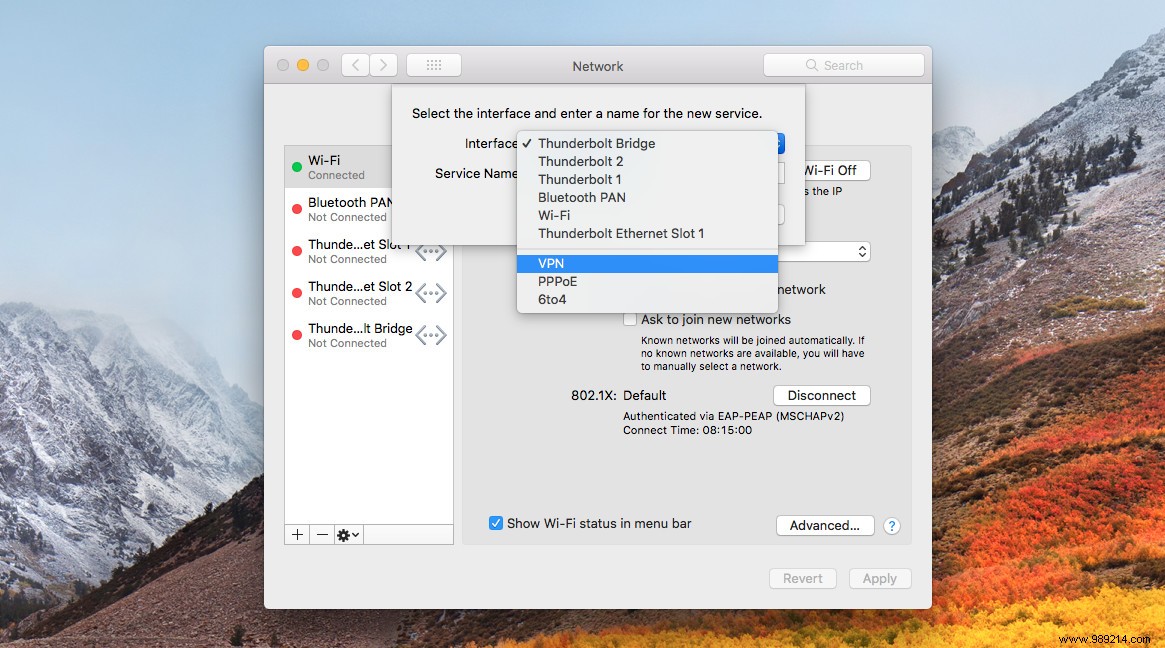
As with the other formats here, there are apps that automatically guide you through the setup process, but you can also do it yourself manually.
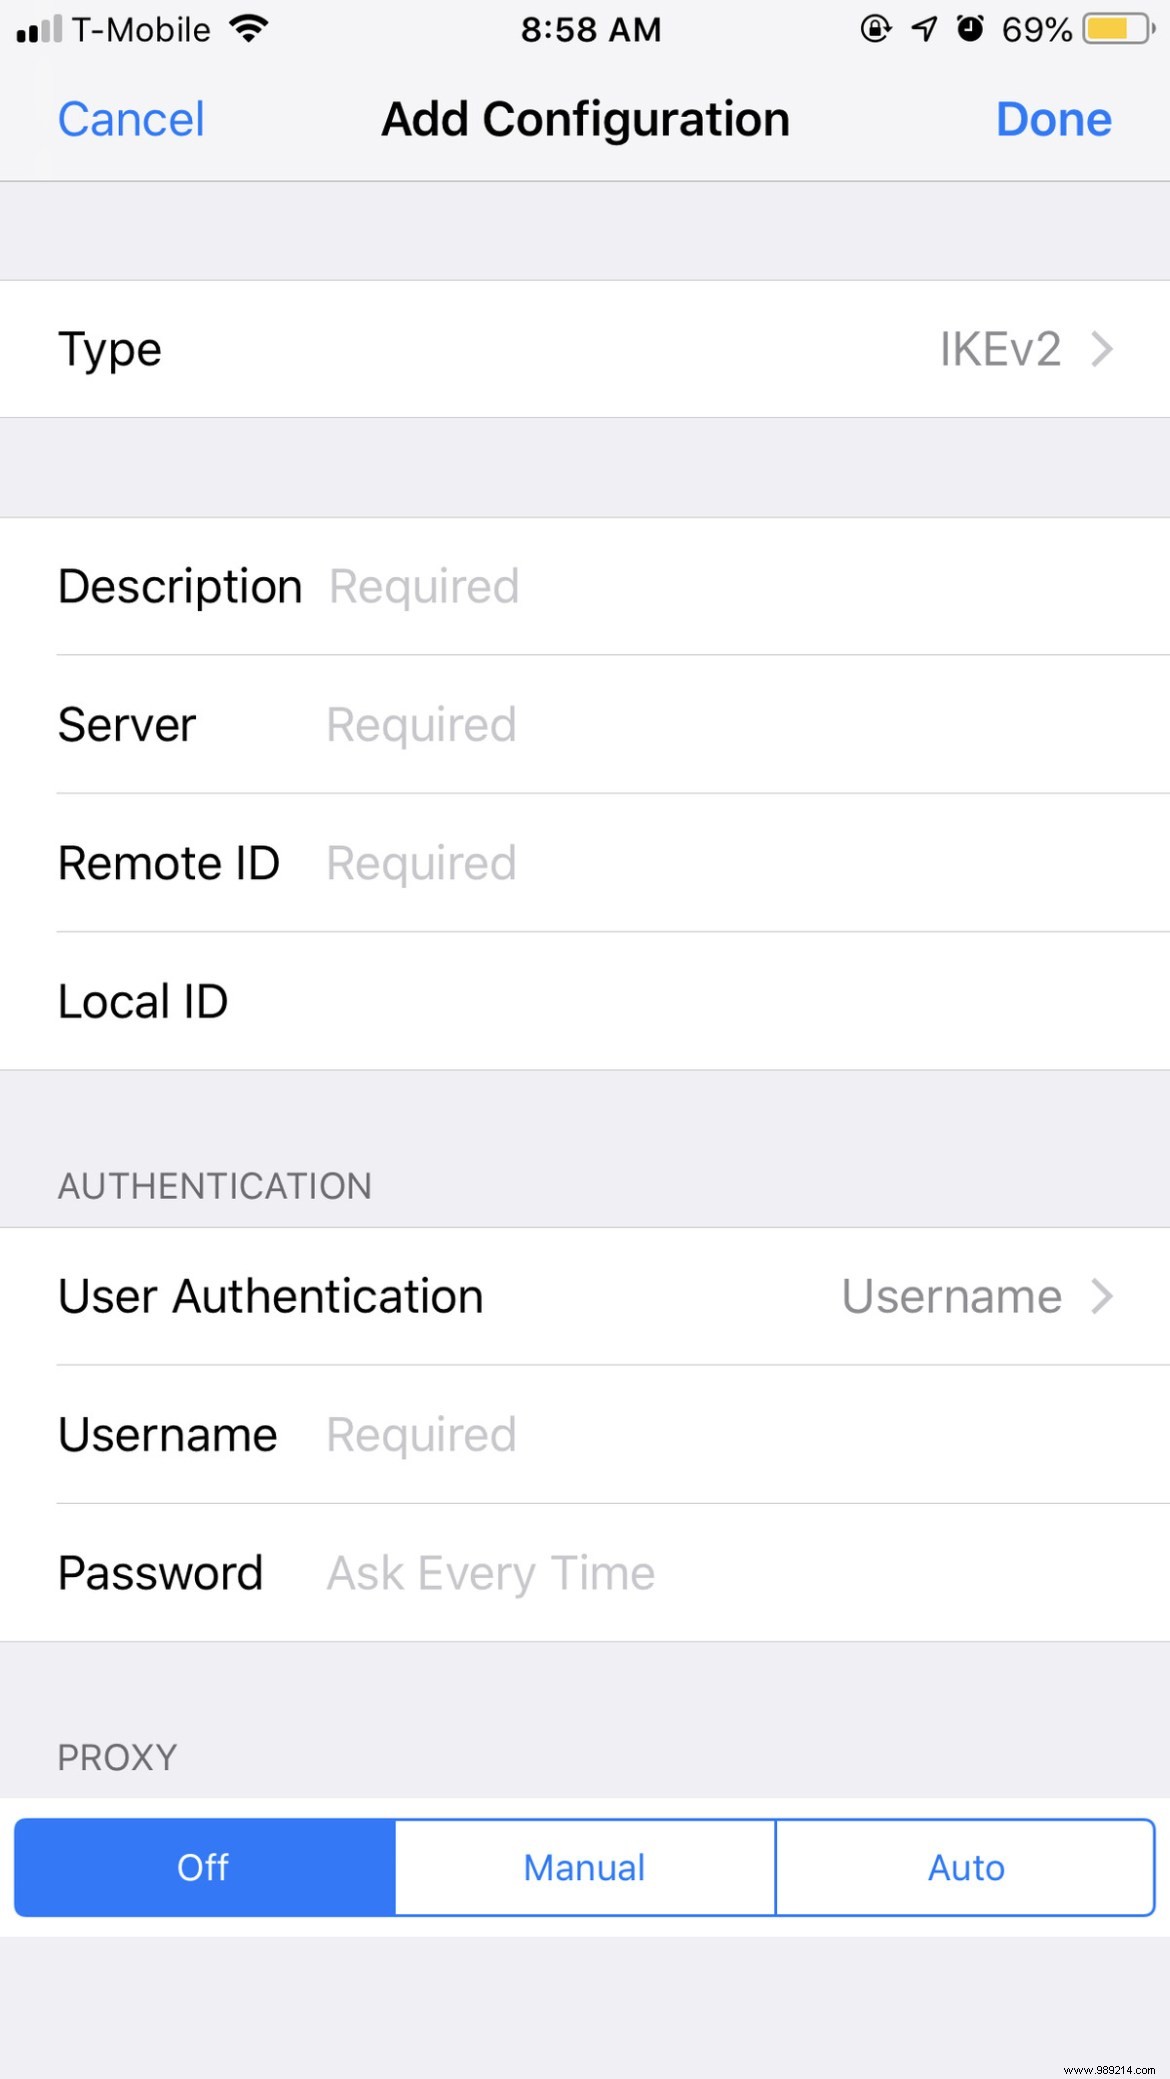
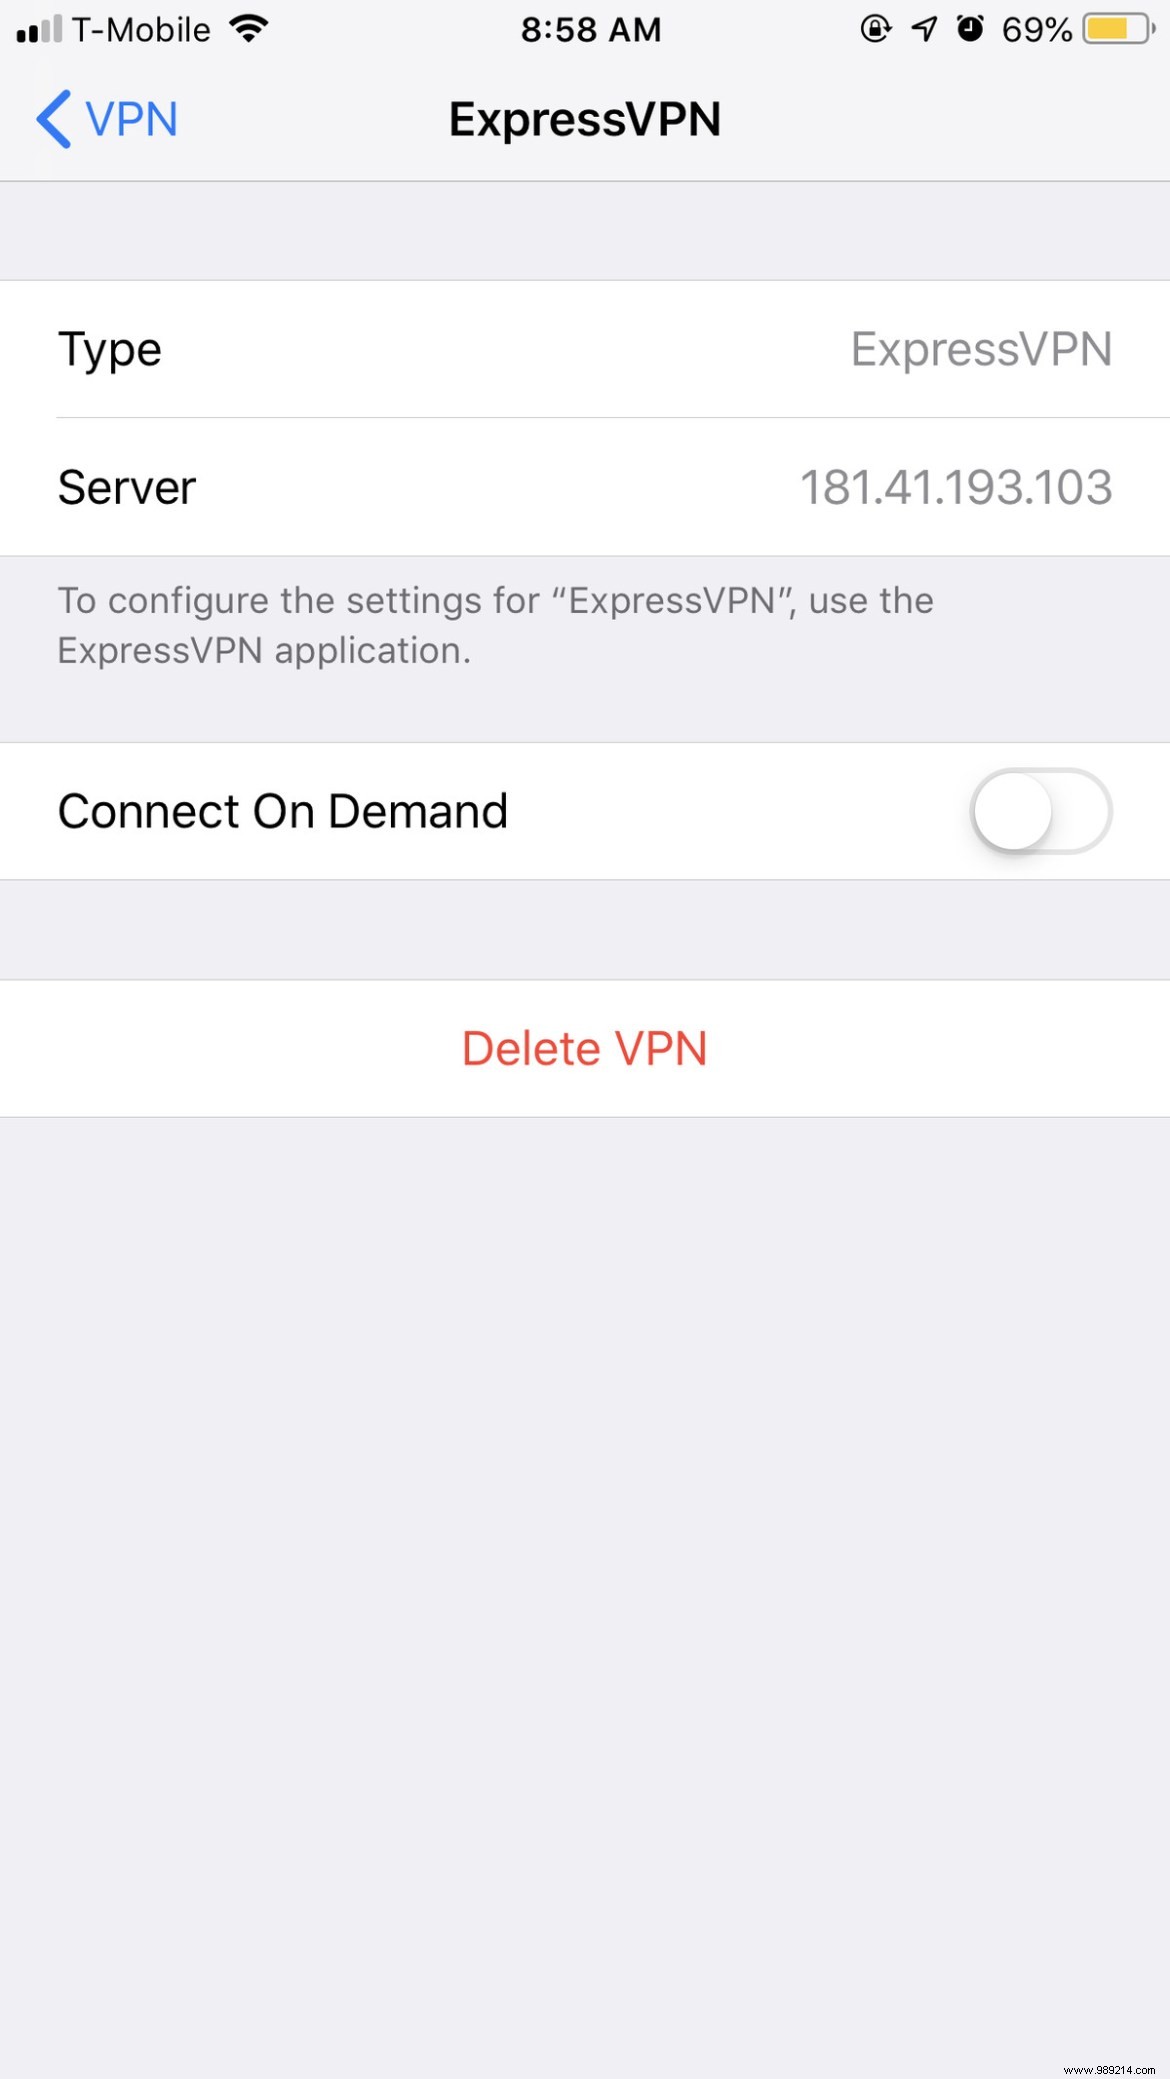
Setting up a VPN on an iOS device is quite simple. Again, if you're downloading an app from the App Store, select it and it should walk you through the setup. Here's how to do it manually though:
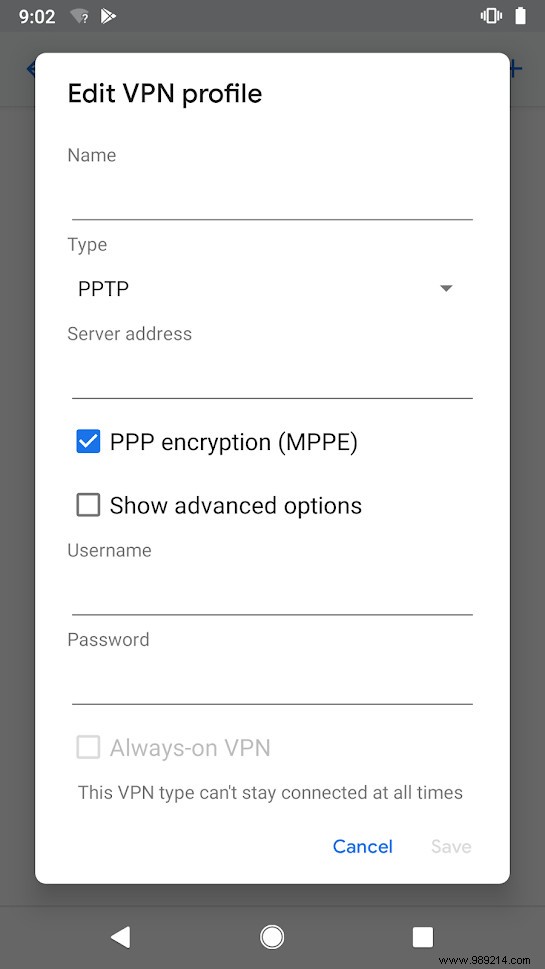
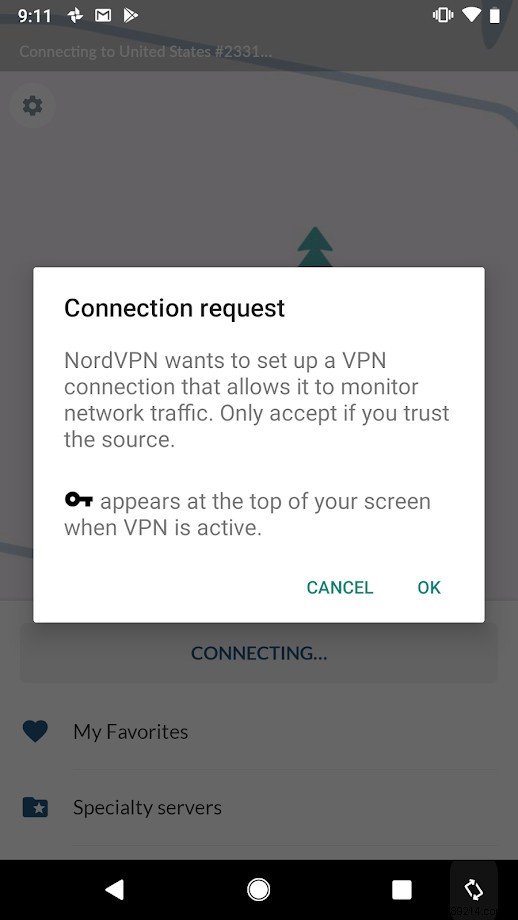
As with iOS, setting up a VPN on an Android device shouldn't be too difficult. Here's the manual process if you don't let an app automatically set things up for you. (Keep in mind that because some vendors like Samsung change their Android versions, your process may vary slightly.)
Once your VPN is up and running, you may notice that web browsing isn't as fast as it used to be, especially if you've configured traffic to go through another country . Stronger encryption, or more users connected to a VPN, can also slow your internet speeds. Downloads can slow down to a snail's pace, and your League of Legends screen lag can be absurd. But these are not big issues compared to the security you have added.
And anyway, now that you know how to set up a VPN, disabling it is easy in comparison. You just have to remember to do it.
Update June 1, 2021, 10:20 a.m. ET: This article was originally published on March 1, 2019 and now features a few updates related to Windows 10 interface changes.